
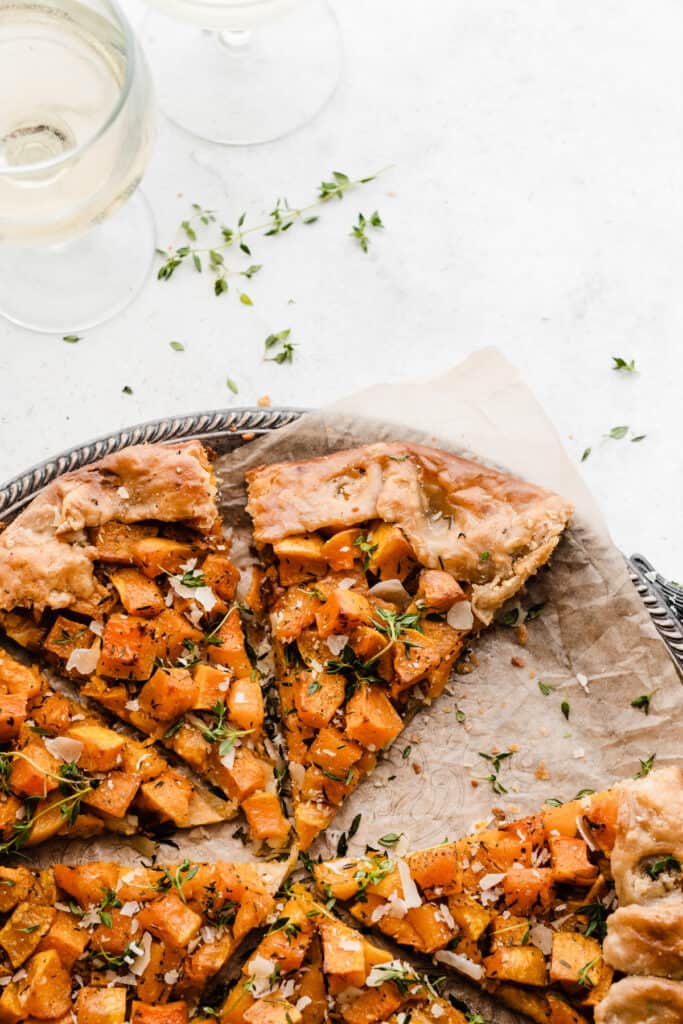
This Butternut Squash Galette is a fabulous fall dinner, Thanksgiving dish, and all-around good autumn comfort food. Sage and thyme roasted butternut squash is wrapped into a buttery, flaky pie crust, filled with asiago & parmesan cheese, and baked to golden brown perfection. Yum town!

How to Make the Roasted Butternut Squash:
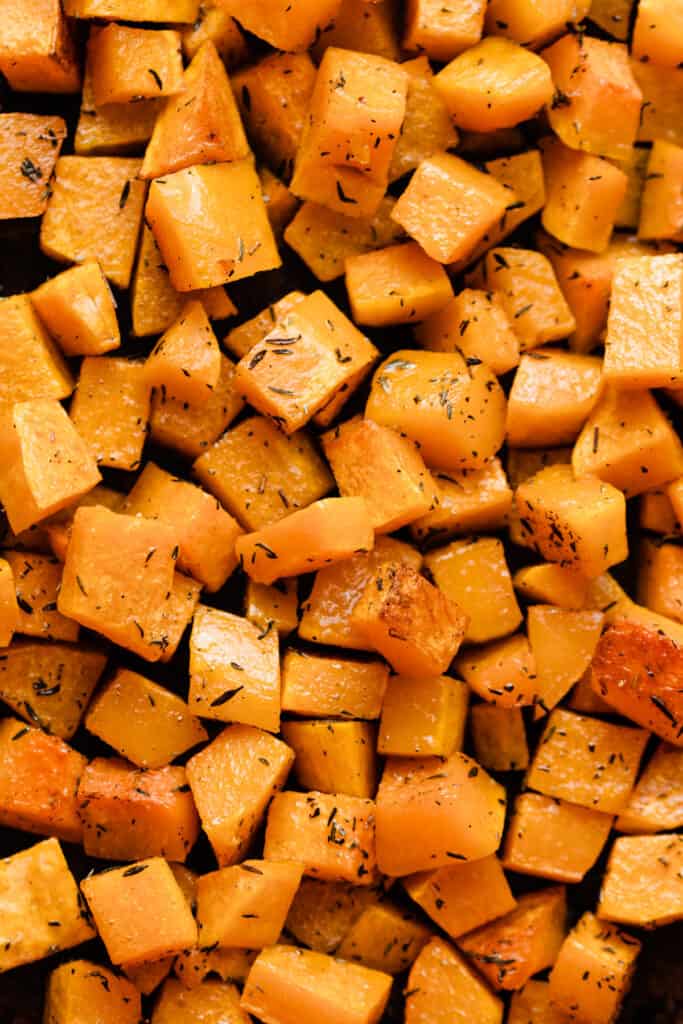
Here’s a great time-saving hack – buy pre-cut butternut squash. I know, I know, it’s more expensive than buying a whole squash, but if you’re short on time it’s a great hack. Otherwise, you’ll need to peel your squash (any vegetable peeler should work!) and cut it into cubes. Season the squash with olive oil, salt, pepper, thyme, and sage and pop it in the oven to get nice and caramelized while you get your crust ready.
How to Make the Galette:
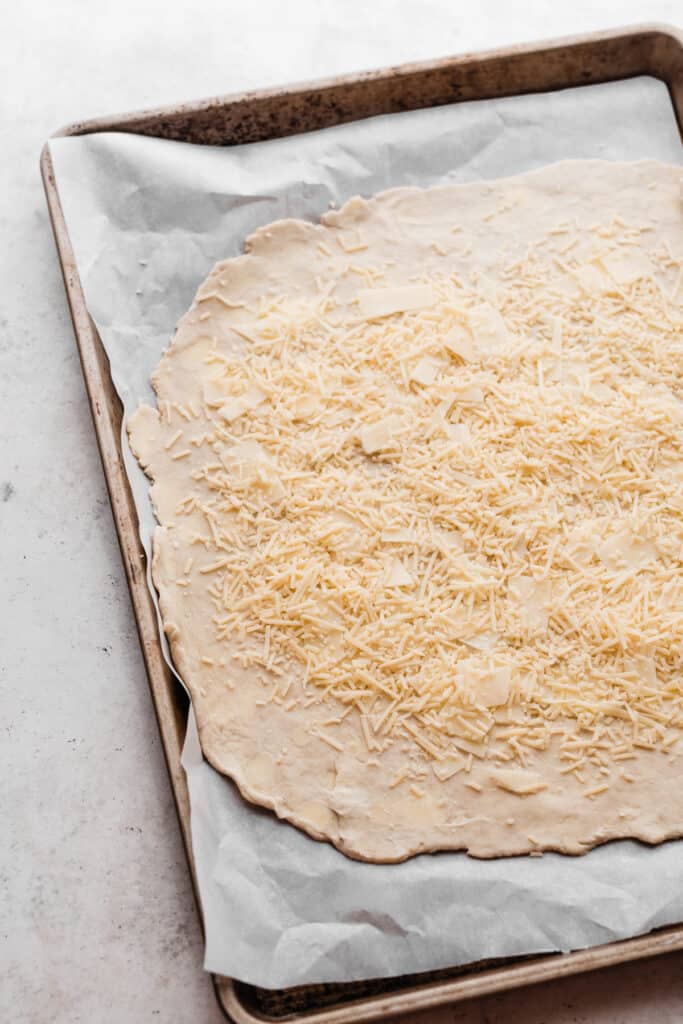
Roll out your chilled pie dough, and place it on a parchment-lined baking sheet. It does not need to be perfectly round by any means – this is a rustic recipe, and it’ll look beautiful no matter what! Add the asiago and parmesan to the galette, leaving a bit of border around the edges.
Once your squash is roasted. add it to the galette on top of the cheese, and then fold the edges over, working in small sections at a time.
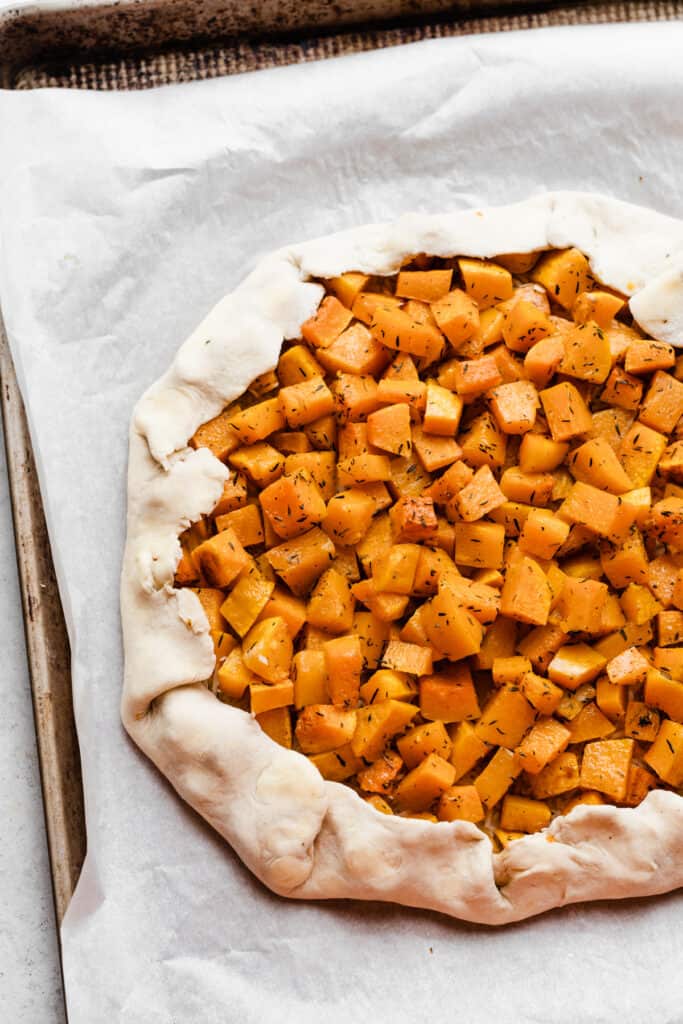
Brush the edges with egg wash, and bake until the crust is deep golden brown and crisp. If there’s something that looks like a little bit of melted butter on the baking pan around the galette, don’t fret – that always happens to me but the galettes still always have a crisp crust.

Sprinkle on a little extra fresh thyme and parmesan, and slice up your galette! It’s truly a recipe worthy of your Thanksgiving table – everyone will be impressed with the look of it, and with the uniqueness of this side dish!
If you’re more on the traditional-recipes-only bus for Thanksgiving, try this out for Friendsgiving instead!

Happy Thanksgiving!
Did you make this recipe? Snap a photo and leave a comment!
Be sure to follow bluebowlrecipes on instagram and tag #bluebowlrecipes with your photo – I’d love to see what you make! And, be sure to leave a comment + rating if you make this recipe.

Ingredients
For the Galette Crust:
- 1 and 1/4 cups all-purpose flour
- 3/4 tsp salt
- 1 tsp granulated sugar
- 1/2 cup cold salted butter (1 stick, 8 tbsp, or 113 grams)
- 1/4 cup full-fat cold sour cream
- 5 tbsp ice cold water, plus more as needed
For the Roasted Butternut Squash:
- 2 lbs butternut squash, cubed about 6 cups
- 2 tbsp olive oil
- 2 large cloves garlic, minced
- 1/2 tsp dried thyme
- 1/2 tsp dried sage
- 1/2 tsp salt
- 1/4 tsp` pepper
For the Rest of the Galette:
- 2/3 cup grated parmesan cheese (the little shreds, not the powdery stuff)
- 2/3 cup grated asiago cheese
- 1 egg, for egg washing the crust
Instructions
- Make the Pie Dough: In a medium mixing bowl, whisk together the flour, salt, and sugar. Cut the butter into large chunks and add to the dry ingredients. Use a pastry cutter or clean hands to cut the butter into the dry ingredients until you have chunks the size of blueberries (some will be a bit bigger, and some a bit smaller).Drizzle in the water and add the sour cream. Toss with a fork until the dough is moistened and the sour cream is mixed in. Gently gather the dough into a ball. If the dough holds when you push it together, it's ready. If it's a bit dry and crumbles apart, add a bit more water, 1 to 2 tablespoons at a time. You can also flick some water onto any dry bits hiding in the bottom of the bowl. Gently flatten the ball of dough a bit, into a 1-inch thick disc. It will be a little scrappy looking but should hold together. Wrap the disc tightly in plastic wrap and chill in the freezer for at leas 1 hour or in the fridge for at least 2 hours. If you freeze the dough for 1 hour, and your filling isn't ready yet, move the dough to the fridge so it doesn't freeze solid.Make-Ahead Tip: Dough can be made ahead and refrigerated for 2-3 days before using, or frozen for up to two months. Let it thaw in the fridge overnight before using, if you froze it.Find More Troubleshooting Tips for Pie Crust in my "How to Make Perfect Pie Crust" Post.
- Roast the Squash: Pre-heat your oven to 400° F. Add the cubed squash to a large baking sheet in an even layer and toss with the olive oil, minced garlic, thyme, sage, salt, and pepper. Roast for 20-30 minutes, until squash is fork-tender.
- Roll out the Dough and Assemble the Galette: Preheat the oven to 375° F, and line a large baking sheet with parchment paper or a silicone baking mat. Flour your countertop and rolling pin. Unwrap the dough and sprinkle lightly with flour. Begin rolling out the dough gently, turning continuously so it doesn't stick to the counter. Sprinkle more flour under the dough as needed. Be a little patient here - we're not trying to stretch the dough all the way out in a few passes. Once the dough is about 12 to 14 inches in diameter and about 1/8 inch thick, gently roll it up onto the rolling pin and transfer it onto the prepared baking sheet. Evenly spread the two kinds of cheese on the galette, leaving about 2-3 inches of border. Evenly distribute the roasted squash over the cheese. Fold up the edges of the dough, working in small sections, to cover edges of the squash. Galettes are rustic - don't fuss over this too much.Chill the assembled galette, uncovered, in the fridge for 15 minutes to re-chill before baking. Beat the egg in a small bowl. Once the galette has chilled, brush the egg wash over the edges of the crust.
- Bake: Bake for 48 to 58 minutes, covering with foil at about the 40 minute mark if the top of the squash pieces are starting to brown too much. The crust should be golden brown and should feel and sound crisp when lightly tapped. You can also gently lift the corner of it with a flipper to make sure the crust looks browned underneath.
- Serve + Store: Serve immediately, with an additional sprinkle of cheese. This is absolutely best when it's fresh from the oven. Leftovers can be stored in an airtight container in the fridge for a few days, and gently re-heated.
- Make-Ahead Tips: I don't recommend making this galette ahead of time, as the crust will only get less crisp as the days go on. However, you can make the dough ahead of time (see tips above in the dough-making direction), and you can roast the squash ahead of time, cool it, and store it in an airtight container in the fridge for up to 1 day ahead of baking the galette.

Order my new book:

Teri and steve Christman says
I’m in the process of making this, cooling the squash for later today while dough is chilling. There’s garlic in the ingredient list. Are you putting it on top of the assembled galette before baking??
Stephanie Simmons says
Hi Teri and Steve! Looks like I forgot to list the garlic in the directions, but it should go with the roasted squash as indicated in the ingredient list. I’ll update the directions now so that’s more clear. It sounds like you already roasted your squash? If so, I’d toss the roasted squash in 1/4 tsp of garlic powder (a little quick googling says that 1/8 tsp garlic powder should be used in place of each fresh clove – otherwise it can be too overpowering). Sorry about that mix-up. I think that may be the safest bet to still add that garlic flavor in, so you don’t end up with burnt pieces of minced garlic in the galette while it bakes. I hope you enjoy the galette! 🙂 Let me know how it turns out.