This post contains affiliate links. Please see our disclosure policy.
Homemade Nutella Pop Tarts are warm, ultra flaky, and filled with creamy dreamy nutella. Dunk them in a simple nutella glaze and drizzle on some salted caramel and you’ve got the ultimate Valentine’s Day treat!

Why you’ll love Homemade Nutella Pop Tarts:
- One of the Best Things You’ll Ever Eat – Ever. You’re sure to fall head over heels for all this gooey nutella encased in a warm, flaky, buttery crust and drizzled with salted caramel sauce. SWOON.
- Better Than Store Bought, Obviously – Homemade hand pies are 1000x better than prepackaged pop tarts – but still super easy to make at home!
- Sweet Treats to Share – Make these for a fun Valentine’s dessert or even for a special breakfast treat (pop tarts are a breakfast food, after all). Your kids/coworkers/significant other will love you forever!

Ingredient Overview:
As always, the full recipe with measurements & directions can be found in the recipe card at the bottom of this post. Use the table of contents (back at the top, below the first image, to navigate).
- Flour – Spoon your flour into the measuring cup, then level it with a flat utensil for best results, or use a scale. Scooping the measuring cup directly into your flour will lead to too much flour, and a potentially dry bake.
- Butter – I always use salted butter because in my experience, it lends the best flavor, but feel free to use unsalted butter if that’s what you prefer.
- Nutella – Use nutella or any other brand of chocolate hazelnut spread you like.
- Milk – I prefer the richness of whole milk to make the glaze, but feel fee to use 2% or even nondairy plant milk.
- Salted Caramel Sauce – Sure, you could use store bought sauce… But give my practically foolproof 10-minute Caramel Sauce recipe a try and I practically guarantee you’ll never buy the jarred stuff again!
How to Make Homemade Nutella Pop Tarts:
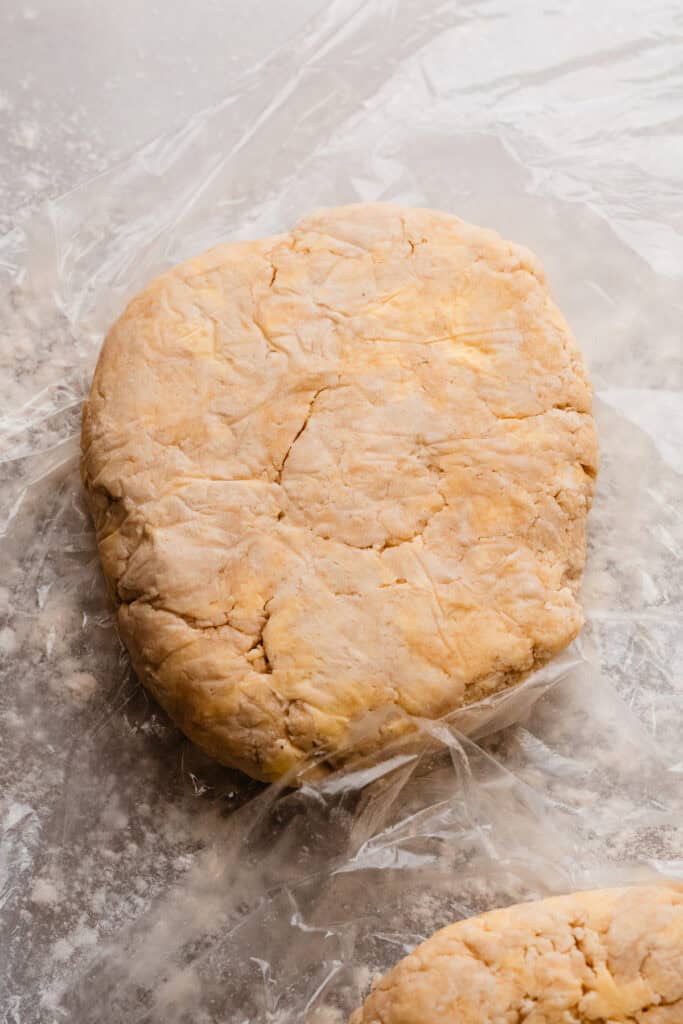
Step 1: Make the Pie Dough. This is what takes the whole recipe right over the top – it’s flaky, buttery, crisp, and all-around food perfection. If you’re not super comfortable making pop tart pie crust from scratch, take a few minutes to read through my post on How to Make Perfect Pie Crust.
Step 2: Prep. Line 2 large baking sheets with parchment paper or a silicone baking mat. Make the caramel sauce while the dough chills, using my easy 10-minute Homemade Caramel Sauce.
Step 3: Roll Out the Dough. Roll out dough on a floured surface until it’s about 1/8″ thick – it’ll be a large piece of dough. Use a cookie cutter to cut out any shapes you want! I used this heart cookie cutter.

You can re-roll the dough twice, and you should be able to get about 18 pies (36 hearts) total! You’ll need two hearts per pie – a top and bottom piece.
(I cut these out in more of a cutesy way than a practical way in the photo above – try to cut your shapes out as close together as possible so you don’t have to re-roll the dough as many times).

Step 4: Assemble the Pop Tarts. Transfer 12 hearts at a time onto a baking sheet to make 6 pop tarts. Top each one with nutella & brush the edges with egg wash before adding a heart on top. Crimp the edges & brush the whole thing with egg wash.

Step 5: Bake. Bake for 22-25 minutes, until the flaky pastry crust is golden brown. You can use a cookie spatula to gently lift the edge of a pop tart to check if it’s golden brown and crisp on bottom, too.

Step 6: Make the Glaze. While you wait for the pop tarts to bake and cool, whip up the Nutella glaze by whisking together nutella, milk, cocoa powder, and powdered sugar.
Serving + Storing:
You are absolutely doing yourself a disservice if you do not eat these while they’re warm from the oven! Add the glaze, drizzle on the caramel, add a sprinkle of flaky sea salt, and DIVE IN.
Please, please eat these while they’re warm. However, leftovers can be cooled to room temperature then stored in an airtight container in the fridge for 1-2 days.
Freezing Homemade Pop Tarts:
Once your pop tarts are assembled, but before adding egg wash, freeze in a single layer on a cookie sheet. You can then transfer them to a tupperware container in layers, with wax or parchment paper between each layer, & keep in the freezer.
They bake beautifully from frozen – do not thaw them. Just brush with egg wash, and bake as directed in the recipe. This tip makes these much more practical to make, since the recipe is a bit more time intensive, yet is best fresh from the oven.

Expert Baking Tips:
- Oven Thermometer – An oven thermometer will tell you if your oven is actually running at the temperature you set it to. Your oven may not be accurate. Accurate oven temperature is crucial for most bakes, so I leave an oven thermometer in at all times to keep an eye on my oven’s calibration.
- Kitchen Scale – A food scale is the best way to make sure your flour is at the proper weight, since amounts will vary SO widely based on how you measure it, as well as the measuring cup you use, as they are not standardized.
- Keep It Cool – The best tip I can offer for making pie dough is to make sure it stays cold at all times. The butter and water should be ice cold, and the dough must be cold when it goes into the oven. Don’t be afraid to pop the dough back into the fridge periodically, if it ever feels less than cold!
FAQs:
Sure! As-is this recipe makes 18 hand pies. Since it’s best to enjoy pop tarts made from scratch on the same day they’re baked, you might want to cut the recipe in half for a smaller group.
Yes, totally feel free to use ready made pie dough to make nutella pop tarts if you’re short on time.

Equipment:
- Pastry Cutter: You don’t need much to make pie crust, but I ALWAYS recommend using a pastry cutter! It’s the most essential tool for pie crust recipes.
- Pastry Brush: By far the best way to get an even coating of egg wash is to use a quality pastry brush.
More Handheld Desserts to Love:
- S’mores Pop Tarts
- Homemade Blueberry Pop Tarts
- Strawberry Rhubarb Hand Pies
- Salted Caramel Peach Hand Pies
- Puff Pastry Caramel Apple Turnovers
- Cherry Hand Pies
- Homemade Chocolate Cake Pops
Did you make this recipe? Leave a comment & star rating!
Click the little stars in the header of the recipe card below to leave a comment & star rating, letting me know how you liked the recipe. I take all feedback seriously, & leaving a rating helps my small business immensely!

Homemade Nutella Pop Tarts with Nutella Glaze
Ingredients
For the Pie Crust
- 1 cup white whole wheat flour, ( Yes, you can sub all-purpose) – 130 grams
- 1 cup all-purpose flour, spooned & leveled or weighed out , 130 grams
- 3/4 tsp salt
- 1/2 cup + 6 tbsp cold salted butter, 14 tbsp or 198 grams
- 1/2 to 2/3 cup ice cold water
For the Filling
- 1 cup + 2 tbsp nutella
For the Glaze
- 3 tbsp nutella
- 1 tbsp cocoa powder
- 2 tbsp milk
- 3/4 cup + 1 tbsp powdered sugar, 93 grams
Other
- 1 batch salted caramel sauce, optional, recipe linked below
Instructions
- Make the Pie Dough: (These directions look long but I promise this recipe isn't complicated! I want to be super thorough with the pie crust directions for those who haven't made it before.) Whisk together flours & salt in a medium mixing bowl. Take the butter out of the fridge (it needs to be COLD). Unwrap and cut into tablespoon-size chunks. Add to the flour mixture and toss to coat with flour. Cut in the butter using a pastry cutter or two forks (highly recommend getting a pastry cutter!) You've cut it in enough when there are mostly pea-sized bits of flour coated butter left. (See photos in my perfect pie crust post). Drizzle the cold water in, a little at a time, stirring with a fork after each addition. Make sure you get some into the bottom of the bowl where dry crumbs like to hide. Stop adding water when the dough comes together easily and begins to form large clumps. The dough shouldn't feel sticky or wet. If you can grab a handful of the dough, and it forms, well, dough when you squeeze it, it's ready!Gently form the dough into a ball. You can work it a bit to get some of the cracks out – do this in the mixing bowl or on a floured counter. Slightly flatten into a 1-inch thick disc. Wrap tightly in plastic wrap and chill in the fridge for 2 hours (or up to 2 days) or in the freezer for 30-40 minutes.
- Prep: Line 2 large baking sheets with parchment paper or a silicone baking mat. Make the caramel sauce while the dough chills, using my easy homemade caramel sauce recipe.
- Roll Out the Dough: Preheat the oven to 375℉. Let the dough sit at room temp about 10 minutes before rolling. Beat the egg in a small bowl and add a splash of water or milk (for egg wash). Flour your counter & rolling pin. Gently begin roll the dough out in all directions. Turn the dough every few rolls to make sure it's not sticking to the counter. Continue flouring the counter and rolling pin as you go. Roll until it's about 1/8" thick – it'll be a large piece of dough. Use a cookie cutter to cut out desired shapes – I used this heart cookie cutter. You could use a drinking glass or small bowl to make round pop tarts. or cut out rectangles like I did for these blueberry pop tarts. My cookie cutter was 3 and 1/4" across – use something similar in size so you get a similar yield and bake time. Gently push the dough scraps back together – you can roll them back out 2 more times to get all the hearts you need. (See note).
- Assemble the Pop Tarts: Transfer 12 hearts onto a baking sheet to make 6 pop tarts. Top each one with 1 TBSP nutella. Brush the edges with the egg wash using a pastry brush. Add a second heart on top, and pinch the edges together to seal the pop tart. Crimp the edges by pressing the tines of a fork into them, all the way around. Brush the whole pop tart with the egg wash.
- Bake: Bake for 22-25 minutes, until golden brown. You can use a cookie spatula to gently lift the edge of a pop tart to check if it's golden brown and crisp on bottom, too.
- Make the Glaze: Whisk together the glaze ingredients in a small bowl while the pop tarts bake.
- Serve & Store: Spread some glaze on top of each pop tart. Add a drizzle of caramel and a sprinkle of flaky sea salt, if desired. DIG IN!Please, please eat these while they're warm, or at least on the first day. They'll lose their crispness with each passing day. You can store cooled leftovers in an airtight container in the fridge for a day or two.
- Make Ahead Tips: Pie crust can be made, wrapped up tightly, and frozen for up to 2 months. Thaw in the fridge overnight before rolling out and using.
Notes
Nutrition
Nutrition information is automatically calculated, so should only be used as an approximation.


This takes pop tarts to a whole new level! I love it! The nutella is amazing with the caramel!
Thanks, Suzy! I agree 😀
These are incredible! I’m not sure which I like better, the flaky crust or the Nutella filling. Yum!
The flaky crust is amazing but it’s nothing without the nutella filling! 😀 Glad you liked these. 🙂