This post contains affiliate links. Please see our disclosure policy.
Homemade Pie Crust is easier to make at home than you might think. Today, I’m teaching you all my tips + tricks to help you master homemade pie crust! This easy recipe requires just three basic ingredients, comes together quickly, and produces a beautifully flaky all-butter pie crust that serves as the base for so many delicious recipes! I’ve included tons of step-by-step photos & troubleshooting tips to help you master the art of perfect pies.

First, do not be intimidated by the length of this post! I’m trying to be as thorough as I can to make sure you have ALL your questions answered. This will become second nature over time! And, even though this post is long, there’s actually not a ton of hands-on time involved with making pie crust! Like I said, this post is extensive to make sure I’m giving you all the tools you need to be successful.
This post was originally published in Nov of 2019, and was just updated in Nov of 2022 with more tips and tricks, and newer photos.
Table of Contents
- Why you’ll love this 3-Ingredient Pie Crust recipe:
- Ingredient Overview:
- Ingredient Substitutions:
- Par-Baking & Blind Baking 3 Ingredient Pie Crust:
- Par Baking Your Pie Dough:
- Blind Baking Homemade Pie Crust:
- Pie Crust Troubleshooting and FAQs:
- Problem 1: Why isn’t my crust flaky?
- The Fix: Chill things out.
- Problem 2: Why is my homemade pie crust melting?
- The Fix: Do not over handle the crust!
- Problem 3: Your pie dough is difficult to work with
- The Fix: Moisture or hydration.
- Problem 4: Your pie dough is tearing when you transfer it to the pie plate.
- The Fix: How to transfer pie dough to a pan.
- Problem 5: Your dough cracks when rolling it out.
- The Fix: Hydration & Rest.
- Problem 6: The pie dough tore in the pie pan.
- The Fix: Patch it!
- Expert Success Tips:
- Recipe Variations:
- Special Tools:
- Pie Recipes to Love:
- Traditional Pies:
- Galettes:
- Hand Pies:
- Savory Pies:
- Perfect Homemade Pie Crust Recipe
Why you’ll love this 3-Ingredient Pie Crust recipe:
- Ultra Flaky Crust – My all butter pie dough produces an ultra flaky, flavorful homemade pie crust!
- Troubleshooting Tips – I’ve had every problem under the sun occur when making pies over the years, so I can help you prevent these issues with my troubleshooting tips!
- Versatile Recipe – Use my pie dough in sweet and savory pies, quiche, galettes, and hand pies and homemade pop tarts! A full list of my pie recipes by category can be found at the bottom of this post.

Ingredient Overview:
I realize that this list is technically more than 3 ingredients, BUT everyone has salt and water on hand, leaving you with 3 ingredients – all-purpose flour, sugar, and butter.
- All Purpose Flour – This provides the structure for the whole crust.
- Salt – Essential for flavor!
- Sugar – Not every pie crust recipe uses sugar, but I love adding just a few teaspoons – but this is certainly optional!
- Butter – This is that magical ingredient that gives us flaky pie dough! Keeping it as cold as possible is essential! I always use salted buter for the best flavor, but feel free to use unsalted butter if you prefer.
- Water – Ice water helps bind the ingredients together to form a dough. Pop your cold water in the freezer before you begin to thoroughly chill it.
Ingredient Substitutions:
- Dairy Free – I haven’t tried it myself, but I’ve heard that you can substitute dairy-free sticks of butter in your pie dough.
- Gluten-free – I haven’t ever tried making my pie dough recipe gluten-free, and I don’t think it would translate correctly if you simply swapped gluten-free flour for all-purpose flour. It would likely yield a drier dough or crust. Try a gluten-free baking blog that you trust for a gluten-free modification!
How to Make this Homemade Pie Crust Recipe Step-by-Step:
Step 1: Whisk the Dry Ingredients. Whisk together your flour, salt, and sugar in a large bowl.

Step 2: Cut in the Butter. Cut your cold butter into chunks. Toss in the flour to coat it on all sides. Cut butter and shortening into the flour mixture with a pastry cutter. You want to have pea-sized pieces scattered throughout the dough.


Step 3: Add the Water to form a Dough. Add ice-cold water in a few additions, stirring some after each addition to help evenly moisten the dough. To make sure your water is actually ice cold, fill a bowl with ice and water, and measure it out a tablespoon at a time. Or, measure the exact amount before starting the dough, and keep it in the freezer until you’re ready – it won’t be in there long enough to actually freeze. Stop when you can squeeze a handful of dough and it sticks together, like dough (hah).Start to form the dough into a ball. Don’t roll it – just gather it together, folding it into itself a few times, if needed.Your dough may look a tad dry but that’s normal! We don’t want it the dough to be over-hydrated. A few cracks are fine, as long as it can hold together.

Step 4: Chill the Dough. Once you have a ball of dough, flatten it slightly into a thick disc. Wrap tightly in plastic wrap and chill it in the fridge for at least 2 hours, or up to 2 days.

Step 5: Roll the Dough. Roll the chilled dough out on a lightly floured surface (your kitchen countertop), applying even pressure. Pie dough should be 1/8″ thick. And, you want to see that butter marbling, or distinct pieces of butter throughout your pie dough. Those pockets of cold butter are what create flake in the crust when it hits the hot oven.

Transfer dough to your 9-inch pie plate. Do not use a glass plate – ceramic and metal are the best, and are universally recommended by all pie-baking experts. (I would specifically go for metal!) They conduct heat more evenly and will give you much more success – I’ve had pies fail in glass pie plates for no reason whatsoever. You can transfer by rolling it around your rolling pin and draping it over the plate, or by folding it in half, then in half again, placing the point of the crust in the center of your plate, and unfolding it back out. Trim the overhanging edge to about 2 inches.

Step 6: Crimp the Edges. Fold the overhang over, from the outside in, rolling it like a rope, pinching it to the inside of the crust, so you have a thick rope of dough around the rim of the pie plate. Do not futz with it too much – it will freeze in place in the next step, and if you touch the edges too much during this step, they’ll shrink in the oven. Messy edges on the inside will be hidden by the filling, anyways. Crimp the edges using your index finger on the outside of the pie plate, and guide the shape of the crimp or flute using your index finger and thumb on your other hand, from the inside of the pie plate (or vice versa).

Step 7: Freeze the Whole Thing. Next, freeze hour homemade pie crust in the pan for 15 minutes before filling, egg washing and baking! Do this whether or not the recipe requires par or blind baking. See below info on blind and par baking.

Step 8: Finish Assembly and Bake the Pie. Once your pie is filled and chilled, and topped with whatever topping you’re using (a crumble, top crust, or lattice), and chill in the fridge for an additional 10-15 minutes to ensure everything is cold before going in the oven. When ready to bake, brush the crust with egg wash, sprinkle with coarse sugar and bake as directed in the pie recipe!

Par-Baking & Blind Baking 3 Ingredient Pie Crust:
Par-baking is often called for in pies that have a liquid filling, like pumpkin pie, pecan pie, sweet potato pie, or lemon meringue pie. Par baked is just what it sounds like – partially baked. We’re giving the crust a head start in the oven to ensure it will still cook through once a liquid filling is added.
Blind Baking is when we fully bake a pie crust because the filling requires no baking. This is called for in French Silk Pie, and other similar pies that have a stovetop cooked filling, or a no-bake, no-cook filling.
Par Baking Your Pie Dough:
Follow the steps above until you have your pie dough in the pie dish, and freeze it for 15 minutes as directed. Prick (or “dock”) the bottom of the pie dough with a fork. This helps prevent puffing as it bakes. Then, crumple some parchment paper (only use parchment here – not foil or anything else! It will ruin your crust!) to easily fit it inside the pie, and fill with pie weights or dried beans, rice, or sugar. Make sure the weights come up to the crimps – this will prevent them sliding down into the pie as it bakes.
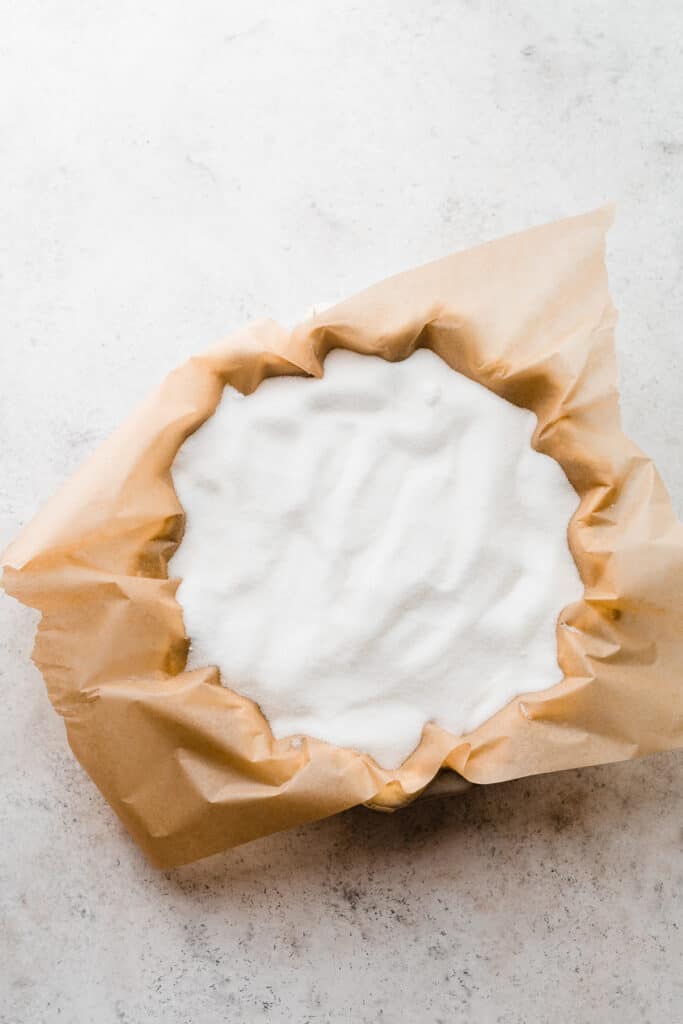
Bake at 425 F for 15-17 minutes, or until the crimps are lightly browned. Remove the parchment and pie weights, brush the crust with egg wash, and return to the oven for 2-4 minutes until the bottom and sides appear matte, not shiny.
Blind Baking Homemade Pie Crust:
Start with the steps above, then bake the pie for 10-12 minutes after removing the parchment & weights, rather than just 2-4 minutes more.
The below left photo is what the homemade pie crust will look like after the first portion of the bake, once you’ve removed the parchment and pie weights. The below right photo is what a blind baked, or fully baked, pie crust looks like.

Pie Crust Troubleshooting and FAQs:
I’ve had plenty of practice making homemade pie crust – and making it incorrectly. Here’s what to do if you face some common pie dilemmas in your pursuit of the perfect pie!
Problem 1: Why isn’t my crust flaky?
This is caused by letting the dough sit out too long at room temperature – the butter will melt at room temp rather than in the oven and you won’t have a flaky pie crust. The steam that’s released when the butter melts in the oven is what creates those lovely flakes in your crust.
The Fix: Chill things out.
If your dough is getting too warm or melty at any point when working with it, pop some plastic wrap over it and move it back to the freezer for a 10-minute chill (or longer) to keep the butter cold. You should be able to see the bits of butter in the dough when it’s rolled out. (It’s hard to see it in these photos, but it’s there!)
Problem 2: Why is my homemade pie crust melting?
Your lovely crimped crust melted off the edges of the pie plate while your pie was baking, or your pie crust shrinks and slides down into the pie dish.
The Fix: Do not over handle the crust!
This is one of the single most important tips I can give you. Don’t spend too much time touching and fussing with your crimped edges – even if you re-chill or even freeze the dough after this, before baking, you can’t undo the damage you may have done. Don’t be scared – you can obviously touch and work with the pie crust, but don’t spend too much time trying to perfect your crimps. I promise that the 15 minute freezer chill before baking the crust will hold them in place much better than you fussing with them. Last, once your pie is assembled, always chill it for an extra 15 minutes in the freezer or 30 minutes in the fridge before egg washing and baking! Your pie must always be cold before it goes into the oven.
Problem 3: Your pie dough is difficult to work with
My pie dough is too dry and crumbly, or it’s too wet and sticky.
The Fix: Moisture or hydration.
Getting the moisture of the pie crust right is so important – too much water or too little water can cause problems. Make sure you’re adding the cold water just a bit at a time (it’s easier to add more than to try and compensate for dough that’s too wet later), stirring with a fork to evenly distribute it. The dough is moist enough when you can grab a chunk and it holds together, like a dough – but still looks a tad dry. I go over this in more detail in the recipe as well. You can always add a bit more flour to help dry things up, if it’s too sticky.
Problem 4: Your pie dough is tearing when you transfer it to the pie plate.
The Fix: How to transfer pie dough to a pan.
This could be caused by dough that’s too sticky (see problem 3) or by dough that’s been rolled too thin. Make sure you’re rolling your dough to about 1/8′” thick – no thinner. Also make sure that you floured your surface well, and even lightly flour your rolling pin. Next, there are two ways to get your dough into your pan. You can gently fold it in half lengthwise, then in half again widthwise, making a triangle shape, and lift that into your plate, centering the point, and gently unfolding the edges. You can also gently wrap the dough around a floured rolling pin. Roll the dough back over the rolling pin, without lifting it off the counter much – slide the pie plate underneath and drape the dough back over it. The folding method is easier for beginners.
Problem 5: Your dough cracks when rolling it out.
The Fix: Hydration & Rest.
Your dough is under hydrated – meaning you didn’t quite add enough water to it.. Let it sit at temp for about 10-15 minutes once to help make it more workable. Stop rolling and give it a few minutes, then try again. You can also sort of push the cracked edges together with your hands to seal them up, or flip the dough over, and roll on the other side. The cracked side will start coming together underneath.
Problem 6: The pie dough tore in the pie pan.
The Fix: Patch it!
No need to start over! Just grab a scrap of dough leftover from trimming the edge overhang and patch the hole. Grab one that’s just slightly bigger than the tear. Dip your finger in a bowl of cold water and run it around the edge of the scrap and around the edge of the hole (you’re not trying to add extra water here, but the dough needs to be a tad wet to stick). Place the scrap over the hole and gently tap the edges of the scrap into the surrounding dough, then dip your finger in the flour and gently tap the patched spot to counteract any wetness. Try not to touch it *too much*.The same technique works if you have a short spot on the edge of the crust where there isn’t enough dough to make a crimp.
Expert Success Tips:
- Follow the Recipe – I don’t recommend many modifications with this recipe, as there is a science to making pie. Read through the recipe and all the tips before you begin, to familiarize yourself with the process, especially if it’s your first time.
- COLD, COLD, COLD – It is imperative that your dough is kept cold through every step of the process. The butter must be cold when the pie hits the oven – the heat from the oven hitting the cold butter creates steam, which is what creates the flaky layers in pie crust.
Recipe Variations:
- Lattice Top Crust – To learn how to make a lattice top crust for your pie, check out this video.
- Whole Wheat – Sometimes, I use 1 cup of white whole wheat flour and 2 cups all-purpose flour (for a total of 3 cups, as called for), if I want a slightly darker crust.

Special Tools:
You don’t need a lot of fancy gadgets to make this simple recipe, but there are a few tools that are essential, and a few that aren’t but that can make things even easier.
- Rolling Pin
 – I recommend a simple wooden one with handles.
 - Pastry Cutter – Technically not essential but a pastry blender makes cutting the butter into the flour SO much easier and produces great results! You can also use your hands or a food processor (although be sure not to over mix if using a food processor).
- Parchment Paper – This is helpful if you have issues with pie crust sticking to your counter (even with flour) when rolling it out – this helped me a ton when I was just getting the hang of homemade pie crust. I no longer use it, but it can be handy for beginners.
- Pie Plate – I recommend a 9-inch metal or ceramic pie plate, not a glass one. Most pie experts agree that a glass pie plate doesn’t conduct heat as well, and will lead to issues. I’ve learned from experience that this is true.
- Pie Crust Shield – Not essential, but it’s handy for preventing burnt crust edges! You can also use a piece of foil.
- Pastry Brush– This is how you’ll brush on your egg wash, which helps the crust brown and develop a bit of shine.
Pie Recipes to Love:
Traditional Pies:
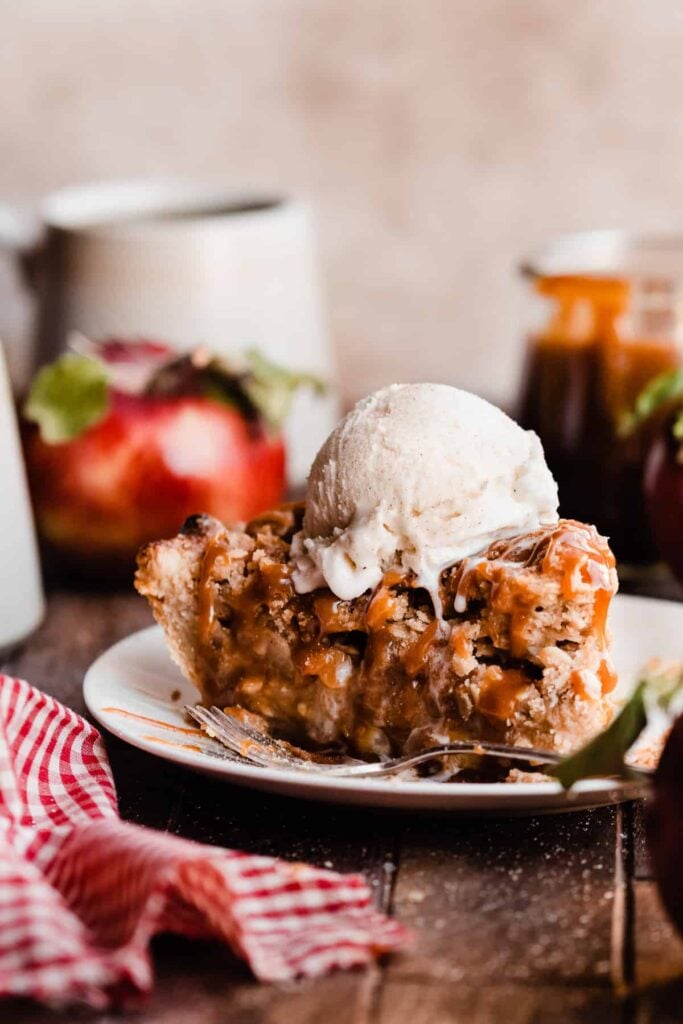
- Dutch Caramel Apple Pie
- Chocolate Pecan Bourbon Pie
- Maple Pie with Brûléed Topping
- French Silk Pie
- Cranberry Apple Slab Pie with Maple Glaze
- Cherry Bourbon Pie with Crumble Topping
- Strawberry Blueberry Pie
Galettes:
- Salted Caramel Pear Galette
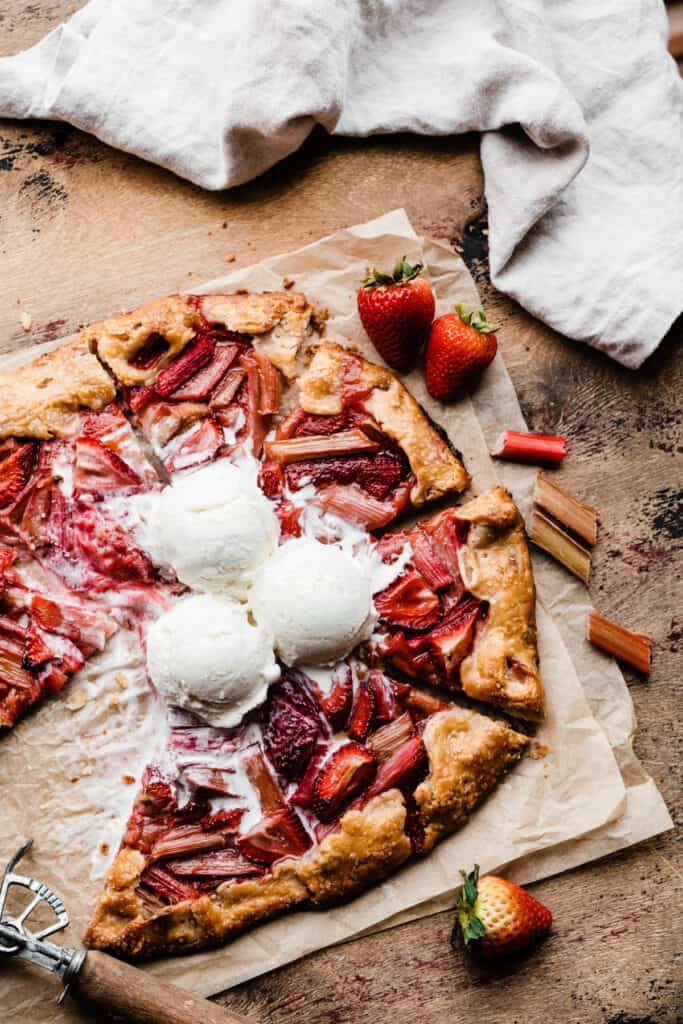
- Strawberry Rhubarb Galette
- Blueberry Cherry Galette
- Salted Caramel Apple Galette
- Whole Wheat Mini Blackberry Galettes
- Peach Nectarine Galette
Hand Pies:
- Cherry Hand Pies
- Salted Caramel Peach Hand Pies
- Cherry Cobbler for Two
- Pumpkin Pasties
- Strawberry Rhubarb Hand Pies
- Homemade Blueberry Pop Tarts
- Nutella Pop Tarts

Savory Pies:

Did you make this recipe? Snap a photo and leave a comment!
Be sure to follow bluebowlrecipes on instagram and tag #bluebowlrecipes with your photo! You can also post a photo of your recipe to the bluebowlrecipes Facebook page. I’d love to see what you make!

Perfect Homemade Pie Crust
Ingredients
- 3 cups all-purpose flour, spooned & leveled or weighed out , 390 grams
- 3/4 tsp salt
- 1 tbsp sugar
- 1 cup cold salted butter, cubed, 226 grams
- 2 tbsp shortening, 24 grams
- 9-10 tbsp ice-cold water
Instructions
- Please Read This Before You Begin: Read through the directions once before you begin, especially if you're newer to making pie crust. This will help you to avoid any mistakes!Make sure your filling and topping (crumble, lattice, etc.) are ready to go before you roll out your bottom crust and put it in the pan – I explain why in the post above – it can become weak and dry if you let it sit in the pie plate too long while you make the filling and topping. Don't do it! I have lots of troubleshooting fixes above in the body of this post, so if you have issues with your dough at any point, scroll back up and read through those.
- Start the Dough: Before you begin, measure out the water and pop it in the freezer so it gets REALLY cold. Whisk together flour, salt, and sugar in a medium mixing bowl. Next, toss the cold butter cubes in the flour. Add the shortening, and begin to cut in the fats using a pastry cutter or two forks (highly recommend getting a pastry cutter!) You've cut it in enough when there are mostly pea-sized bits of flour coated butter, and the rest looks like very small crumbles (almost like the powdery parmesan that comes in the shakers).3 cups all-purpose flour, spooned & leveled or weighed out , 3/4 tsp salt, 1 tbsp sugar, 1 cup cold salted butter, cubed, 2 tbsp shortening
- Add Water to the Dough: Drizzle the cold water into the flour/butter mixture, 2 Tablespoons at a time, stirring with a fork after each addition. Stop adding water when the dough comes together easily and begins to form large clumps. The dough shouldn't feel sticky or overly wet. If you can grab a handful of the dough, and it forms, well, dough when you squeeze it, it's ready! It will still seem a bit on the dry side.9-10 tbsp ice-cold water
- Form Dough & Chill: Gently begin to form the dough into a ball – don't roll it, just gather it and pat it until you have a ball. You can work it a bit to get some of the cracks out – do this in the mixing bowl or on a floured counter. Use a large knife or bench cutter to divide the dough in half. Slightly flatten each half into a 1-inch thick disc. Wrap tightly in plastic wrap and chill in the fridge for at least 2 hours, or up to 48 hours before using. See note below about freezing.
- Roll out Chilled Dough: Flour your counter and rolling pin. Unwrap the chilled dough disc, working with just one disc at a time. Start in the center of the disc, and gently roll the dough out in all directions. Turn the dough (or flip it over if you feel comfortable doing that!) every few rolls to prevent sticking. Continue flouring the counter and rolling pin as you go. Smooth out/push together any cracked areas and continue rolling. Flip your pie plate upside down and lay it on top of the dough to see if it's rolled out enough, allowing for a 2-3 inch overhang of dough around the edge of the pie plate. Don't roll the dough thinner than about 1/8" to 1/16". I usually roll mine about 16" across.
- Transferring dough to your pie plate: -Gently fold your dough into quarters, then place the point in the center of your pie dish. Gently unfold it.-Gently and loosely wrap your dough around the floured rolling pin, but don't lift it far off the counter. Slide the pie plate under the rolled portion and gently drape it back over the pie plate. After either method, gently press and smooth it down onto the bottom and onto the sides of the plate, making sure there are no gaps between the dough and the pan.
- Finishing Touches and Crimping the Edges: Once you've transferred your dough to the pie plate, trim the edges with a kitchen scissors or knife, leaving a 1 and 1/2" to 2" overhang. Tuck the overhang under, so it's sort of between the dough and edge of the pie plate. Don't worry about trying to pinch it onto the rest of the dough. It'll stay in place. Crimp the edges by using your index finger on the outside of the pie plate, and guide the shape of the crimp or flute using your index finger and thumb on your other hand, from the inside of the pie plate. Repeat all the way around the pie! You can make your crimps as large or small as you want. Extra Chill Time – DO NOT SKIP: Once the pie dough is in the pan and crimped, chill in the freezer for an additional 15 minutes to ensure that everything is nice and cold (or frozen) before going into the oven. For a Single Crust Pie Or a Pie with a Crumble (Dutch) Topping: If you're making a single crust pie that doesn't call for par baking or blind baking, you'll freeze the crust for 15 minutes, egg wash the crust, pour in the filling, top with any crumble topping, if using, and bake.For a Double Crust Pie: If you’re making a double crust pie, I recommend prepping the topping (a lattice or a whole crust) – it can be rolled out and chilled on a baking sheet in the fridge while you make the filling and get your bottom crust in the dish. Once your whole double crust pie is assembled, freeze for 15 more minutes before egg washing and baking.Regardless of the type of pie you're making, don't skip this last round of chilling! It will help ensure that the pie crust holds its shape and bakes up with that beautifully flaky texture.
- Egg Wash: I always use an egg wash on my crust – it helps it brown nicely in the oven! Beat one egg and brush on all exposed parts of the crust using a pastry brush. Sprinkle crust with coarse sugar and proceed to bake as directed in the recipe you're using! I linked all of my pie recipes in this blog post, above the recipe! See below for details on when to apply this.
- Recipes that Call for Par-Baking: Freeze the crust in the same way, skip the egg wash, and blind bake the pie as directed in the recipe. Preheat oven to 425° F. Use dry beans, rice, or even granulated sugar in a pinch as pie weights. Take the pie crust out of the freezer and gently press in a piece of crumbled parchment paper – the edges will be semi exposed – that's fine. Pour in the pie weights making sure that they come all the way up to the crimped edges of your crust – this will prevent those edges from slipping down into the pie dish. Place this on a baking sheet and bake for 15-20 minutes, or until the crimps are lightly browned. Remove the pan from the oven, and gently lift out the parchment with the pie weights (have a bowl ready to set it in to keep your counter clean). Brush the edges of the crust with egg wash at this point, if desired (gives a nice shine – I always do this). Return the pan with the pie to the oven and bake for 3-7 more minutes, until the bottom and sides appear set and matte (they shouldn't be shiny). This method should work with almost any recipe for a single crust pie! I used it in my Bourbon Cherry Pie. This method comes from Erin McDowell's "The Book on Pie."
- Blind Baking: Follow the same steps as listed in the par baking section above, but bake the pie for 10-16 minutes in the second portion, after you've removed the parchment and pie weights. Use a piece of foil with the center cut out to protect the edges from over-browning.
- Preventing Burnt Crust: No matter how long the bake time is for a pie, I always start with about 20-30 minutes, and check the crust at that point to make sure it's not browning too quickly. If it is, I cut a hole from a large pice of foil, then use this as a pie shield to protect the edges of the crust from over-browning or burning. It works very well!
- Finishing Par-Baked or Blind Baked Pies: Once your crust is par-baked or blind baked, finish the recipe as that recipe specifies.
- Crust Decorations: Gather your pie dough scraps, roll them out (no thinner than 1/4 – 1/8") and use a knife or leaf shaped cookie cutters to cut designs! Brush with egg wash and sprinkle with coarse sugar. Bake on a parchment-lined baking sheet (use whatever temp your pie is baking at) for about 5-12 minutes (depending how large they are). They're finished when lightly browned. Top your pie with these pie crust designs! They work well for hiding any flaws in your crust, and they're fun!
Notes
Nutrition
Nutrition information is automatically calculated, so should only be used as an approximation.
Note: This post contains Amazon affiliate links. This in no way affects the cost of any of the items – it simply means that we earn a small commission if you make a purchase using one of those links. Thanks for supporting Blue Bowl Recipes!


You mentioned shortening in the recipe, but I don’t see any in the recipe.
Hi Hallie! I used to use a little shortening but changed it to all butter – sorry about that! ☺️
Hi! I’m preparing to make my first ever pie crust and I’ll be using your recipe and helpful instructions! I am a bit confused on the amount of butter to use though- it says 2 cups+ 2 tablespoons (18 tablespoons) but if I’m correct I believe 18 tablespoons of butter would be 1 cup+2 tablespoons (1 stick of butter is 1/2 cup) could you clear this up for me? Thank you!
Hi Erin! So sorry about that – it should be 18 tablespoons, which is 1 cup + 2tbsp. It used to read 2 sticks, and I must’ve only partially changed it at one point. Thanks so much for catching that! Let me know how the pie crust turns out. 🙂
Thank you for all the details! One question though, you mention using shortening in the instructions but no shortening is listed in the ingredients. How much shortening do I use and do I reduce the amount of butter or use the amount that is listed + the shortening?
Thanks again! I’m excited to try it!
Hi Robin! I used to use 2 tbsp of shortening but have since swapped that out for 2 tbsp butter. Feel free to try it either way! Let me know how the whole process goes for you. 🙂 Happy baking!
Hi!
I was wondering if the pie dough can be in the fridge for more than a day? I was thinking of making it two days in advance of my baking, would that be okay?
And do I simply just divide the amount of ingredients by 2 if I just want to make one and not two, or does this recipe not work like that?
Hi Caroline! Yes, you can keep it in the fridge for two days before baking. I’ll add a note about that to the recipe! And yes, you can cut everything in half if you just want one crust and not two. Or, you can make the full recipe, divide the dough into two discs, and freeze one for up to 3 months for later use. 🙂 Happy baking!
Hi there I am going to make your quiche recipe and am going to blind bake the crust but I am wondering about the last part on chilling the crust before going into the oven I’m worried my glass pie pan will break..
Hi Serena! I’ve done that countless times and have never had my glass pie pan break. I also wanted to mention that I no longer recommend blind baking the crust with foil – parchment paper works SO much better. I am updating the recipe card to note that as we speak. Hope you enjoy the quiche – let me know how it turns out! 🙂
As a baker whose pies are my specialty….you directions are right on the money!! All of them!
Thanks, Kelly! I appreciate that 🙂
it sounds really involved. especially since I asked for a Cuisinart great Pie crust recipe. at 89 my hands don’t work as well as they once did. I need all the help I can get. I just want to make a great crust in my 10 inch pie plate .
But thanks anyway. I think it probably is a super crust.
Hi Annelise! Is this the recipe you were looking for – https://www.cuisinart.com/recipes/desserts/405 ? Thanks for stopping by! Have a Happy Thanksgiving. 🙂
Omg I have been looking for a pie crust recipe! Your apple pie looks amazing!
Thank you!