This post contains affiliate links. Please see our disclosure policy.
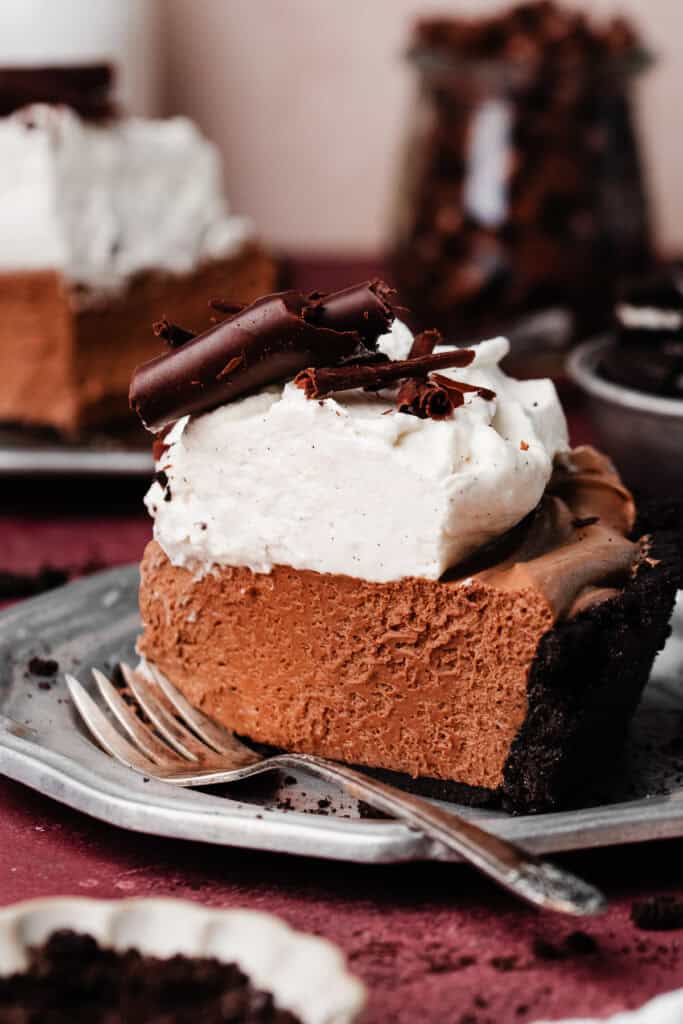
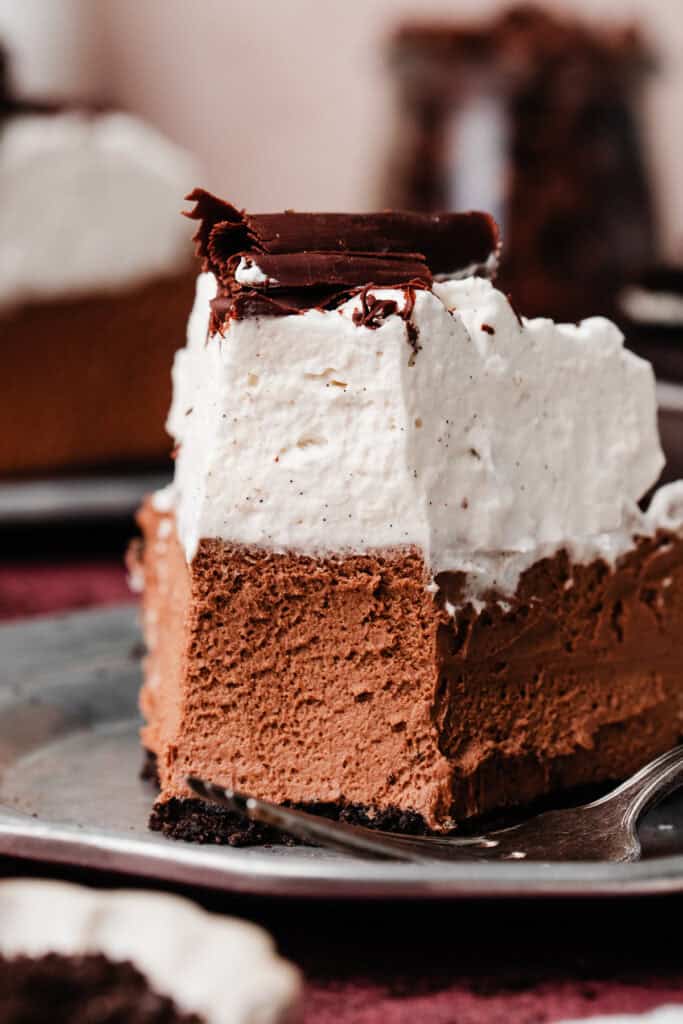
This French Silk Pie has the creamiest chocolate filling, is made with simple ingredients, and has no raw eggs! Add the luscious filling to a press-in chocolate cookie crust (so easy!), or a buttery, flaky pie crust. This pie is sure to fly off plates!

Why You’ll Love French Silk Pie:
- Luscious French Silk Filling – The gorgeous filling features two types of chocolate and heavy cream. It’s smooth and rich, similar to a dense mousse.
- Homemade Whipped Cream – Literally whip up the BEST whipped cream with only 3 simple ingredients! It’s the perfect light and fluffy topping for the decadent pie.
- No Raw Eggs – This is very much a classic French silk pie recipe, but unlike traditional versions, I gently cook the eggs so they are not raw nor scrambled. So those sensitive to raw eggs can dig right in!
- Choose Your Crust – You have a few terrific options for what pie crust to use. From a classic all-butter crust to fun and simple cookie crusts, honestly, any option will taste amazing with the thick chocolatey filling!
Tip Before Getting Started – Because the filling has a few steps, I recommend looking at all the photos to see what each step looks like, as well as reading through the complete recipe before beginning. See more Expert Baking Tips below!
Ingredient Overview:
As always, the full recipe with measurements & directions can be found in the recipe card at the bottom of this post. Use the table of contents (back at the top, below the first image, to navigate).
- Chocolate – In testing different versions of this recipe, I found that it wasn’t quite sweet enough with all semi-sweet chocolate, so I replaced some with milk chocolate.
- Eggs – Eggs are essential to helping the filling set up and, don’t fret – we temper (or, gently heat) the eggs so you don’t have to worry about raw eggs!
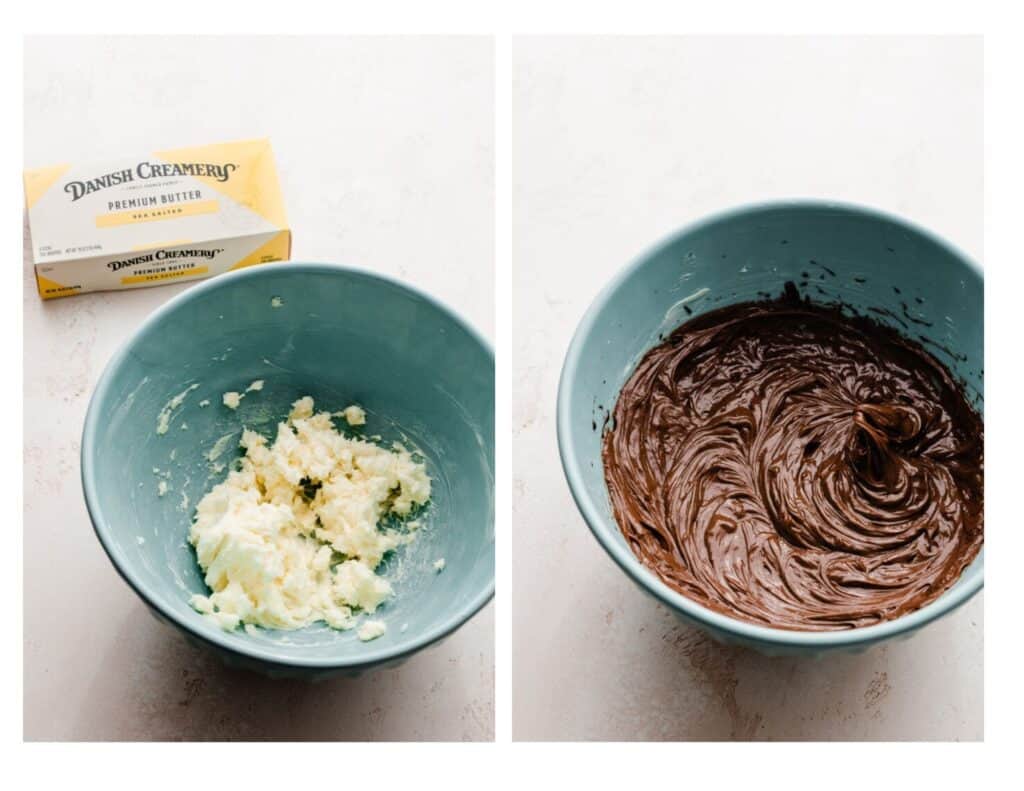
- Butter – Butter provides creaminess and richness to this pie. Salted butter gives the best flavor, but you can use unsalted if you prefer.
- Vanilla Extract – A little vanilla is mixed in with the heavy cream for extra flavor.
Crust Options:
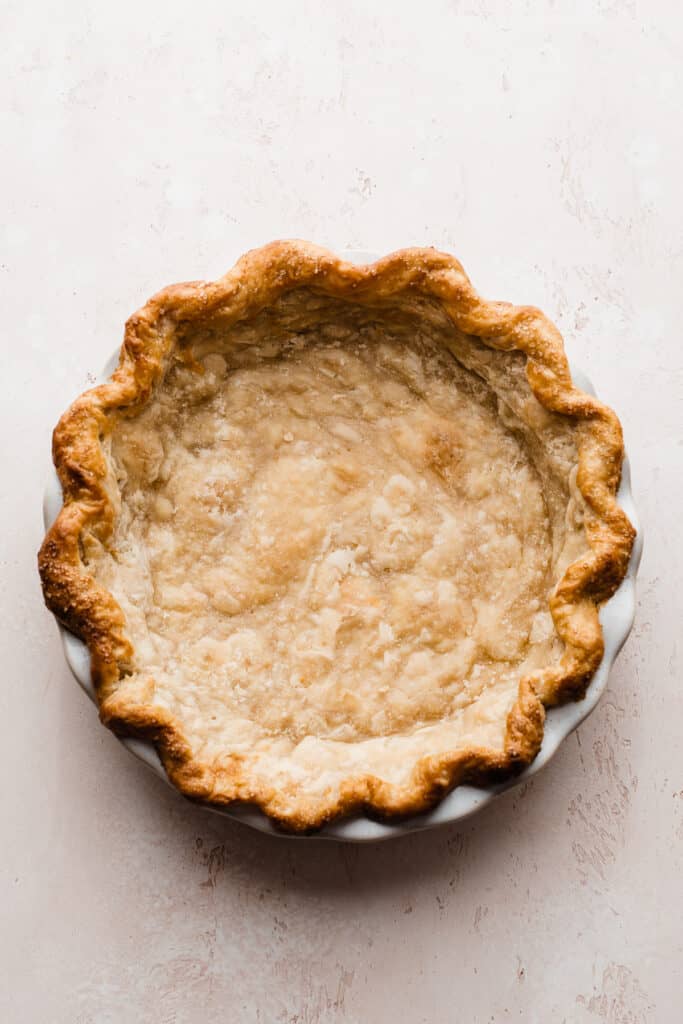
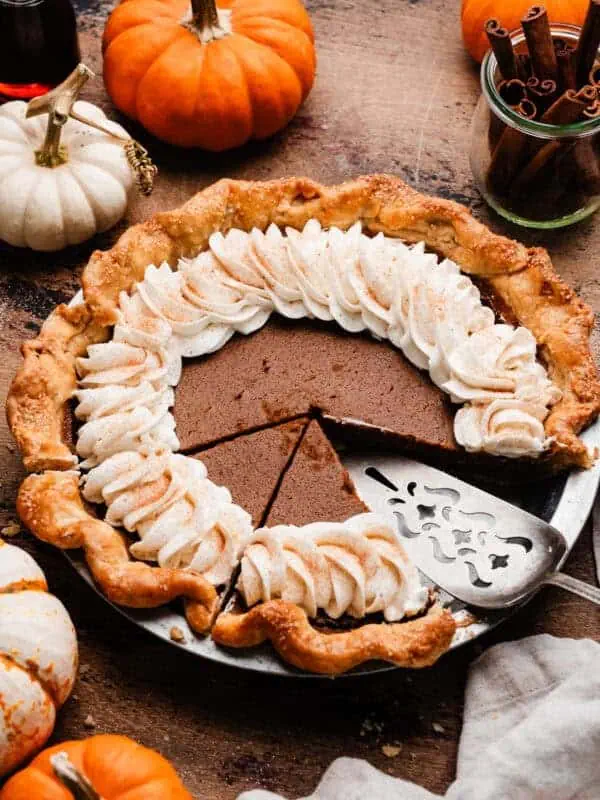
- Pie Crust – You can use a traditional pie-crust, which will need to be blind-baked (aka fully baked) before use, since the filling for this pie isn’t cooked.
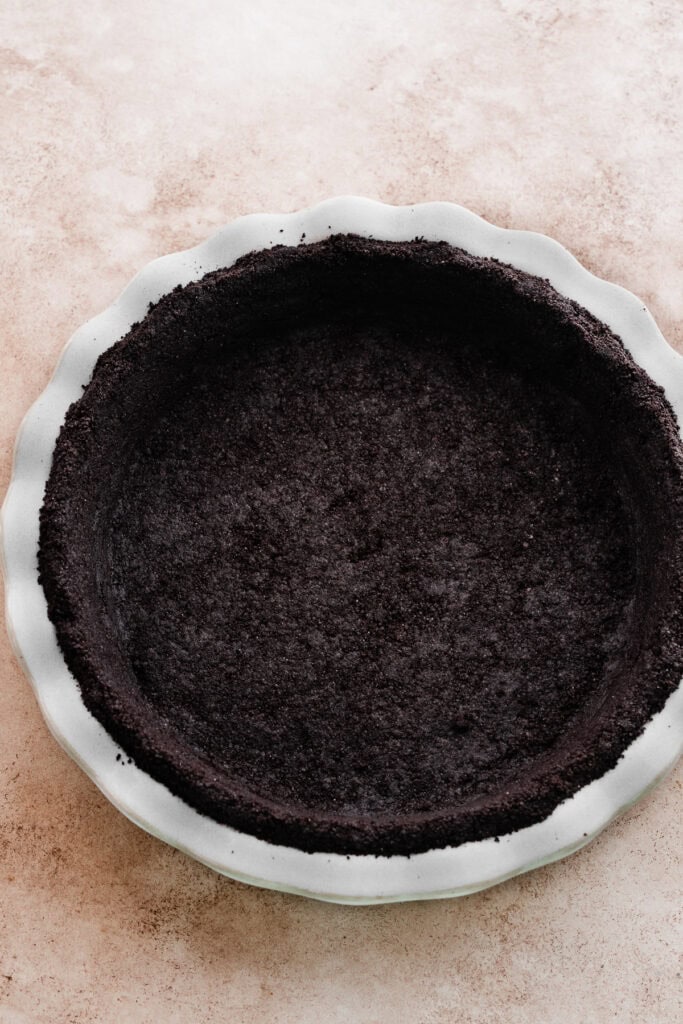
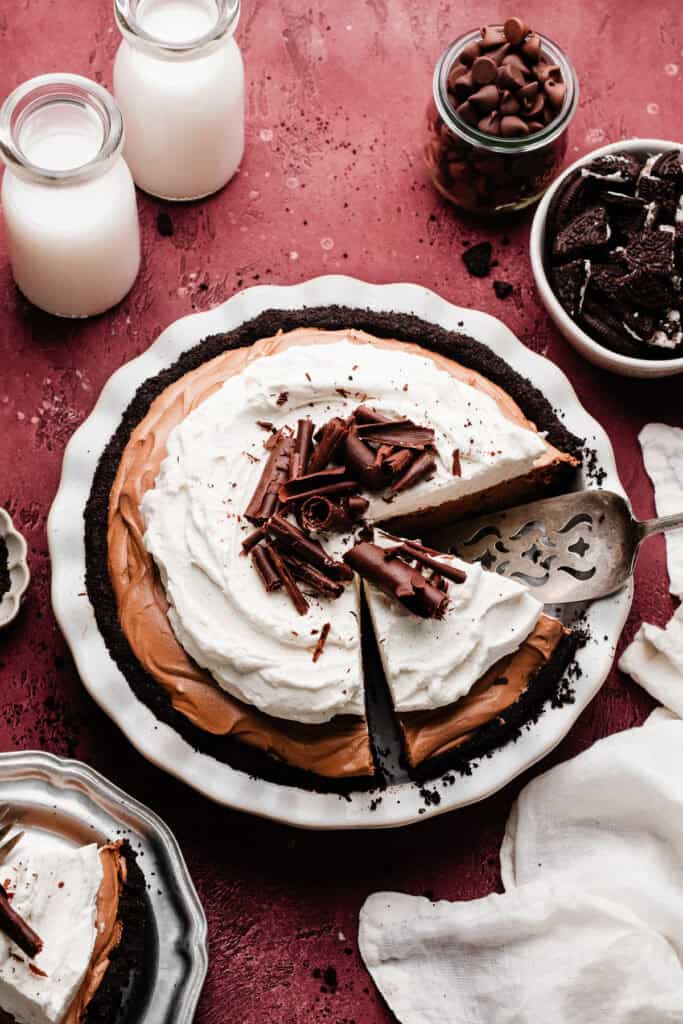
- Oreo Cookie Crust – If you’re a true chocolate lover, you can make this a double chocolate french silk pie by doing a chocolate cookie/oreo crust. This is also an easier option if you aren’t comfortable making traditional pie crust.
Recipe Variations:
- Gluten-free – I haven’t ever tried making my pie dough recipe gluten-free, and I don’t think it would translate correctly if you simply swapped gluten-free flour for all-purpose flour. It would likely yield a drier dough or crust. Try a gluten-free baking blog that you trust for a gluten-free modification!
- Dairy-free – You can certainly try swapping the dairy ingredients with plant-based alternatives, but please note that I have not tried it myself for this specific recipe, so proceed with caution. I do know that dairy-free heavy cream makes very good whipped cream!
How to Make French Silk Pie:
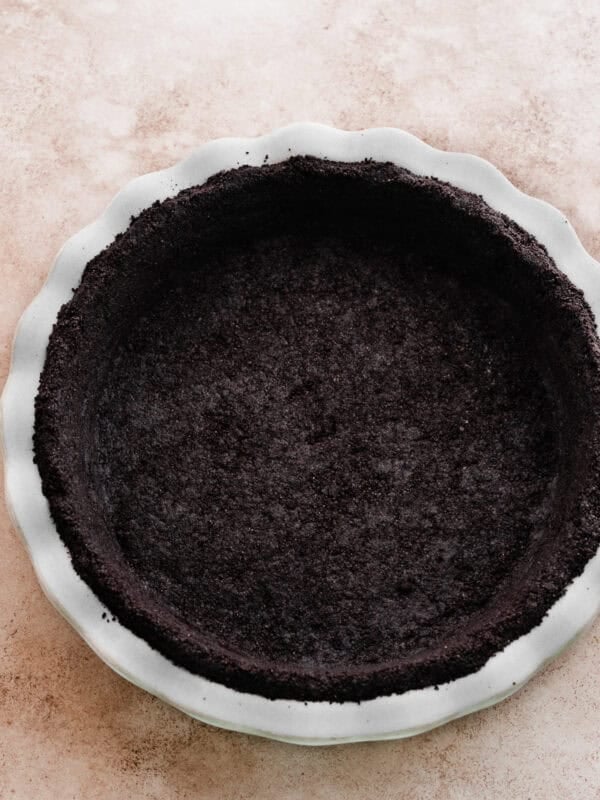
Step 1: Choose & Prepare the Crust. Choose a crust (pie crust or chocolate oreo crust) from the options above and prepare it according to the recipe below.
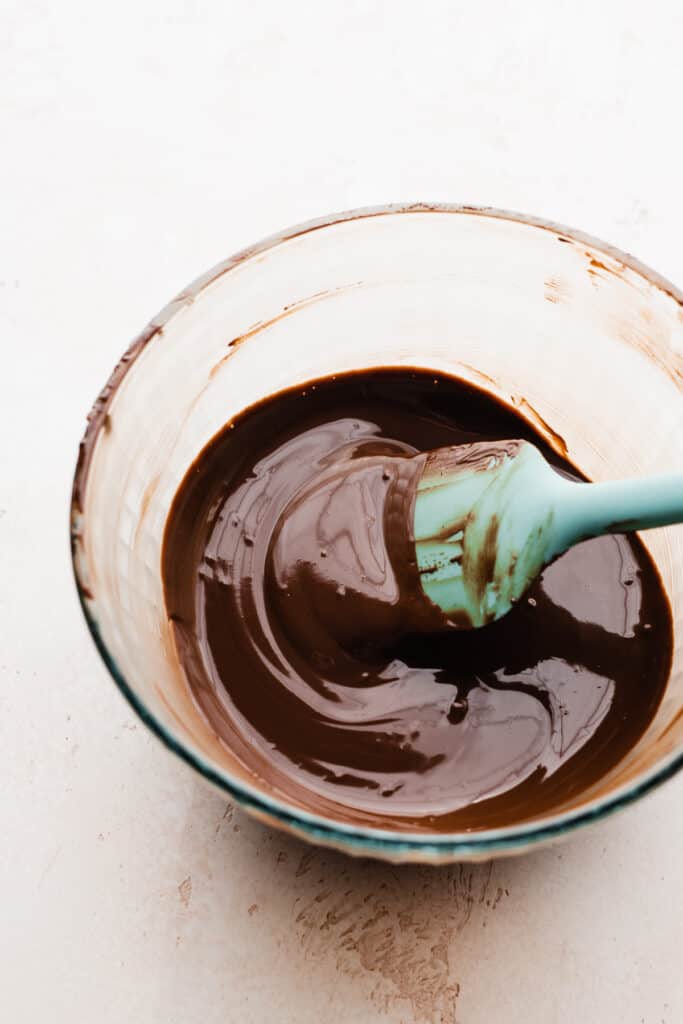
Step 2: Start the Filling. Chop your chocolate and melt in a small bowl. Set this aside to cool for a bit.
Step 3: Temper your Eggs. Whisk together eggs and sugar in a heat-proof bowl. Set this over a small saucepan with an inch of simmering water.
Cook this mixture, whisking constantly, for about 6 minutes, stopping when you reach 160 degrees F. This means the eggs are safe to eat and are no longer “raw”.

Step 4: Continue the Filling. Beat room temperature butter in a large mixing bowl. Once the egg mixture has cooled, slowly whisk the chocolate into the egg mixture, and then let cool for 5 minutes.
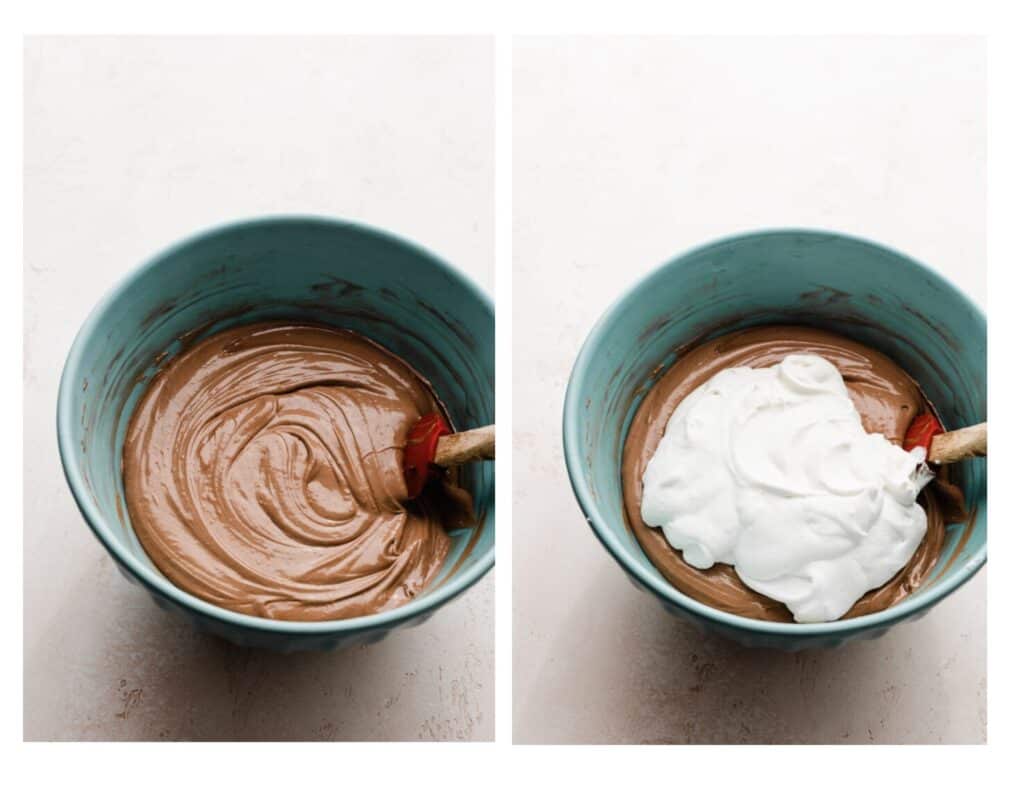
Make the whipped cream during this time. Next, slowly mix the cooled chocolate mixture into the butter.
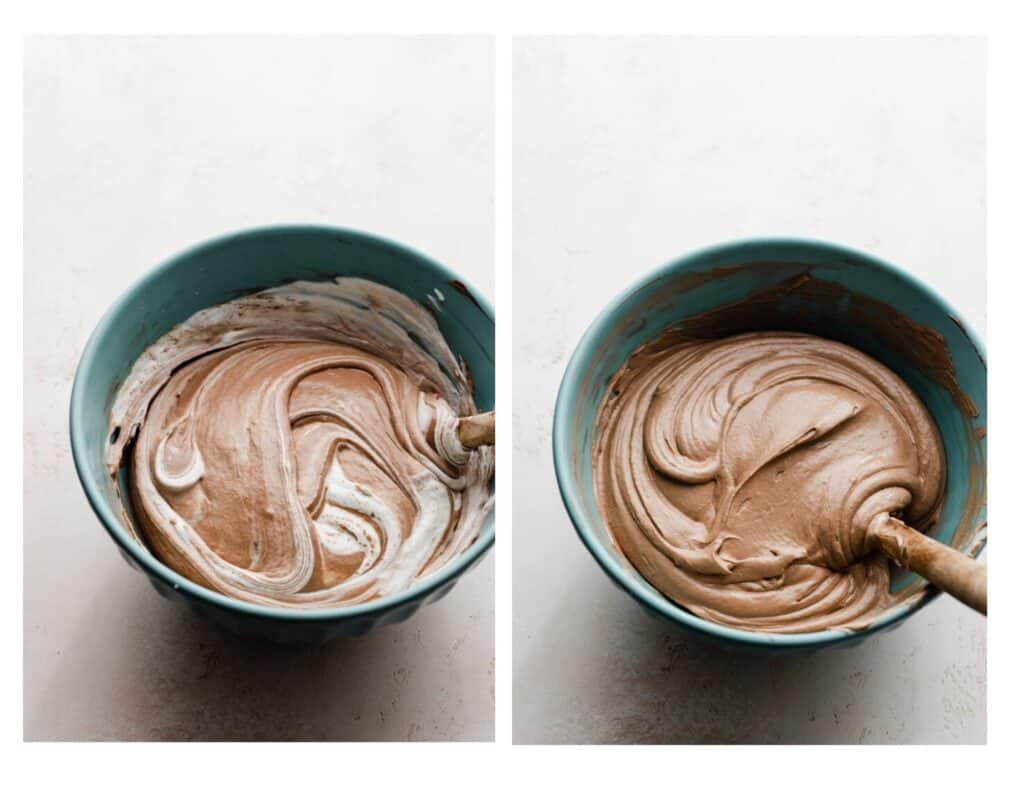
Step 5: Finish the Filling. Once the chocolate is mixed in, continue mixing for 5 minutes – the mixture will increase in volume and lighten in color (see photo on below left). Then, fold in your whipped cream.
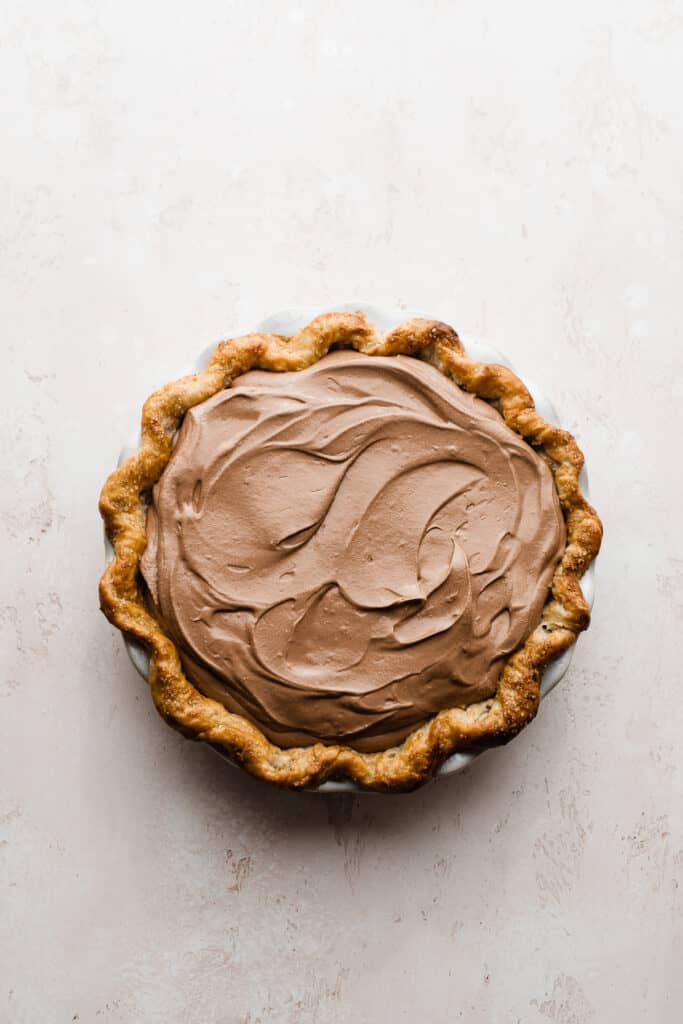
Step 6: Chill the Pie. Spread your filling into your cooled pie crust. The filling needs at least 4-6 hours in the fridge to set up before you can serve it, which makes it a great make-ahead dessert.
Serving + Storing:
Once you’re ready to serve the pie, top it with a cloud of whipped cream and chocolate curls or shavings. Leftovers will keep in the fridge for 3-5 days, but the pie crust will lose a bit of crispness with each day.
If you enjoyed this recipe, you’ll love my No-Bake Peanut Butter Pie or my No-Bake Black Forest Pie!
Expert Baking Tips:
- Oven Thermometer – An oven thermometer will tell you if your oven is actually running at the temperature you set it to. Your oven may not be accurate. Accurate oven temperature is crucial for most bakes, so I leave an oven thermometer in at all times to keep an eye on my oven’s calibration.
- Kitchen Scale – A food scale is the best way to make sure your flour is at the proper weight, since amounts will vary SO widely based on how you measure it, as well as the measuring cup you use, as they are not standardized.
- Follow the Recipe – Following the steps in order is the ONLY way to succeed with this recipe! (I hear Colette’s voice from Ratatouille whenever I say this, hah!)
FAQs:
Chocolate cream pie is usually made with a thickening agent like cornstarch or tapioca starch. They are also made with just egg yolks so the consistency is thick and rich, kind of like a dense pudding.
Classic French silk pie recipes include full eggs including the whites, which is key for a fluffy filing. There is no thickeners here which makes the filling ultra light and, well, silky!
Homemade whipped cream lasts about 3 to 5 days in the refrigerator after it is added on top of the pie.

Special Tools:
- Heat-Safe Bowl – You need a sturdy heat-resistant bowl to temper the eggs.
- Instant Thermometer – You must have a thermometer to tell when the eggs are at 160 degrees F.
More Decadent Pie Recipes:
- No Bake Black Forest Pie
- Amazing No-Bake Peanut Butter Pie
- No Bake S’mores Pie
- Perfect Pumpkin Pie
- Dutch Caramel Apple Pie
Did you make this recipe? Leave a comment & star rating!
Click the little stars in the header of the recipe card below to leave a comment & star rating, letting me know how you liked the recipe. I take all feedback seriously, & leaving a rating helps my small business immensely!

French Silk Pie (No Raw Eggs!)
Ingredients
For the Oreo Crust:
- 1/4 cup salted butter, melted, 56 grams
- 25 oreo cookies
For the Pie Filling
- 6 ounces semi-sweet chocolate, chopped, Use high-quality chocolate bars here, such as Baker's or Ghirardelli. Do NOT use chocolate chips.
- 2 ounces milk chocolate, chopped, Use high-quality chocolate bars here, such as Baker's or Ghirardelli. Do NOT use chocolate chips.
- 3/4 cup + 2 tbsp granulated sugar, 184 grams
- 4 large eggs, at room temperature
- 1/2 cup + 5 tbsp salted butter, at room temperature , 13 tbsp total, or 184 grams
- 1 cup cold heavy cream, 240 grams
- 2 tsp vanilla extract
For the Whipped Cream
- 1 and 1/2 cups cold heavy cream, 360 grams
- 3 tbsp powdered sugar, 21 grams
- 1 tbsp vanilla extract
For Chocolate Curls
- 3 ounces semi-sweet chocolate, *see notes for chocolate curl directions – 85 grams
- 1 tbsp shortening, 14 grams
Instructions
- If you want a Traditional Pie Crust: Make a half batch of the pie dough from my Perfect Pie Crust post. Make the dough and chill it, then fully blind bake it as directed in that blog post recipe card.
- Make & Bake the Chocolate Crust: Preheat your oven to 350℉. Spray a 9-inch pie plate with nonstick spray. Pulse the oreos in a food processor until finely ground. Stir in the melted butter and press this mixture into your prepared dish, and up the sides. Really spend some time packing the crust in tightly here – it may seem like a lot of mixture for the pie plate, but it will fit!Bake the oreo crust for 10 minutes, then set aside to cool completely.1/4 cup salted butter, melted, 25 oreo cookies
- Start the Filling: Read through the directions before you begin so you understand the order of steps here. This won't be complicated as long as you familiarize yourself with the steps first.Melt the chopped chocolate in a small bowl, in 30 second intervals, stirring between each until completely smooth. Set aside to cool a bit. Fill a small saucepan with 1 inch of water and bring to a gentle simmer over medium-low heat. Choose a heat-safe bowl that will sit in the pot but not touch the water. Add eggs and granulated sugar to the bowl and whisk to combine. Place the bowl of egg and sugar over the pot of simmering water. Cook for 6 minutes or so, whisking constantly, until the mixture reaches a temperature of 160° F (go by temp, not time). Once it reaches that temperature, remove the bowl from the heat immediately. You can also rub a bit between your fingers to make sure the sugar granules have all dissolved.If you heat the eggs too high or too long, they'll scramble and you'll know it. Toss it out and try again. Set this aside to cool for 10 minutes.6 ounces semi-sweet chocolate, chopped, 2 ounces milk chocolate, chopped, 3/4 cup + 2 tbsp granulated sugar, 4 large eggs, at room temperature
- Finish the Filling: After 10 minutes, slowly whisk the chocolate mixture into the egg mixture. Set this aside to cool for 5 more minutes. While that's cooling, cream your butter in a large mixing bowl. Set aside. Then, add the heavy cream and vanilla to another large bowl, and mix until stiff peaks form. Pop this in the fridge for later. After the 5 minutes are up on the chocolate egg mixture, slowly pour it into the bowl with the butter, while the mixer runs on medium. Once it's all combined, continue mixing the butter chocolate mixture on high speed for 5 minutes. The mixture will grow in volume and lighten in color. Carefully fold in the whipped cream until completely combined. See notes below for tips on how to fold.1/2 cup + 5 tbsp salted butter, at room temperature , 1 cup cold heavy cream, 2 tsp vanilla extract, 1 and 1/2 cups cold heavy cream
- Chill the Pie: Spread the filling into your cooled crust. Pop in the fridge, and let chill for 4-6 hours before serving. You can chill up to 48 hours before serving.
- Serve + Store: Make chocolate curls, if desired. These can be stored in an airtight container in the fridge for a few days. When ready to serve the pie, make the whipped cream by mixing all whipped cream ingredients together in a large bowl on high speed, just until stiff peaks form. Dollop this on your chilled pie, and top with chocolate shavings or curls. Enjoy! Leftovers keep in the fridge for 3-5 days, although this is better on the first or second day, as the crust can start to absorb moisture from the pie over time.3 tbsp powdered sugar, 1 tbsp vanilla extract, 3 ounces semi-sweet chocolate, 1 tbsp shortening
Notes
Nutrition
Nutrition information is automatically calculated, so should only be used as an approximation.


What size pie plate!!??? Assuming 9 inch but ???????????
Hi Jenni. Step 2 states to use a 9-inch pie plate. Enjoy the recipe!
Delicious and beautiful. Excellent instructions. Will definitely make again. Thank you.
So glad to hear you enjoyed this recipe, HVMom!
Hey 3 different stores they dont have milk chocolate in either brand. Would lindt be a good substitute for it? They have it in milk chocolate. Trying to get ingredients for tomorrow. First time making this.
Hi Natasha! So sorry you went to three stores! Yes a lindt milk chocolate bar would be perfect. Let me know how you like the recipe! And Happy Thanksgiving!
Very rich and delicious pie. I followed the instructions and it went well. It is a little more complicated than your average pie, but no problem. The instructions are thorough and the pictures informative. Nice to not have raw eggs in there. My eggs got to temp much quicker than six minutes, but that’s why you use a thermometer. I usually get 8 slices from a pie, and wondered about the 12 servings – until I ate it. A small serving is plenty!
Thanks so much for your in depth review, Ted! Glad you enjoyed the pie.
Just a little unclear on the recipe amounts. The recipe is for two pie crusts, but the filling recipe part is for one pie? The number of servings is 12, is that one pie? Thanks.
Hi Ted! Yes, the pie crust recipe makes 2 crusts but the french silk pie filling is for 1 pie – and only needs 1 crust. And yes – 12 servings from one pie. Feel free to just make half the pie dough recipe if you don’t want an extra crust to freeze for later. Let me know how you like the recipe!
1/2 cup + 5 tbsp Danish Creamery’s Premium Salted Butter (13 tbsp total, or 184 grams)
Butter is normally 8 Tbsp per 1/4 cup. Is this recipe calling for 13 or 21 Tbsp of butter?
Hi Ashley! 8 tbsp of butter is actually 1/2 cup. This recipe calls for 1/2 cup (8 tbsp) + 5 additional tbsp, for a total of 13 tbsp. Happy baking!