This post contains affiliate links. Please see our disclosure policy.
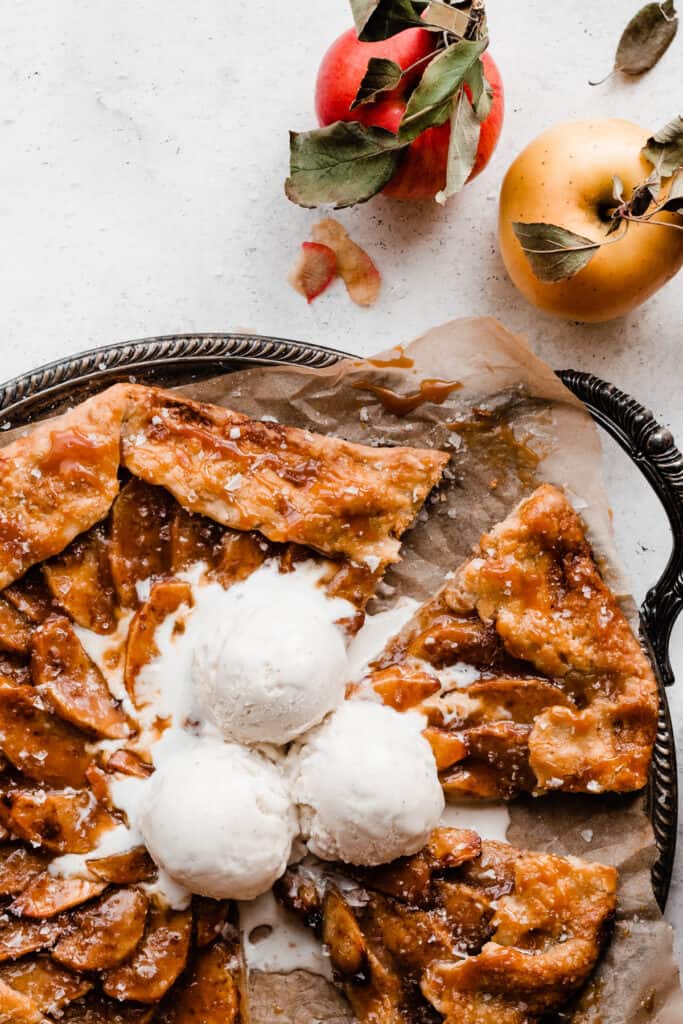
Apple Galette is full of spiced, tender apples wrapped up in a buttery, flaky crust and drizzled with homemade salted caramel sauce. This is the coziest fall dessert I know how to make – perfect for any occasion, from Thanksgiving to a cozy afternoon baking session after apple picking.

Why you’ll love this Apple Galette:
- Tender Spiced Apples – Sliced apples are spiced with cozy fall spices and baked to tender perfection.
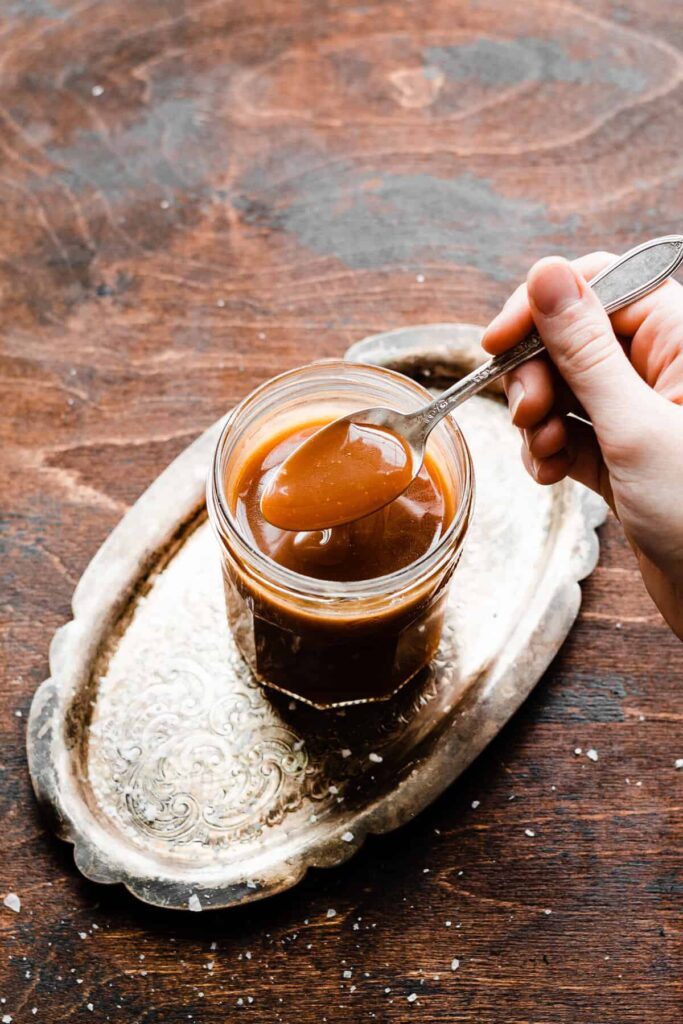
- Salted Caramel Sauce – A salted caramel drizzle takes this dessert right over the top!
- Buttery, Flaky Pie Crust – My recipe yields an ultra flaky and buttery crust, and is easy enough for even a beginner baker!
Ingredient Overview:
As always, the full recipe with measurements & directions can be found in the recipe card at the bottom of this post. Use the table of contents (back at the top, below the first image, to navigate).
- Apples – I like to use apples that are a bit on the sweeter side, like Honeycrisp or Gala (or even a mix of those two!). You can also use something like Granny Smith if you prefer.
- Butter – I always use salted buter for the best flavor, but feel free to use unsalted butter if you prefer. Always use extremely cold butter when making pie dough, of the crust will not turn out nice and flaky.
- Water – Use ice water here. I usually add ice cubes to a bowl of water and keep it in the fridge until I’m ready to measure it out and use it.
- Lemon – A hint of lemon helps balance the sweetness.
- Vanilla extract – Be sure to use real vanilla extract for best results.
- Sour Cream – Be sure to use full fat for best results. This should also be very cold, straight from the fridge.
Recipe Substitutions & Variations:
- Greek Yogurt – You can sub greek yogurt or plain yogurt (full fat, of course) for the sour cream.
- Cranberries – Add 1/2 cup of cranberries in place of 1/2 cup of the apple spices for a Cranberry Apple Galette.
- Caramel Sauce – The caramel sauce is certainly optional, but I do recommend it because it takes this dessert to another level!
How to Make this Apple Galette:
Step 1: Make the Salted Caramel Sauce. This comes together in just 10 minutes! My post (linked above) has tons of photos & tips to help you! Let this cool while you make the pie dough.
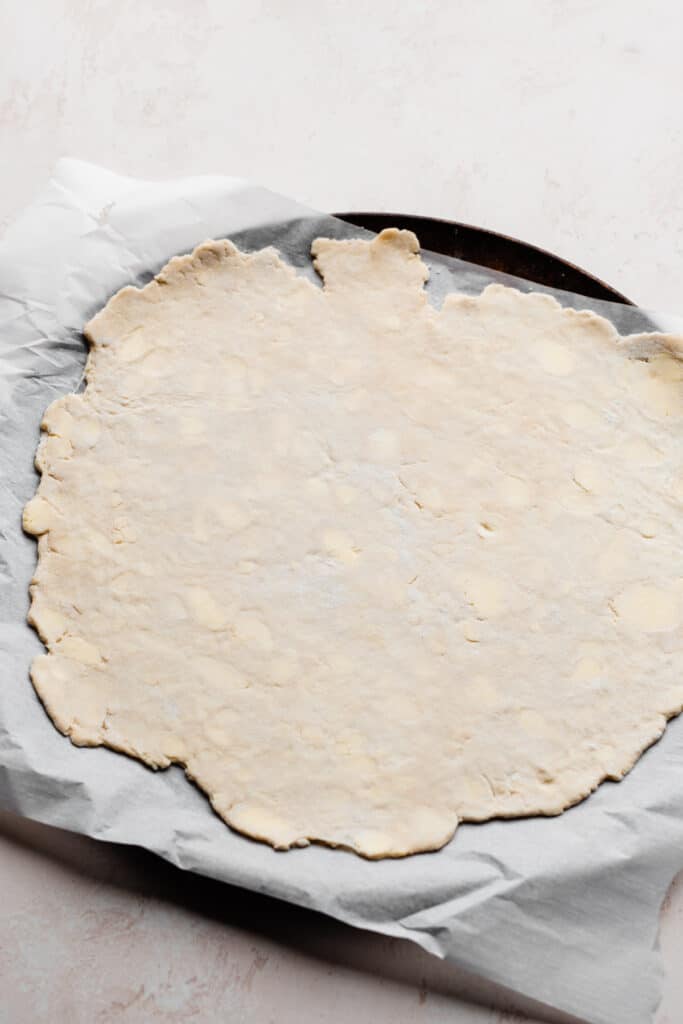
Step 2: Make the Pie Dough. My buttery, flaky crust is easy to make – read my post on How to Make Perfect Pie Crust for tips, tricks, & troubleshooting. This dough is a simple mix of flour, butter, salt, sugar, water, & sour cream.
Chill it as directed, then roll it out on a lightly floured work surface. You want those visible pieces of butter (pictured below) – that is what will create flakiness when the crust bakes!
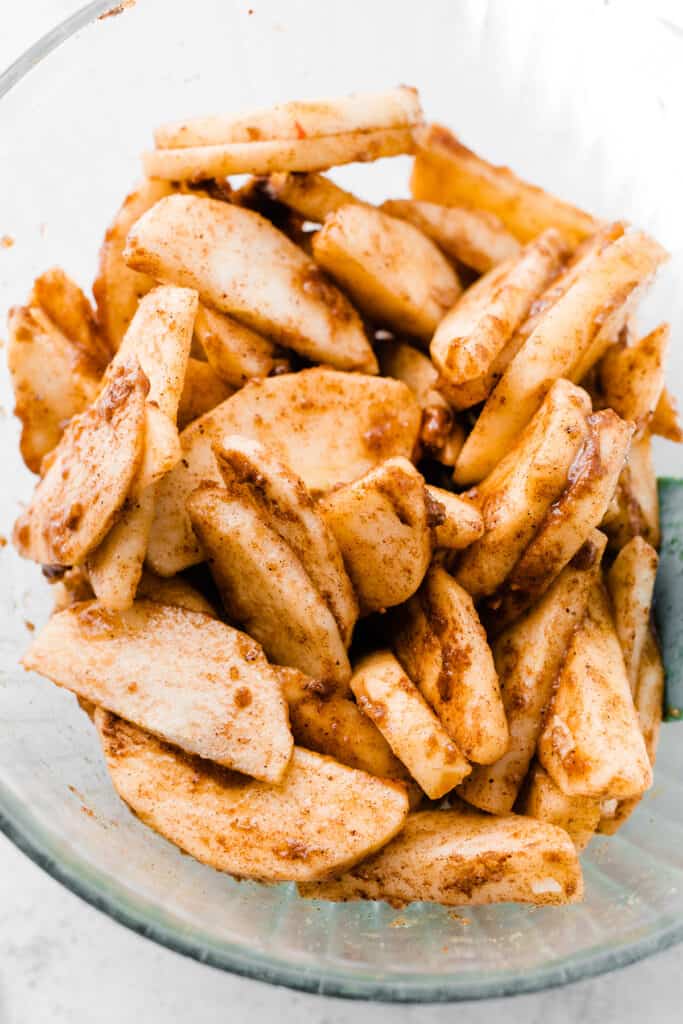
Step 3: Make the Apple Filling. Toss your apple slices in a large bowl with a bit of flour, brown sugar, vanilla, a splash of lemon juice, and warm spices like cinnamon, cloves, and nutmeg.
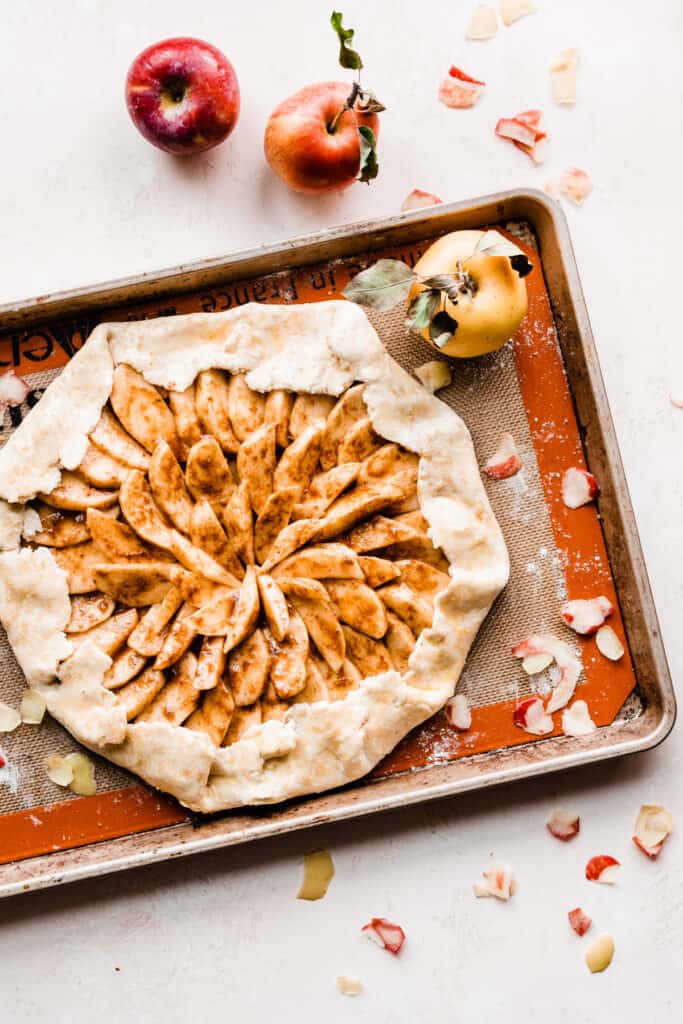
Step 4: Assemble & Bake your Galette. Arrange your apple slices in whatever pattern you want inside your crust, making sure to leave a 2-3 inch border so you can fold over the edges of the dough.
I start at the outside of the border and arrange them in concentric circles, finishing in the center of the dough. Brush with egg wash and bake as directed in the recipe card below.
Serving + Storing:
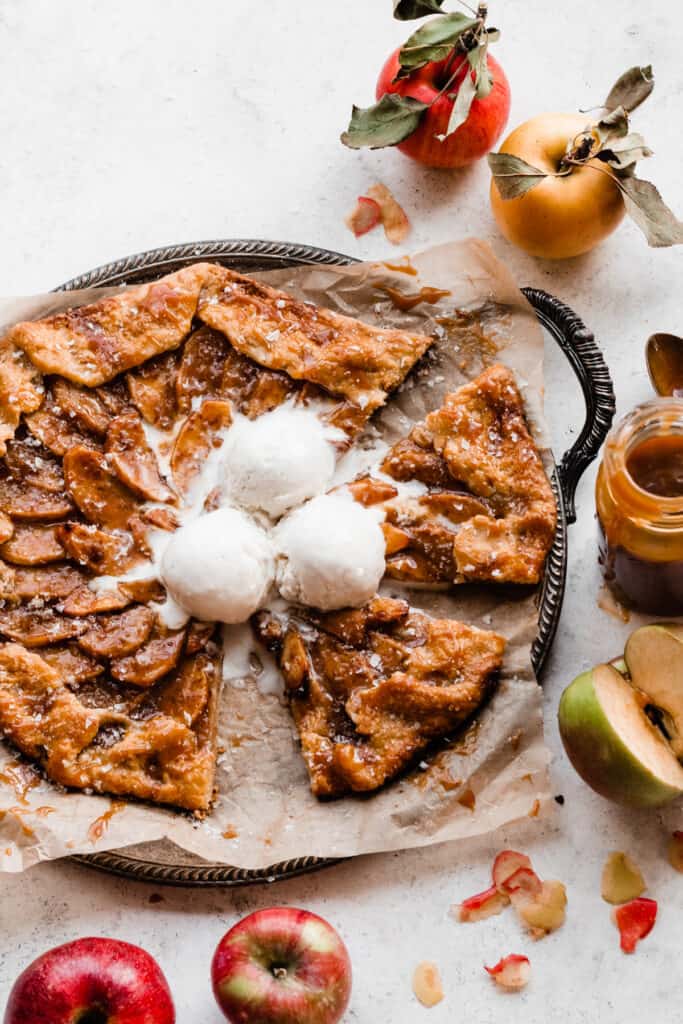
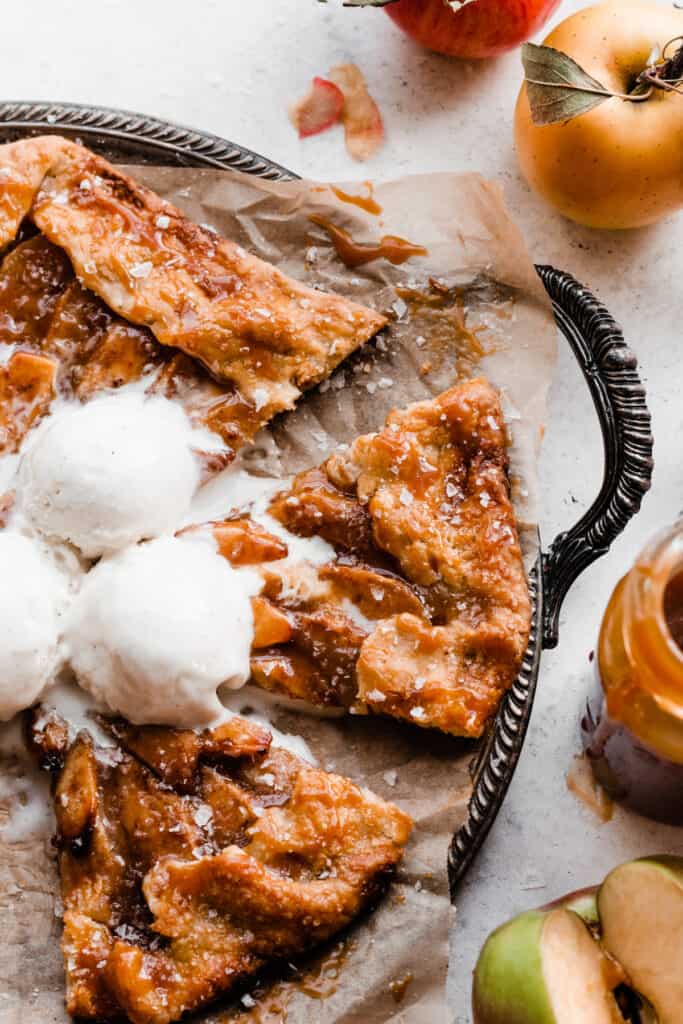
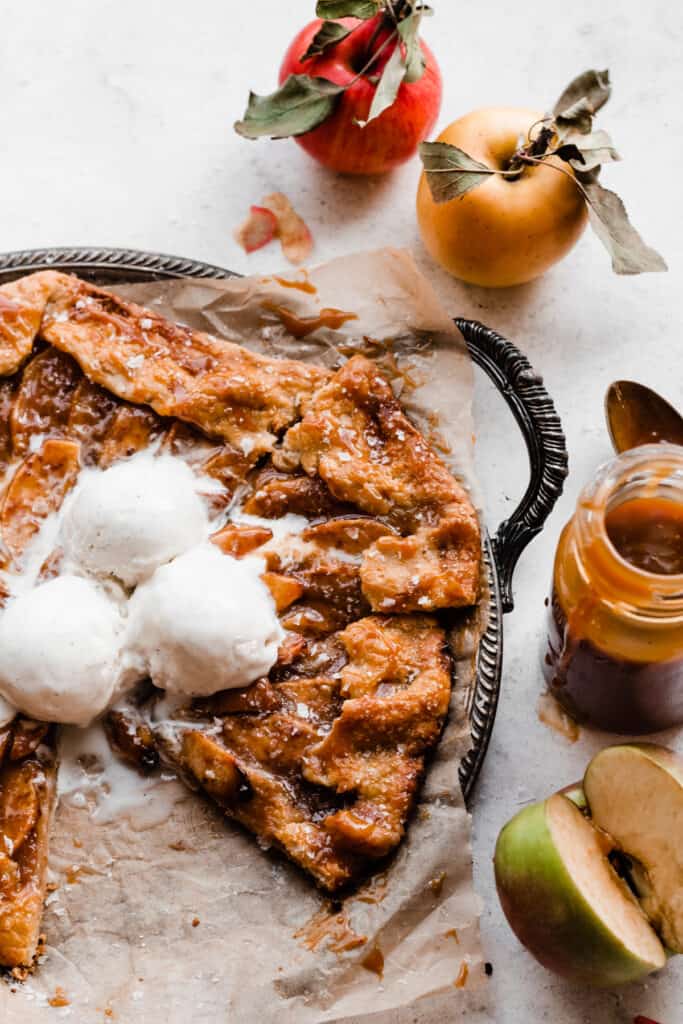
Once the apple galette is out of the oven, drizzle it with salted caramel sauce, and add a scoop of vanilla ice cream and a pinch of flaky sea salt. Dig in while it’s piping hot!
This is best enjoyed warm from the oven. But, leftovers can be stored in an airtight container in the fridge for 2-3 additional days. Reheat slices in the oven to retain crust crispness.
Still have tons of apples from apple picking? Make my Salted Caramel Apple Pie Bars or my Instant Pot Applesauce next!
Expert Success Tips:
- Avoid Soft Apples – Don’t use soft apples like McIntosh for this galette, as they’re much too soft for baking. Any good baking apple will work.
- Cold Butter – NEVER use room temperature butter in pie dough. It needs to be cold, straight from the fridge. The same goes for your water and sour cream. Otherwise, the crust will not be flaky or hold its shape in the oven.
- Oven Thermometer – An oven thermometer will tell you if your oven is actually running at the temperature you set it to. Your oven may not be accurate. Accurate oven temperature is crucial for most bakes, so I leave an oven thermometer in at all times to keep an eye on my oven’s calibration.
- Kitchen Scale – A food scale is the best way to make sure your flour is at the proper weight, since amounts will vary SO widely based on how you measure it, as well as the measuring cup you use, as they are not standardized.
FAQs:
This galette is best enjoyed warm from the oven, but the caramel and pie dough can each be made ahead. Caramel can be made and kept in the fridge up to 2 weeks ahead, and pie dough can be refrigerated up to 3 days or frozen for 2-3 months before using. Thaw overnight in the refrigerator before using.
A galette is essentially an open-faced or free-form pie. It’s a great option for beginner pie bakers because it’s easier than a full on pie! You’ll fall in love with galettes the instant you try one.
While the galette bakes, a bit of butter may escape and melt on the baking sheet. This is totally normal and will not give you a soggy crust. I always have a little bit of this on my baking pan but have never had a soggy galette.
Special Tools:
Affiliate links below.
- Rolling Pin – A rolling pin is essential when making any pie recipe.
- Pastry Brush – Use a pastry brush to brush egg wash on your pie dough
More Galette Recipes to Love:
- Butternut Squash Galette
- Strawberry Rhubarb Galette
- Mini Whole Wheat Blackberry Galettes
- Salted Caramel Pear Galette
- Blueberry Cherry Galette
More Apple Recipes to Love:
- Caramel Apple Cider Cookies
- Cranberry Apple Crisp
- Homemade Apple Fritters
- Honeycrisp Apple & Kale Fall Salad
- Caramel Apple Crumb Cake
- Apple Cider Old Fashioned Cocktails
- The Best Recipes to Make During Apple Season
Did you make this recipe? Leave a comment & star rating!
Click the little stars in the header of the recipe card below to leave a comment & star rating, letting me know how you liked the recipe. I take all feedback seriously, & leaving a rating helps my small business immensely!

Salted Caramel Apple Galette
Ingredients
For the Salted Caramel Sauce:
- 1 cup granulated sugar , 210 grams
- 6 tbsp salted butter, cubed, 85 grams
- 1/2 cup + 1 tbsp heavy cream, 135 grams
- pinch of flaky sea salt
For the Crust:
- 1 and 1/4 cups all-purpose flour, spooned & leveled or weighed out , 163 grams
- 3/4 tsp salt
- 1 tsp granulated sugar
- 1/2 cup cold salted butter, 113 grams
- 5 tbsp ice-cold water, 75 grams
- 1/4 cup cold, full-fat sour cream, 60 grams
For the Apple Filling
- 3 medium apples , I recommend a mix of Honeycrisp and Gala
- 2 tsp lemon juice
- 1 and 1/2 tbsp all-purpose flour, 12 grams
- 1/4 cup brown sugar, packed, 55 grams
- 1 tsp vanilla extract
- 1 and 1/4 tsp cinnamon
- 1/4 tsp nutmeg
- 1/8 tsp ground cloves
- 1/4 tsp salt
- 1 large egg, for egg wash
- sprinkle of raw or turbinado sugar, for garnishing crust
For Serving
- flaky sea salt
- vanilla bean ice cream
Instructions
- Make the Salted Caramel Sauce: Make the Salted Caramel Sauce before you start everything else, so it has time to chill and set up a bit. It takes just 10 minutes! This can be made up to 1 week in advance – store in the fridge in a jar.1 cup granulated sugar , 6 tbsp salted butter, cubed, 1/2 cup + 1 tbsp heavy cream, pinch of flaky sea salt
- Make the Crust: In a medium bowl, whisk together the flour, salt, and sugar. Cut the butter into large chunks and add to the dry ingredients. Use a pastry cutter or clean hands to cut the butter into the dry ingredients until you have chunks the size of blueberries (some will be a bit bigger, and some a bit smaller). Drizzle in the water and add the sour cream. Toss with a fork until the dough is moistened and the sour cream is mixed in. Gently gather the dough into a ball. If the dough holds when you push it together, it's ready. If it's a bit dry and crumbles apart, add a bit more water, 1 to 2 tablespoons at a time. You can also flick some water onto any dry bits hiding in the bottom of the bowl. Gently flatten the ball of dough a bit, into a 1-inch thick disc. It will be a little scrappy looking but should hold together. Wrap the disc tightly in plastic wrap and chill in the freezer for at leas 1 hour or in the fridge for at least 2 hours. If you freeze the dough for 1 hour, and your filling isn't ready yet, move the dough to the fridge so it doesn't freeze solid. Make-Ahead Tip: Dough can be made ahead and refrigerated for 2-3 days before using, or frozen for up to two months. Let it thaw in the fridge overnight before using, if you froze it. Find More Troubleshooting Tips for Pie Crust in my "How to Make Perfect Pie Crust" Post.1 and 1/4 cups all-purpose flour, spooned & leveled or weighed out , 3/4 tsp salt, 1 tsp granulated sugar, 1/2 cup cold salted butter, 5 tbsp ice-cold water, 1/4 cup cold, full-fat sour cream
- Make the Apple Filling: Start the filling once the dough has chilled, or while it's close to being ready. If you're making the filling the same day that you made the crust, you can use the same bowl. Just give it a quick wipe first! Peel and slice your apples 1/4" thick. You'll have about 4 cups of slices. Stir together the apple slices and the rest of the filling ingredients. If the dough still has a few minutes of chill time left, you can cover the bowl of apple filling with a kitchen towel and pop it in the fridge while you wait and while you roll out the dough.3 medium apples , 2 tsp lemon juice, 1 and 1/2 tbsp all-purpose flour, 1/4 cup brown sugar, packed, 1 tsp vanilla extract, 1 and 1/4 tsp cinnamon, 1/4 tsp nutmeg, 1/8 tsp ground cloves, 1/4 tsp salt
- Roll out the Dough and Assemble the Galette: Preheat oven to 400° F, and line a large baking sheet with parchment paper or a silicone baking mat. Flour your countertop & rolling pin. Unwrap the dough and sprinkle lightly with flour. Begin rolling out the dough gently, turning continuously so it doesn't stick to the counter. Sprinkle more flour under the dough as needed. Be a little patient here – we're not trying to stretch the dough all the way out in a few passes. Once the dough is about 12 to 14 inches in diameter and about 1/8 inch thick, gently roll it up onto the rolling pin and transfer it onto the prepared baking sheet. Evenly spread the apple filling onto the dough, leaving a 2- to 3-inch border around the edges. You can fan the apple slices out in circles or you can let them fall where they fall. Just try to keep them in an even layer throughout. Drizzle the little bit of liquid left in the bottom of the bowl over the apple slices. Fold up the edges of the dough, working in small sections, to cover edges of the apples. Galettes are rustic – don't fuss over this. Chill the assembled galette, uncovered, in the fridge for 15 minutes to re-chill before baking (don't skip this). Beat the egg in an already used measuring cup. Once the galette has chilled, brush the beaten egg (your egg wash) over the edges of the crust. Sprinkle on coarse sugar.1 large egg, for egg wash, sprinkle of raw or turbinado sugar, for garnishing crust
- Bake: Bake for 38 to 45 minutes. The crust will be golden brown and should feel crisp if you tap it with your fingertip. You can also prick the apples with a fork to ensure they're tender.
- Serve + Store: Brush the apple slices in the galette with salted caramel sauce when it comes out of the oven. If the caramel has been in the fridge awhile, you'll need to microwave it for 30 sec to 1 minute to loosen it up. Let the galette rest about 10 minutes before slicing + serving. Drizzle slices with more salted caramel sauce, and serve with vanilla ice cream. This is best fresh from the oven, but you can keep leftovers in the fridge for 2-3 days in an airtight container.
Notes
Nutrition
Nutrition information is automatically calculated, so should only be used as an approximation.

Could this be prepared a day ahead and refrigerated and baked the next day?
Hi Trish! I haven’t tried that but my guess would be no. You can certainly make the caramel (up to 1 week ahead) and the pie dough (up to 2 days ahead). Let me know how you like the recipe!
Very delicious! Our friends and family really enjoyed it. The crust turned out very flaky and yummy.
Thanks so much for taking the time to leave a review, Natasha!
My second time making this! It’s very delicious. All our friends and family enjoyed it today! The dough turns out very flaky and the filling is very fall like. Made this for the fall contest.
Thanks so much for taking the time to leave a review, Natasha! Is there anything you felt could improve the recipe to be deserving of 5 stars? 🙂 Thanks!
I have a ? re your cookbook. My grand is ‘gluten free’ and loves to cook, bake. Are your recipes compatible with either King Author’s gluten free flour or Red Mill’s gluten free flour?
Thanks. /jd
Hi Judy! I haven’t tested my recipes in a gluten-free version unless it explicitly says so. Gluten-free baking is not currently my area of specialty. I would recommend using a food blog that specializes in gluten-free baking, like https://theglutenfreeaustrian.com/
Hi Stephanie! How are you? Where I live, sour cream isn’t sold. Is there any alternative? Or can I just skip it
Hi Sophia! You can skip it in this case – just follow the directions from my pie crust post here – half the recipe will be enough for your galette. https://bluebowlrecipes.com/perfect-pie-crust-tips/ Let me know how you like this recipe, please!
Made this last week 9/2023 followed exactly, used a mix of Granny Smiths and Honeycrisp apples. Came out perfectly!
Glad you enjoyed this recipe, Debbie!
This recipe was beyond delicious and so easy to make and follow! I will be making it again no question!
Thanks for the rave review, Samantha! 🙂
Flaky dough, tender apples, brushed with caramel is a gamechanger! Thank you for another great recipe!
Glad you enjoyed it! Thanks for taking the time to leave a review. 🙂