This post contains affiliate links. Please see our disclosure policy.
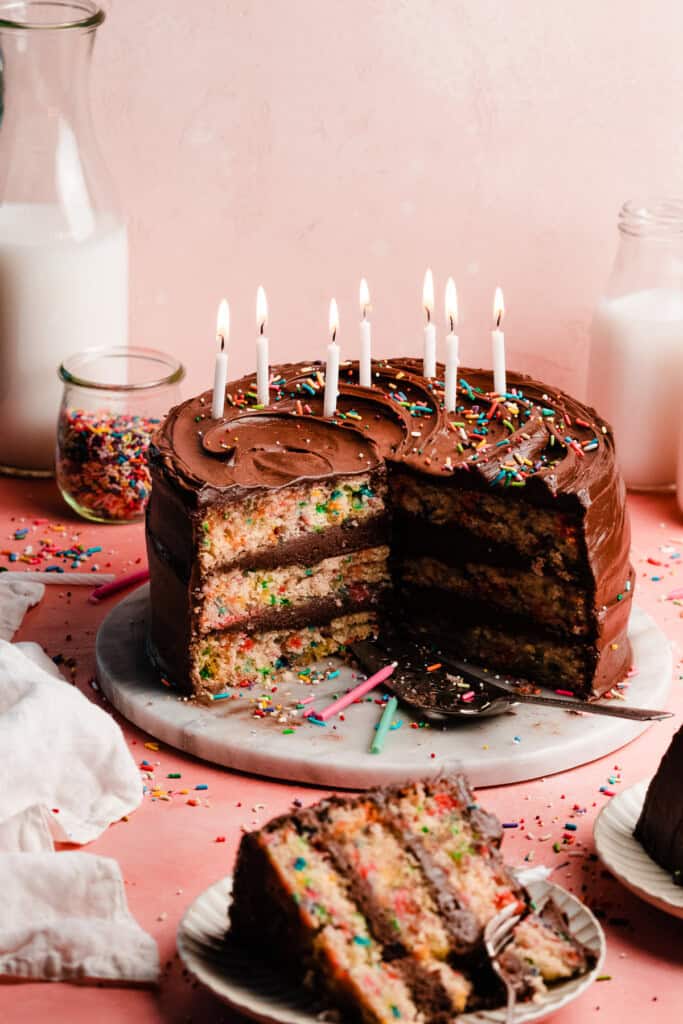
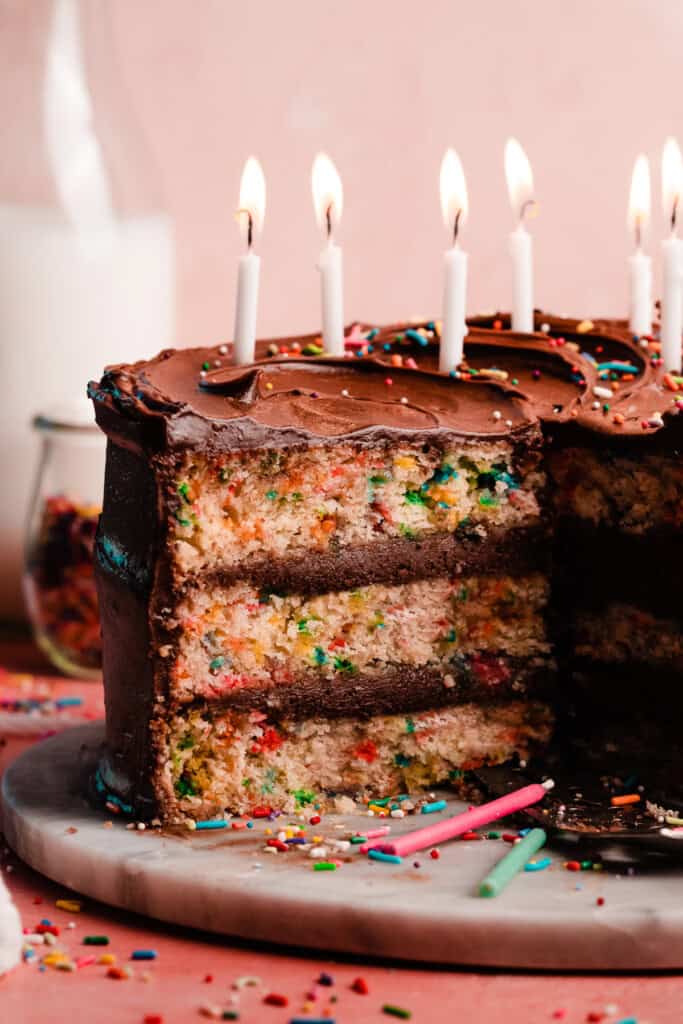
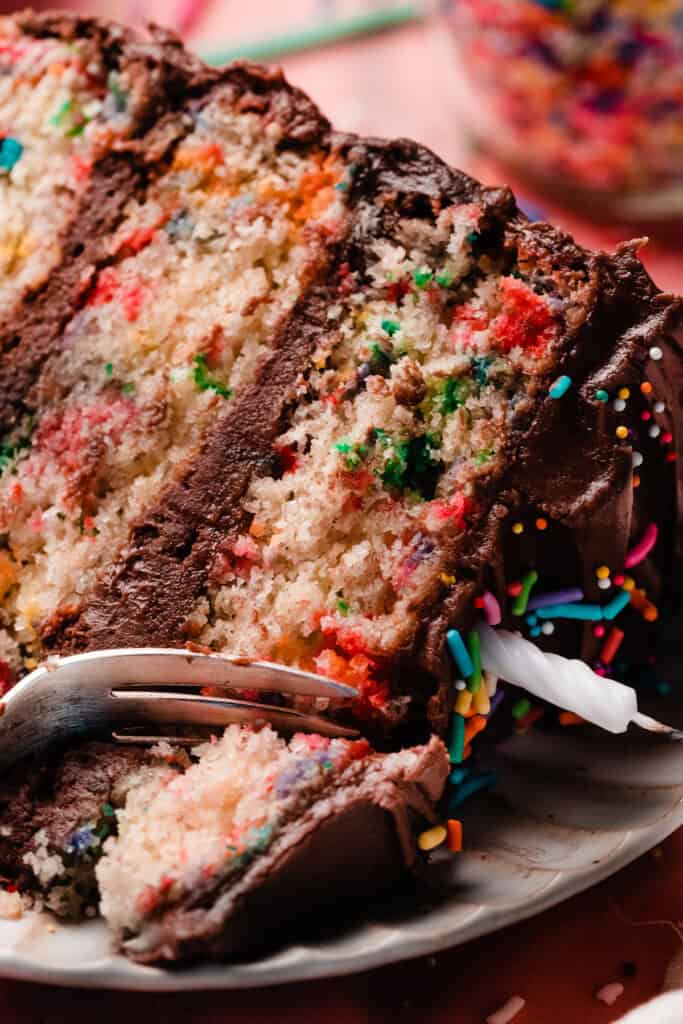
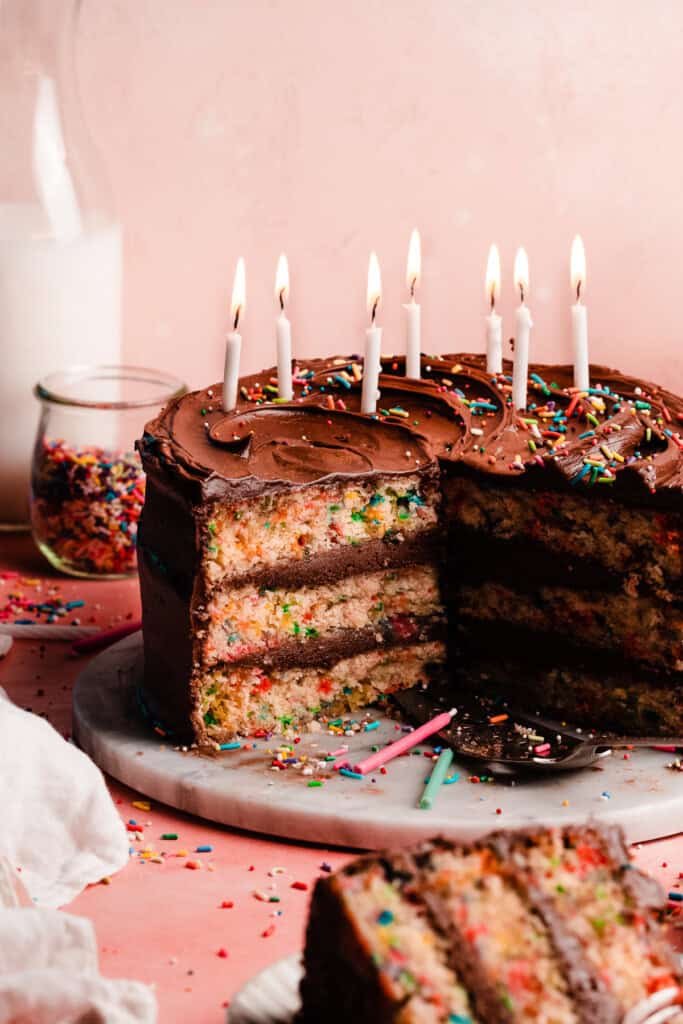
Funfetti Cake is ultra fluffy, moist, and full of rainbow jimmies! It has the perfect buttery vanilla cake flavor, just like your favorite bakery cake! Frost this cake in the creamiest chocolate frosting and watch it fly off plates at any birthday party or celebration.

This recipe was originally published in April of 2023, but I’ve updated it with new photos and a slightly tweaked recipe as of May 2024. I reduced the butter by 2 tbsp, added 1 tbsp of oil, switched from 4 whole eggs to 3 eggs and 1 egg white, reduced the sour cream from 1 cup to 3/4 cup, and increased the milk from 1 and 1/4 cup to 1 and 1/2 cup. The result is a cake that’s even fluffier & more moist than the old recipe! I’ve also used a chocolate frosting this time, but you can use my vanilla cream cheese frosting if desired.
Table of Contents
Why you’ll love this Homemade Funfetti Cake recipe:
- Classic Funfetti Flavor – The buttery, vanilla flavor shines in this classic funfetti cake.
- Velvety Texture – The texture of this cake is so light and velvety, while also being super moist!
- Easy to Make – Follow the directions and success tips given for a perfectly tender and flavorful celebration cake every time!
Ingredient Overview:
As always, the full recipe with measurements & directions can be found in the recipe card at the bottom of this post.
- Butter – I prefer salted butter, but you can use unsalted butter if that’s your preference.
- Eggs – I tried this cake with 4 whole eggs, but it was slightly denser than I wanted. Switching to 3 whole eggs and 1 egg white yielded the perfect fluffy & moist texture. (Save the extra egg white for your morning scramble!) Use large eggs for best results.
- Milk – I used 2% milk. I think whole milk would also work, but I don’t recommend buttermilk.
- Sour Cream – Use full-fat sour cream at room temperature.
- Cake Flour – Cake flour gives this cake a lighter, more tender crumb than all-purpose flour, so I highly recommend using cake flour here. See sub below.
- Vanilla Extract – Since the flavor in this cake comes from simple quality ingredients, be sure to use real vanilla instead of imitation for the best flavor.
- Vegetable Oil – Using a combination of oil and butter gives this cake the best of both worlds – oil keeps the cake tender and moist, and butter adds flavor.
Recipe Substitutions & Variations:
- Sour Cream – Full fat greek yogurt works in place of the sour cream.
- Cake Flour Substitute – Make your own cake flour by spooning & leveling 1 cup of flour into a measuring cup, using a flat edge to level it off. Add to a mixing bowl, then remove two tablespoons (scoop & level them off). Add two tablespoons of corn starch, then sift this mixture twice. This is important to evenly mix the ingredients and to give the same light texture as cake flour.
- Dairy-free – I haven’t tested a dairy-free version of this cake, but if you already have trusted dairy-free substitutes for baking, you can theoretically go that route.
- Gluten-free – I have not tested a gluten-free version of this cake.
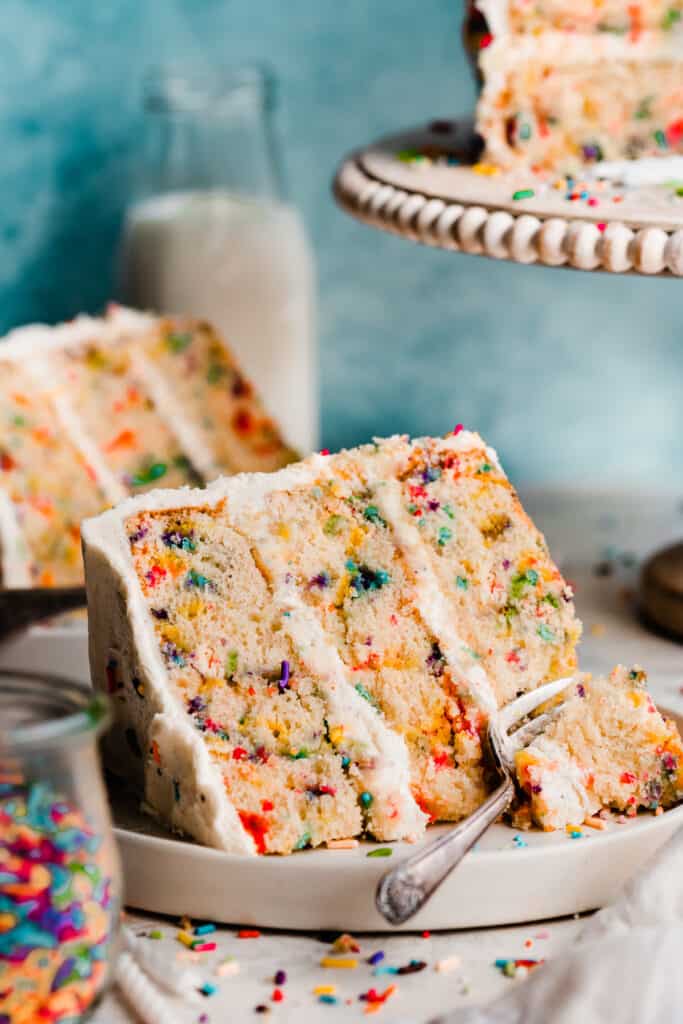
- Vanilla Frosting – Make a batch of Creamy Vanilla Frosting (from my White Birthday Cake) if you prefer it to chocolate with your funfetti cake (pictured below)!
- Fruit Jam – I love incorporating jam into cakes for a pop of flavor – use 1/4 to 1/3 cup of jam between layers if desired, making sure to pipe a border of frosting to contain it (I use a Wilton 1A tip). Feel free to use any flavor – raspberry or strawberry would be delicious with the vanilla frosting!
How to Make Funfetti Cake:
Step 1: Start Making the Cake Batter. Cream together butter & oil with an electric mixer in a large mixing bowl, or in the bowl of a stand mixer fitted with the paddle attachment. Then, add sugar & beat on high speed for two full minutes.
Add the eggs, two at a time, mixing on medium between each for 45 seconds. until well combined. Add the sour cream and vanilla, making sure to scrape the sides and bottom of the bowl as you go, to make sure everything is incorporated.
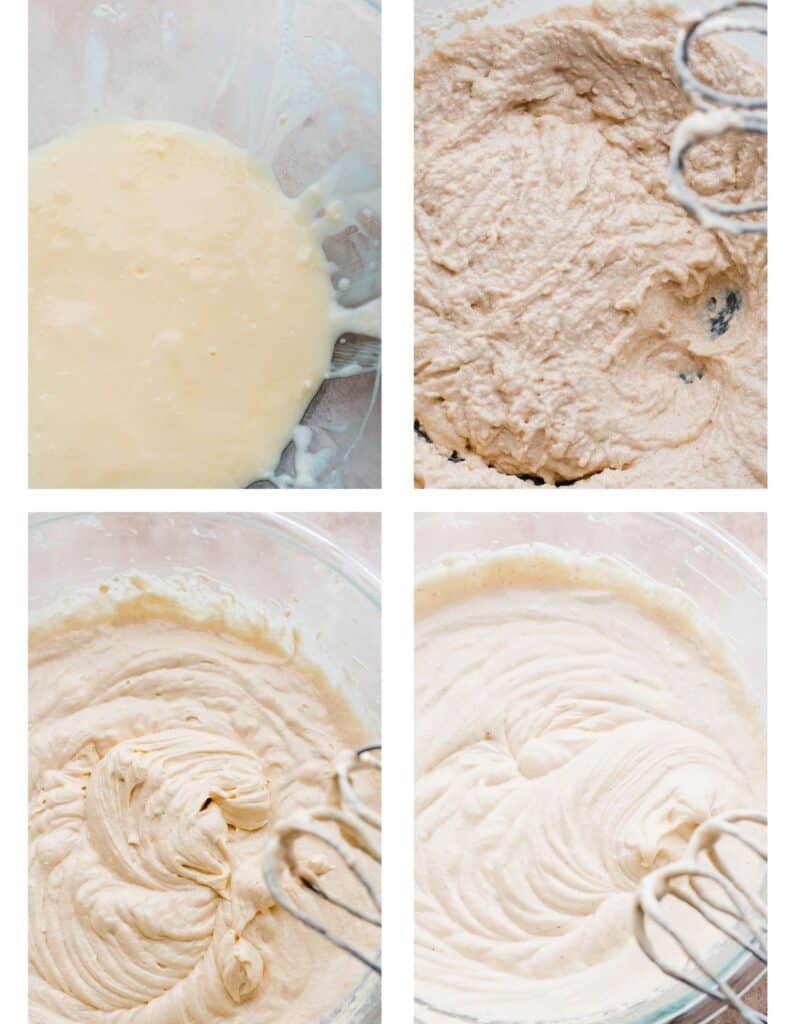
Step 2: Add the Dry Ingredients. Alternate adding the dry ingredients and milk as directed below, taking care not to over mix once the flour mixture is added, as this will make a tough cake.
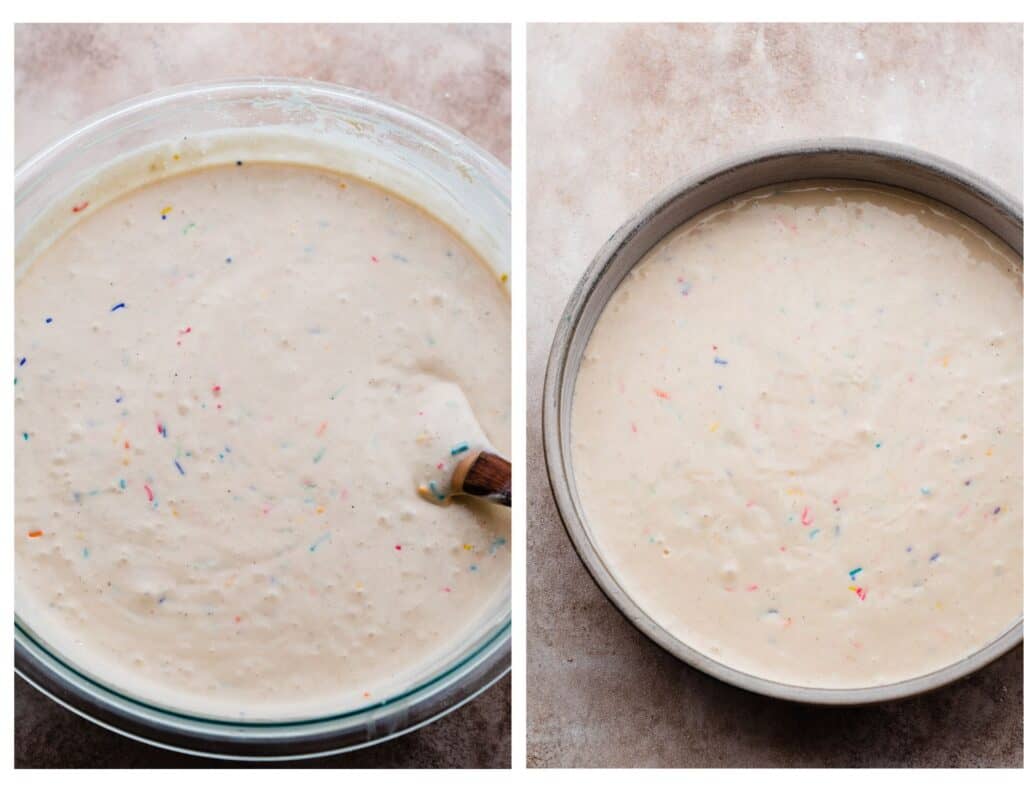
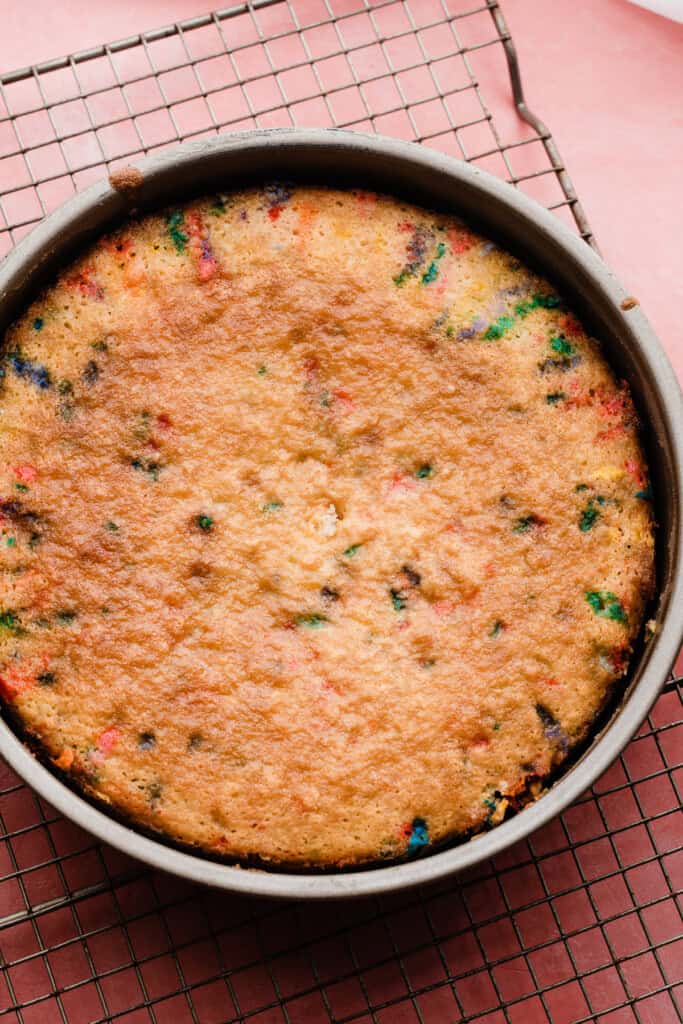
Step 3: Bake the Cake Layers. Divide the cake batter between prepared pans, and bake as directed. Let baked cakes cool completely on a wire rack.
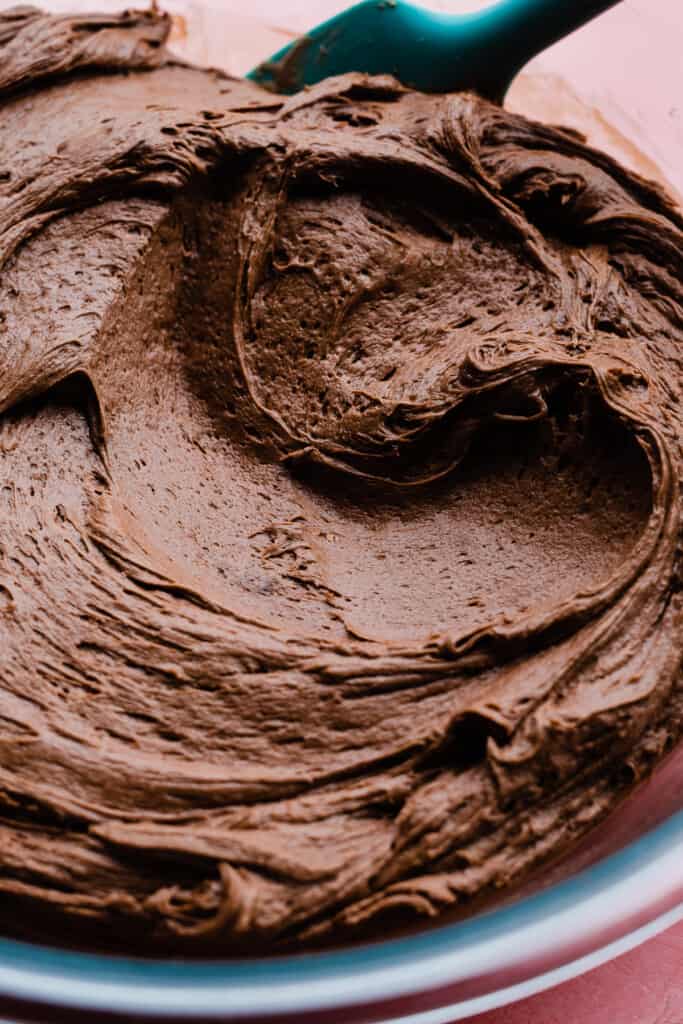
Step 4: Make the Frosting. Beat together butter and powdered sugar, then mix in the vanilla and salt. Beat in the cream cheese last.
Step 5: Assemble the Cake. Frost your cake, then chill to set the things up a bit before slicing and serving. Use 1 and 1/2 cups of frosting between each of the first two layers, and reserve the rest for the sides and top of the cake.
Serving + Storing:
Chill the assembled cake for about 30 minutes, or up to 24 hours, before slicing and serving. This allows the frosting to set up if it got a bit warm while you worked with it.
Let a cake that has been in the fridge longer than 30 minutes sit at room temp for 30 minutes or so before slicing and serving, so the frosting isn’t so stiff. Store leftover cake in an airtight container in the fridge for 2-4 days.
Expert Success Tips:
- Cold Ingredients – Be sure that your butter, eggs, milk, and sour cream all come out from the fridge about 30 minutes to 1 hour ahead of time to come to room temperature. This absolutely affects the texture and outcome of your cake, so don’t ignore these steps.
- Read through the Recipe – Baking a cake from scratch doesn’t need to be difficult – just be sure to read through the whole thing once before you begin to familiarize yourself with each step.
- Follow the Recipe – Don’t expect the best results if you substitute a lot of ingredients.
- Oven Thermometer – An oven thermometer will tell you if your oven is actually running at the temperature you set it to. Your oven may not be accurate. Accurate oven temperature is crucial for most bakes, so I leave an oven thermometer in at all times to keep an eye on my oven’s calibration.
- Kitchen Scale – A food scale is the best way to make sure your flour is at the proper weight, since amounts will vary SO widely based on how you measure it, as well as the measuring cup you use, as they are not standardized. 1 cup of cake flour weighs 110 grams, whereas 1 cup all-purpose flour weighs 130 grams. (Some people standardize at 120, 125, 130, or even 135 – I’ve chosen 130 grams for all my recipes.)
FAQs:
Because of the volume of batter you’d end up with, I don’t recommend this as most home bakers don’t have the equipment to bake in such a large volume. I’d recommend making two batches of the cake if you want 6 layers. (That’s also a ton of cake – see yield tips below for ways to stretch the yield of one cake!) You could also bake one batch and cut each of the three layers in half to make a 6-layer cake.
Yes, this should work just fine. You can bake in a 9×9 square pan (avoid glass pans, they don’t bake as evenly as metal or ceramic) or in two 8-inch round cake pans.
If you cut traditional triangular slices, you’ll easily get 12-16 slices. If you use the method of cutting the cake into horizontal strips, and then cutting each of those into 3-4 slices, you’ll end up with many anywhere from 22-28 slices this way, or even slightly more if you cut the slices on the smaller size.
Yes, this will yield 36-40 cupcakes, and 18-20 if you cut it in half. Be sure to fill the liners only 2/3 full, and bake for 12-18 minutes.
Cream cheese helps cut through the sweetness of traditional vanilla buttercream frosting (and Chocolate Frosting!), so you don’t get that tooth-aching feeling that some frostings give.
Nonpareils will bleed into the batter, so I recommend using rainbow jimmies!
Make-Ahead Tips for Funfetti Cake:
Cake layers can be made up to 24 hours ahead. Let them cool completely at room temperature, then place each layer on a large dinner plate and wrap tightly in plastic wrap. Keep at room temp until ready to assemble. I recommend making the frosting day-of, not ahead of time. The entire assembled cake can be chilled up to 24 hours in advance of serving. This cake is best within the first 3 days or so.
Special Tools:
- Offset Spatula – Offset spatulas make frosting this delicious dessert so easy! They can also be used for spreading cake and brownie batters evenly in your pan.
- Cake Turntable – If you make at least a few cakes a year, a cake turntable makes the frosting process a breeze!
More Cake Recipes for a Party:
- Perfect White Cake
- Salted Butterscotch Crunch Cake
- White Forest Cake
- Peach Cobbler Cake
- German Chocolate Cake
- Raspberry Chocolate Ganache Cake
- Best Yellow Cake with Chocolate Frosting
- Mojito Cake
Did you make this recipe? Leave a comment & star rating!
Click the little stars in the header of the recipe card below to leave a comment & star rating, letting me know how you liked the recipe. I take all feedback seriously, & leaving a rating helps my small business immensely!

Incredible Funfetti Cake
Ingredients
For the Cake
- 3 and 1/2 cups cake flour, spooned & leveled, 385 grams
- 1 tbsp baking powder, 14 grams
- 3/4 tsp baking soda, 4.5 grams
- 3/4 tsp salt, 5 grams
- 1/2 cup salted butter, softened at room temperature , 113 grams
- 1/2 cup + 1 tbsp vegetable oil, 123 mL
- 2 and 2/3 cups granulated sugar , 567 grams
- 1 tbsp vanilla extract, Use 1 tsp extra if skipping the butter emulsion, see below
- 1 and 1/2 tsp bakery buttery emulsion, See note below
- 3 large eggs, at room temperature
- 1 large egg white, at room temperature , See note below
- 3/4 cup full fat sour cream, at room temperature , 180 grams
- 1 and 1/2 cups milk, at room temperature , I used 2%. 240 mL
- 1 cup jimmy sprinkles, plus extra for decorating
For the Frosting
- 1 and 1/2 cups salted butter, softened at room temperature , 24 tbsp, 3 sticks, or 339 grams
- 7 and 1/3 cups powdered sugar (start with 6 cups and go from there, until desired sweetness is reached)
- 2 tbsp heavy cream or milk
- 1 and 1/2 cups cocoa powder, You can use natural or dutch process here. Dutch process will give a darker chocolate flavor.
- 1 tbsp vanilla extract
- pinch of salt, to taste
- 12 oz full fat cream cheese, cold, Use full fat blocks
Instructions
- Prep: Make sure all cold ingredients have come to room temperature. Preheat your oven to 350° F. Prepare three 9-inch cake pans*. Use a paper towel to rub shortening all over the inside of each pan, coating them evenly and completely. Cut a round of parchment paper to fit inside each (tracing is the easiest way). Place this on top of the greased pan bottom, then grease over the parchment paper as well. Add a handful of flour, and tap the pan around to evenly coat the entire inside with flour, tapping out the excess.*Tip: 8-inch cake pans work as well! The cakes will bake in 24 to 28 minutes.
- Make the Cake Batter: In a medium bowl, whisk together the dry ingredients – flour, baking powder, baking soda, and salt. In a large mixing bowl, cream the softened butter for about 30 seconds, until creamy. Add the vegetable oil and beat together on medium high speed for 1 minute. Add the sugar and beat on high speed for 2 full minutes. The mixture will be fluffy. Scrape the sides of the bowl with a rubber spatula throughout, to ensure everything is combined. Add the eggs, one at a time, beating on medium-high speed between each addition, for 45 seconds. The mixture will be very fluffy. Add the sour cream and vanilla and mix on medium speed until just combined.Add half of the dry ingredients while the mixer is running on low speed. Add the milk when just a bit of the flour has disappeared into the batter, then add the remaining dry ingredients. Continue mixing on low, and stop when just a few streaks of flour remain. Turn off the mixer and add the sprinkles. Use a spatula to gently fold in the sprinkles with the last few streaks of flour. If there are some lumps in the batter, that's fine – do not over mix!
- Bake: Divide the cake batter evenly between the prepared pans. (You can eyeball this or use a kitchen scale.) Bake the cakes, the first two pans together on a rack positioned in the center of the oven, and then the 3rd pan on its own after the first two are done. This will ensure the most even bake. Bake the cakes for 22-26 minutes. A toothpick inserted into the center will pull out moist crumbs. Let cakes cool in the pans on cooling racks for 10 minutes. Then, invert onto cooling racks to cool completely.
- Make the Frosting: In a large mixing bowl, cream the softened butter. Add the powdered sugar in 3 additions (start with 6 to 6.5 cups), mixing until smooth between each, adding 1-2 tbsp of heavy cream or milk as needed. Add the cocoa powder, vanilla and a pinch of salt. Beat in the softened cream cheese last. Taste and add extra powdered sugar until desired sweetness is reached.
- Assemble & Frost the Cake: Place the first cake layer on a cake stand (I stick my cake stand on a turntable to make things easy). Use 1 and 1/2 cups of frosting (340 grams) to top the layer, spreading it evenly with an offset spatula. Repeat with the second layer. Add the final layer and give the cake a thin layer of frosting on top and on the sides. Use a cake scraper to smooth out and remove excess frosting. This is your crumb coat, so don't fret if it isn't perfect. Pop the cake in the fridge for 30 minutes or until the frosting is set. Then, use the remaining frosting to frost the cake. Chill the entire cake in the fridge for 30 minutes, or until the frosting is set before covering (with plastic wrap or a cake lid) or serving.Tip: If your frosting is getting too soft at any point from sitting out, pop it back in the fridge for a bit to firm back up.
- Serve + Store: Serve the cake once it's chilled as directed above. Slice into as many slices as desired! Store leftovers, tightly covered, in the fridge for 2-4 days. The cake will naturally start to dry out a bit once it's been cut and put back in the fridge, so just be sure to seal and store it tightly. Press an extra piece of plastic wrap up against the cut part to help keep the cake as fresh as possible.
Notes
Nutrition
Nutrition information is automatically calculated, so should only be used as an approximation.
A-MA-ZING! For a while now, I had been searching for the perfect vanilla/Funfetti Cake. This year, I decided to make my own bday cake for the first time and this recipe looked delicious! A year later, I was finally able to try it out and it was a smash hit! Everyone was raving about it and it tasted even better the next day…
A few notes, it seems like you REALLY have to grease the pans for these layers. I put my usual amount of nonstick spray and found that these cakes were really stuck on there. Next, I think this might be user error but somehow my layers domed in the middle but that did not compromise their taste at all. Lastly, these freeze great! I wrapped them in press N seal and aluminum foil, placed them in a gallon ziplock and stored in the freezer for roughly 48 hours and they tasted great.
I paired it with a different cream cheese frosting recipe I often use but next time I’ll be sure to try it with the chocolate frosting.
So glad to hear you enjoyed this cake, Samantha! Sorry to hear about the nonstick spray not working – it doesn’t work with any of my cake recipes, unfortunately, unless I have specified it in the recipe card. Your oven and/or elevation could have caused the doming, but that’s an easy fix – you can just slice off the domed part and have a baker’s snack 🙂 Happy baking!
I thought I had previously left a review, but apparently did not. This cake is incredible! The buttery emulsion adds such great flavor. This is my new go-to for birthday cakes! 10/10 recommend
So glad to hear that, Brittany!
We made this for my sister’s birthday and everyone was raving about how delicious it was!!! The cake was so spongy and moist, and the sprinkles made it look extra cute. The frosting was also incredible! This recipe is definitely a keeper.
Thanks so much for the rave review, Jackie! I appreciate it so much.
Second time making this cake and it’s turned out great! Have to cook it for 10 minutes longer, no idea if that’s the difference in UK ingredients or ovens!
So glad to hear you enjoyed this recipe, Hayley!
why is your recipe calling for 4 eggs whites in the instructions but on the printed version you make indication to separated/
Hi Charlene! Looks like I mistakenly said add the egg whites in the body of the blog post – thanks for catching that. However, in the recipe card and the printed version I call for 3 whole eggs & 1 egg white. So, always go with the recipe card/printed recipe. Please let me know if you have any more questions and happy baking!
Thank you so much
You’re welcome, Charlene!
OK, but there’s still conflicting information here. At the beginning of the recipe you say that you tweaked it in May of 2024 to use three whole eggs and one egg white. Then in the body, it says “use the extra egg white for breakfast”. Did you mean extra yolk? And now in the comments (May 2024) you’re saying it’s four whole eggs? It’s quite confusing.
Hi Lindsay! Apologies for the conflicting info. However, please always go by what the recipe card says, not the comments or body of the blog post. I did mean to say extra yolk. And the old recipe was four whole eggs – when I updated it, it became three whole eggs & 1 egg white. Sorry about that! The recipe card is always the place to check though – not the comments. Happy baking!
I made this last night for a going away party. I honestly made it last minute because my friend wanted a vanilla cake so I came searching here. I had all of the ingredients and thought it was more fun than a typical vanilla cake so I went to work. This cake was incredible!! I did have to cook my cakes about 8 minutes longer than what was listed but that’s okay, every oven is different! The cake was so incredibly moist and the frosting had the perfect cream cheese to butter ratio. To be honest I only used one cream cheese block because I was lazy. The girls loved the cake and I brought some home to my other half and he had to stop himself from eating all of the leftover cake. Anyway, this was perfect and I will definitely make again. Thank you for the wonderful recipe!
Thanks so much for taking the time to leave such a detailed review, Michelle! I truly appreciate it, and am so glad you loved the cake!