This post contains affiliate links. Please see our disclosure policy.
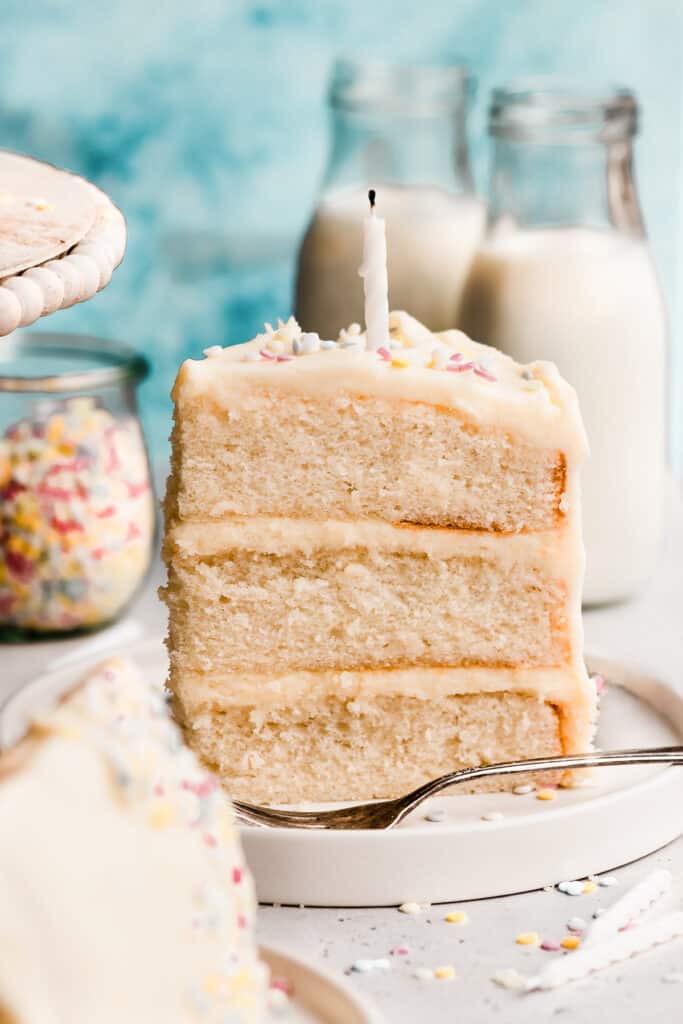
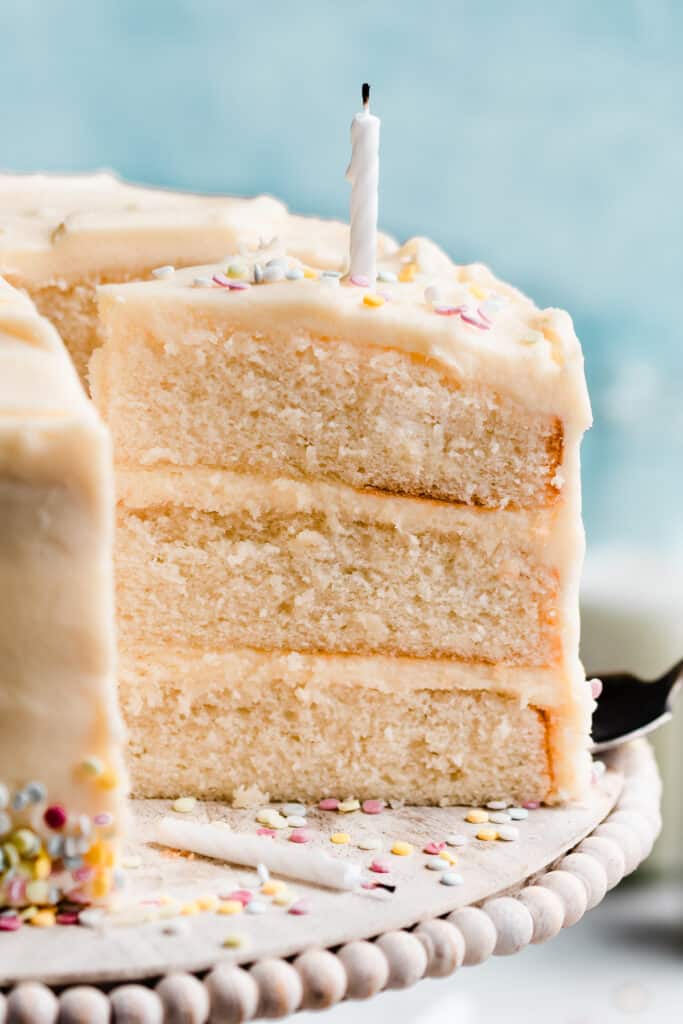
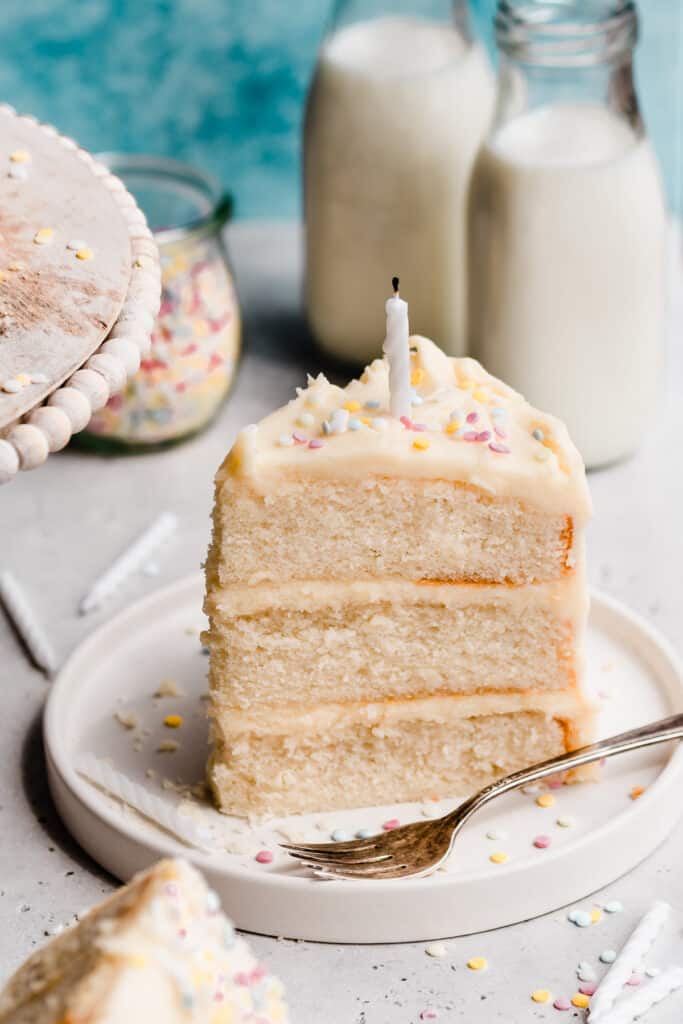
White Cake is a classic cake with a velvet texture and rich, buttery vanilla flavor. The cake is moist and light, and frosted with a creamy vanilla frosting.
Follow all my success tips in the post and recipe for perfect results every time. This cake is perfect for a birthday party or celebration!

Table of Contents
- Why you’ll love this White Cake:
- Is White Cake different from Vanilla Cake?
- Ingredient Overview:
- Recipe Variations:
- Can I make this recipe into cupcakes?
- How to Make White Cake:
- Cake Decorating Tips:
- Cake Storing Tips:
- Expert Success Tips:
- FAQs:
- Special Tools:
- Make-Ahead Tips:
- More Delicious Cake Recipes:
- Perfect White Birthday Cake Recipe
Why you’ll love this White Cake:
- Classic Flavor – White cake doesn’t mean no flavor! This one is full of buttery vanilla flavor.
- Velvety Texture – The texture of this cake is exceptionally light and velvety.
- Easy to Make – Follow the directions and success tips given for a perfectly tender and flavorful cake every time!
Is White Cake different from Vanilla Cake?
Yes! White Cake uses only egg whites, while a Vanilla Cake uses a mix of whole eggs and egg whites to give a slightly richer flavor. Alternatively, a Yellow Cake uses mainly whole eggs, or whole eggs and yolks for higher fat content and more of a yellow color.
Ingredient Overview:
- Butter – I prefer salted butter, but you can use unsalted butter if you prefer.
- Egg Whites – Use large eggs. Be sure to use just the whites and not the yolks for the lightest texture.
- Sour Cream – Use full-fat sour cream at room temperature.
- Cake Flour – Cake flour produces a lighter crumb in cakes, and I highly recommend using it! Spoon & level your flour for best results, or use a scale. Scooping the measuring cup directly in will lead to too much flour. 1 cup of cake flour weighs 110 grams, whereas 1 cup all-purpose flour weighs 130 grams. (Some people standardize at 120, 125, or 130 – I’ve chosen 130 grams.)
- Vanilla Extract – Since the flavor in this cake comes from simple quality ingredients, be sure to use real vanilla instead of imitation for the best flavor.
- Vegetable Oil – Using a combination of oil and butter gives this cake the best of both worlds – oil keeps the cake tender and moist, and butter adds flavor.
- Cream Cheese – I love adding cream cheese to the frosting to cut through the tooth-aching sweetness traditional buttercream can often have.
Recipe Variations:
- Cake Flour Substitute – Make your own cake flour by spooning & leveling 1 cup of flour into a measuring cup, using a flat edge to level it off. Add to a mixing bowl, then remove two tablespoons (scoop & level them off). Add two tablespoons of corn starch, then sift this mixture twice. This is important to evenly mix the ingredients and to give the same light texture as cake flour.
- Fillings – Use fillings (make sure it’s not runny!) like my Raspberry Coulis or Salted Caramel Sauce for extra flavor! Pipe a border of frosting on each of the first two layers and spread 1/4 cup of filling within the border. Then, stack the next layer and chill for 10 minutes before proceeding so the cake doesn’t slide around on the jam.
- Sprinkles – You can add 3/4 to 1 cup of your favorite jimmy sprinkles to the batter to make a funfetti cake.
- Almond Cake – Add 1-2 tsp of almond extract to the batter when you add the vanilla to make an almond flavored cake. This is perfect for weddings!
Can I make this recipe into cupcakes?
Yes, this will yield 36-40 cupcakes, and 18-20 if you cut the recipe in half. Be sure to fill the liners only 2/3 full, and bake for 12-18 minutes.
How to Make White Cake:
Step 1: Start the Cake Batter. Cream together your butter and vegetable oil with an electric mixer or standing mixer. Then, add the granulated sugar and beat on high speed for two full minutes.
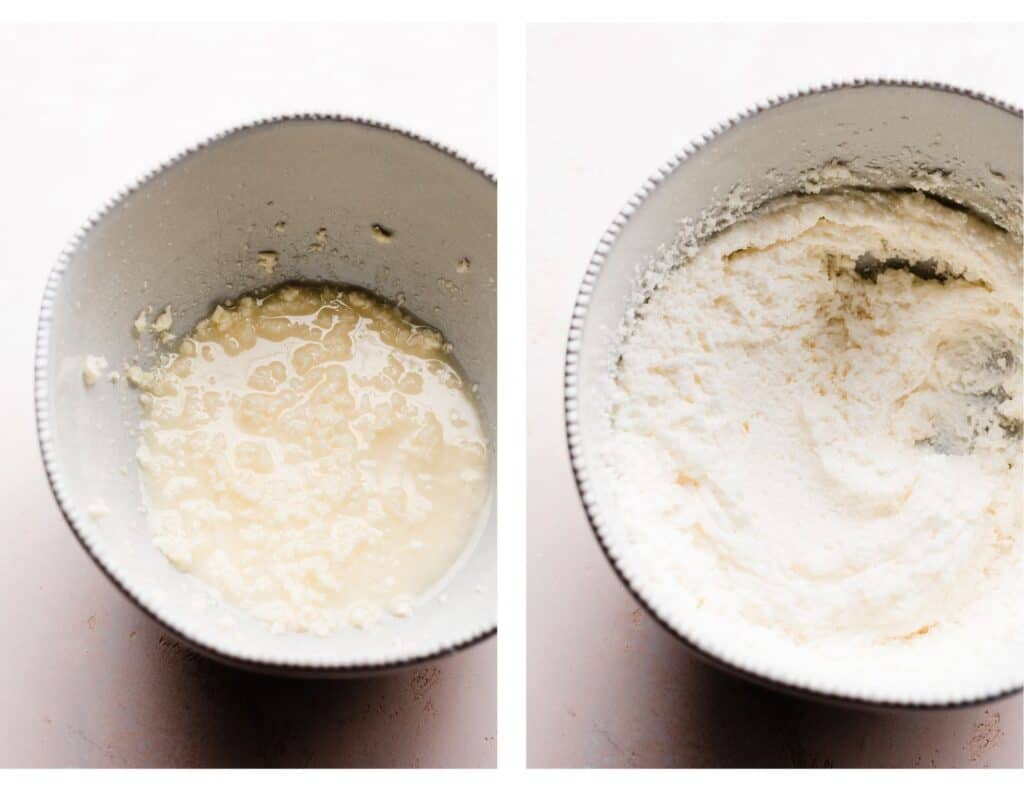
Step 2: Finish the Cake Batter. Add the egg whites, one at a time, mixing between each for 45 seconds. Add the sour cream and vanilla, and mix until just combined. Scrape the sides and bottom of the bowl, to make sure everything is well incorporated.
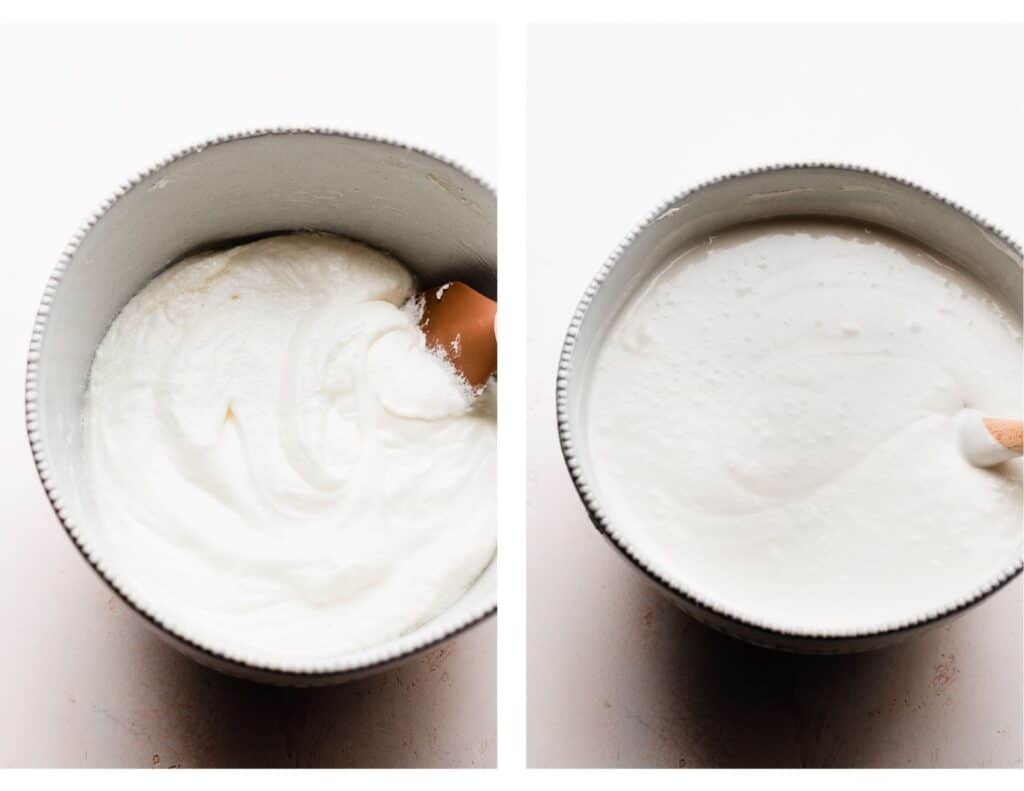
Step 3: Add the Dry Ingredients. Slowly add in the whisked flour mixture while the mixer runs on low. Then, slowly repeat this with the milk.
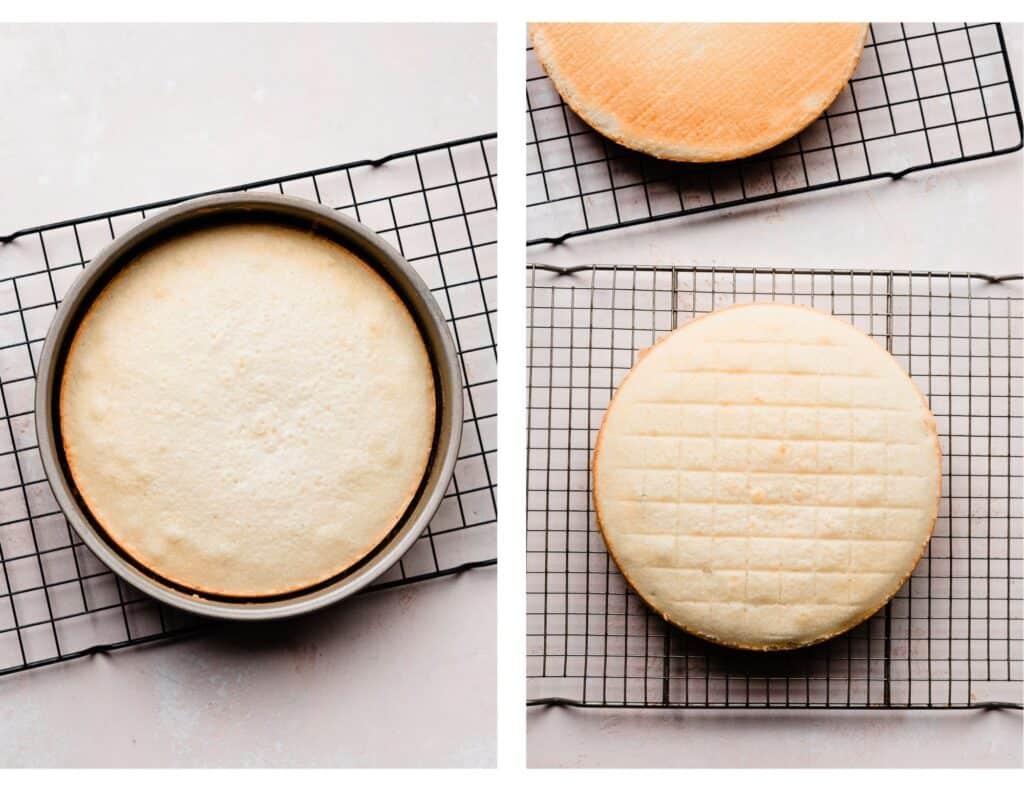
Step 4: Bake the Cake Layers. Divide the cake batter between your prepared pans. Bake your cakes just as directed in the recipe, and let cool completely on a wire rack.
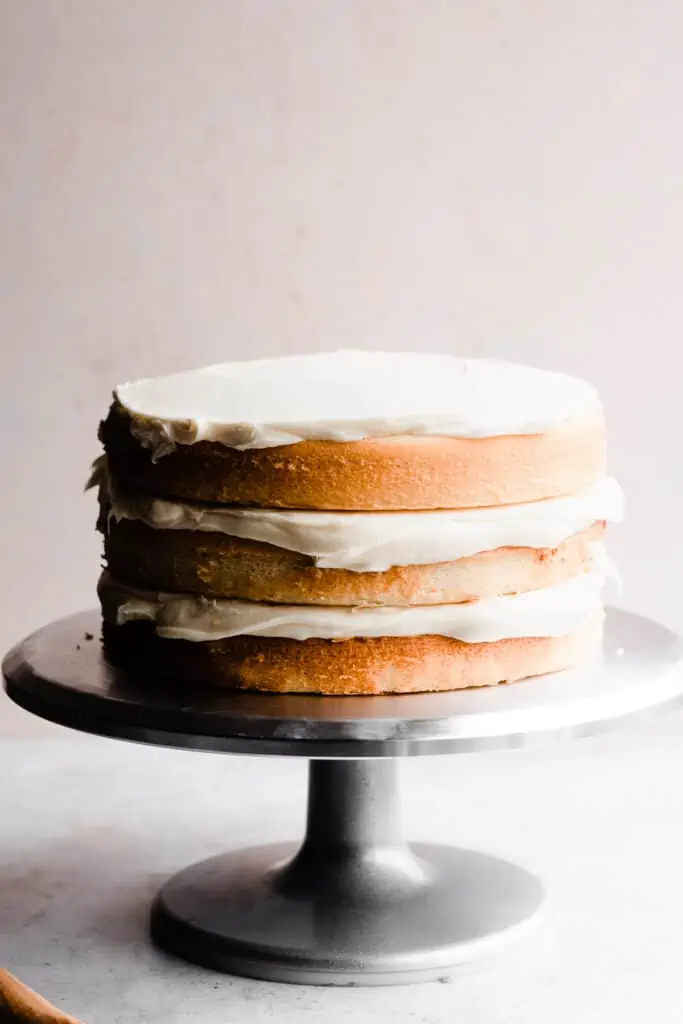
Step 5: Assemble the Cake. Frost your cake with a creamy vanilla frosting. Use 1 and 1/2 cups between each of the first two layers, and reserve the rest for the top and sides of the cake. Chill the cake for 30 minutes set the things before slicing and serving.
Cake Decorating Tips:
Making the Frosting – Be sure to cream the butter and cream cheese together for 3 full minutes like the recipe below says. This will give you the silkiest frosting. This is the real secret- no need to sift your powdered sugar!
Frosting the Cake – More tips on this are included in the recipe instructions below.
Adding Sprinkles – To add sprinkles around the bottom like I did here, just grab a handful, and gently press them around the base of the cake before the frosting is set.
Cake Storing Tips:
Once the cake is frosted just how you like it, pop it in the fridge, uncovered, to chill. After about 30 minutes to an hour or so, the frosting will feel set. At this point, you can easily cover it in plastic wrap without disturbing the frosting.
Expert Success Tips:
Read through the Recipe – Baking a white cake from scratch isn’t difficult – just be sure to read the recipe before you begin.
Follow the Recipe – Don’t expect the best results if you substitute a lot of ingredients. I haven’t tested the cake with every possible swap so I can’t guarantee the results. Do let me know if you try any subs, though!
Cold Ingredients – Be sure to let the cold ingredients all come to room temperature as indicated in the recipe. This is absolutely essential for the best texture and results.
Kitchen Scale – A food scale is the best way to make sure your flour is at the proper weight, since the amount you get will vary SO widely based on how you measure it, and the measuring cup you use, as they are not standardized.
Oven Thermometer – An oven thermometer will tell you if your oven is actually running at the temperature you set it to. Your oven may not be accurate. Accurate oven temperature is crucial for most bakes, so I leave an oven thermometer in at all times to keep an eye on my oven’s calibration.
FAQs:
Because of the volume of batter you’d end up with, I don’t recommend this as most home bakers don’t have the equipment to bake in such a large volume. I’d recommend making two batches of the cake if you want 6 layers. (That’s also a ton of cake – see yield tips below for ways to stretch the yield of one cake!)
Yes, this should work just fine. You can bake in a 9×9 square pan (avoid glass pans, they don’t bake as evenly as metal or ceramic) or in two 8 inch round cake pans.
If you cut traditional triangular slices, you’ll easily get 12-16 slices. If you use the method of cutting the cake into horizontal strips, and then cutting each of those into 3-4 slices, you’ll end up with many anywhere from 22-28 slices this way, or even slightly more if you cut the slices on the smaller size.
Special Tools:
Offset Spatula – Offset spatulas make frosting this delicious dessert so easy! They can also be used for spreading cake and brownie batters evenly in your pan.
Cake Turntable – If you make at least a few cakes a year, a cake turntable makes the frosting process a breeze!
Piping Bag & Piping Tip – I like to use a reusable piping bag and a Wilton 1A or 2A piping tip, but you can use a plastic bag with the corner snipped off in a pinch.
Make-Ahead Tips:
The cake layers can be made up to 24 hours ahead. Let them cool completely at room temperature, then place each layer on a large dinner plate and wrap tightly in plastic wrap. Keep at room temp until ready to assemble. I recommend making the frosting day-of, not ahead of time. The entire assembled cake can be chilled up to 24 hours in advance of serving. This cake is best within the first 3 days or so.
More Delicious Cake Recipes:

Cake & Cupcakes
perfect 8-inch vanilla cake with brown butter frosting

Cake & Cupcakes
chocolate raspberry cake

Cake & Cupcakes
layered lotus biscoff cake with cookie butter buttercream

Cake & Cupcakes
peanut butter chocolate cake
Did you make this recipe? Snap a photo and leave a comment!
Click the little stars in the header of the recipe card below to leave a comment & star rating, letting me know how you liked the recipe. I take all feedback seriously, & leaving a rating helps my small business immensely!

Perfect White Birthday Cake
Ingredients
For the Cake:
- 3 and 1/2 cup cake flour, spooned & leveled, 385 grams
- 1 tbsp baking powder
- 3/4 tsp baking soda
- 3/4 tsp salt
- 1/2 cup + 2 and 1/2 tbsp salted butter, softened at room temperature, 148 grams
- 1/2 cup vegetable oil, 116 mL
- 2 and 2/3 cup granulated sugar, 543 grams
- 7 large egg whites, at room temperature
- 1 and 1/2 tbsp vanilla extract, 22 grams
- 3/4 cup full fat sour cream, at room temperature, 180 grams
- 1 and 1/2 cups milk, at room temperature, I used 2% milk – 360mL
For the Frosting
- 2 cups salted butter, softened at room temperature, 452 grams
- 6 and 1/2 cups to 7 1/2 cups powdered sugar, 780 to 900 grams
- 2-3 tbsp heavy cream, or milk, 30 to 45 grams
- 2 tbsp vanilla extract, 30 grams
- pinch of salt
- 12 ounces full fat block-style cream cheese, softened at room temperature, Note that cream cheese doesn't need as much time to soften as butter does
Instructions
- Prep: Make sure all cold ingredients have come to room temperature. Preheat your oven to 350° F. Prepare three 9-inch cake pans. Use a paper towel to rub shortening all over the inside of each pan, coating them evenly and completely. Cut a round of parchment paper to fit inside each (tracing is the easiest way). Place this on top of the greased pan bottom, then grease over the parchment paper as well. Add a handful of flour, and tap the pan around to evenly coat the entire inside with flour, tapping out the excess.
- Make the Cake Batter: In a medium bowl, whisk together the dry ingredients – flour, baking powder, baking soda, and salt. In a large mixing bowl, cream the softened butter for about 30 seconds, until creamy. Add the vegetable oil and cream together with the butter for 1 minute. Add the sugar and beat on high speed for 2 full minutes. The mixture will be fluffy. Scrape the sides of the bowl down throughout, to ensure everything is combined. Add the egg whites, two at a time and then the last one on it's own, beating on medium speed between each addition, for 45 seconds. The mixture will be very fluffy. Add the sour cream and vanilla and mix on medium low speed until just combined.Add half of the dry ingredients with the mixer running on low speed. Add the milk with a few streaks of flour remaining, then when the milk is almost mixed in, add the remaining dry ingredients. When just a few streaks of flour remain, turn off the mixer and use a spatula to make sure everything is combined – don't over mix!3 and 1/2 cup cake flour, spooned & leveled, 1 tbsp baking powder, 3/4 tsp baking soda, 3/4 tsp salt, 1/2 cup + 2 and 1/2 tbsp salted butter, softened at room temperature, 1/2 cup vegetable oil, 2 and 2/3 cup granulated sugar, 7 large egg whites, at room temperature, 1 and 1/2 tbsp vanilla extract, 3/4 cup full fat sour cream, at room temperature, 1 and 1/2 cups milk, at room temperature
- Bake: Divide the cake batter evenly between the prepared pans. (You can eyeball this or use a kitchen scale to help with precision.)Bake the cakes, the first two pans together, and then the 3rd pan on its own after the first two are done. This will ensure the most even bake. Bake the cakes for 22-26 minutes. A toothpick inserted into the center will pull out moist crumbs and the cakes shouldn't jiggle in the center when you move the pan. Let cakes cool in the pans on cooling racks for 10 minutes. Then, invert onto cooling racks to cool completely before frosting and assembling.
- Make the Frosting: In a large mixing bowl, cream the softened butter until creamy, 30 seconds to 1 minute. Add the powdered sugar in 3 additions, mixing until smooth between each, adding heavy cream as needed to help it come together. Mix in the vanilla & a pinch of salt. Beat in the cream cheese last, on medium high speed, until completely smooth.2 cups salted butter, softened at room temperature, 6 and 1/2 cups to 7 1/2 cups powdered sugar, 2-3 tbsp heavy cream, 2 tbsp vanilla extract, pinch of salt, 12 ounces full fat block-style cream cheese, softened at room temperature
- Assemble & Frost the Cake: Place the first cake layer on a cake stand protected with wax paper strips, or a turntable. (A turntable is the easiest!) Use 1 and 1/2 cups of frosting to top the layer, spreading it evenly with an offset spatula. Repeat with the second layer. Add the final layer and give the cake a thin layer of frosting on top and on the sides. Use a cake scraper to smooth out and remove excess frosting. This is your crumb coat, so don't fret if it isn't perfect. Pop the cake in the fridge for 30 minutes or until the frosting is set. Then, use the remaining frosting to frost the cake, using the cake scraper to smooth the top and sides. Chill the entire cake in the fridge for 30 minutes, or until the frosting is set before covering it (with plastic wrap or a cake lid) or serving it. Tip: If your frosting is getting too soft at any point from sitting out, pop it back in the fridge for a bit to firm back up.
- Serve + Store: Serve the cake once it's chilled as directed above. Slice into as many slices as desired! Store leftovers, tightly covered, in the fridge for 2-3 days. The cake will naturally start to dry out a bit once it's been cut and put back in the fridge, so just be sure to seal and store it tightly.
- Make Ahead Tips: The cake layers can be made up to 24 hours in advance. Let cool completely then place each layer on a large dinner plate or a cookie sheet and plastic wrap tightly to seal. Store at room temp, then frost the next day. The assembled cake can be refrigerated for up to 1 day before slicing and serving.
Notes
Nutrition
Nutrition information is automatically calculated, so should only be used as an approximation.
This is my go to cake! I’ve made it with multiple different fillings and frosting and it’s always a huge fit with any crowd!!
So glad to hear this!! Thanks for taking the time to leave a review!
Amazing white cake. Perfect texture very moist everyone loved it!
So glad to hear you enjoyed this recipe, Kacie!
Another amazing recipe! Perfect the first time! Thank you !!!
Thanks so much, Stephanie!
I make a variety of cakes, but I had never attempted a white “Birthday” cake. After looking at several recipes, I chose this cake and frosting combination and it didn’t disappoint. This cake turned out Fantastic! The overall cake had a rich and buttery taste. As with great homemade cakes, it was somewhat involved to make. I made the three cakes ahead of time and froze my three layers for a few days. Makes it easier to frost. The best part of the cake was the frosting. It is not a traditional butter creme frosting because there is cream cheese. I followed the directions for the frosting exactly. I had never seen cream cheese added after the sugar was incorporated into the butter, but my frosting turned out so light and fluffy. The cream cheese stabilized the butter and gave this frosting a richer taste without the cream cheese over powering the butter creme. I would recommend using a scale to measure grams and make sure your butter and cream cheese are completely soft and room temp. Everyone loved the cake. My friend said it was the best birthday cake he had ever had.
Thanks so much for the detailed review, L Irby! I am so glad this cake was a hit. Happy baking!
Delicious cake and perfect for a birthday! I also used raspberry filling between the layers and it was just a perfect balance of flavors!
Thanks so much, Sue! Glad you enjoyed this cake.
I usually never leave reviews but this cake was worth a review. It is so moist and fluffy not dense at all!! It’s everything I wanted in a cake! It is perfect. I will definitely be making this cake again!! However it did take almost 30 mins to cook just fyi.
Thanks so much for your kind comment, Ella!
Made this today for a birthday party tomorrow and it is delicious! Haven’t made the icing yet but I bet it will be wonderful too. If I wanted to make this a base for a cookies and cream cake, could I just add crushed Oreos without having to change anything else?
Thanks so much Megan! Yes, I think you could add crushed oreos to the cake batter! Just fold them in gently with the dry ingredients. I’d recommend a cup or so of crushed oreos.
The cake is delicious. Have you ever made the cake for 50 people in rounds pans? If not do you have any recommendations on size of pans and how many recipes of the cake I will need. Thanks for your help.
Hi Holli! Sorry for the delay, I lost track of a few comments. I haven’t made the cake for 50 people. I don’t have any experience baking cakes in anything larger than a standard 8 or 9 inch pan, so I’m not going to be of much help this time. My only suggestion would be to double the recipe and bake it in two 9×13 pans and then stack those layers and cut smaller slices to yield 50 servings. Let me know if you end up trying any larger scale version!
My 10 year old daughter made this darling cake last week, as she is quite the junior baker! It truly was the most moist recipe we have ever come across! The frosting literally topped it off as one of the best tasting white cakes we’ve ever had! No ice cream needed to accompany this one!
Thanks SO much for the rave review, Molly! I’m so impressed by your daughter’s skills – and I’m glad you all enjoyed this cake so much! Happy baking. 🙂