This post contains affiliate links. Please see our disclosure policy.
This No Bake Black Forest Pie is made with a chocolate crust, a thick layer of rich chocolate mousse filling, a layer of boozy cherry sauce, and it’s all topped off with a mile-high pile of fresh whipped cream! This is a spectacular dessert – you’ll sure to fall in love with it!

Okay folks, this is my summer masterpiece! I mean, you can eat this any time of year (frozen cherries would work great in place of the fresh!), but it’s especially special enjoyed during these hot summer months. You know – no bake and all. This would also be a fabulous dessert for the holiday season!

Anyways – let’s walk through this recipe!
First, The Crust
The crust is a simple mixture of crushed oreos and melted butter – easy peasy! Press that into a 9-inch pie dish and pop it in the fridge to chill while you mix up the rest of the pie.

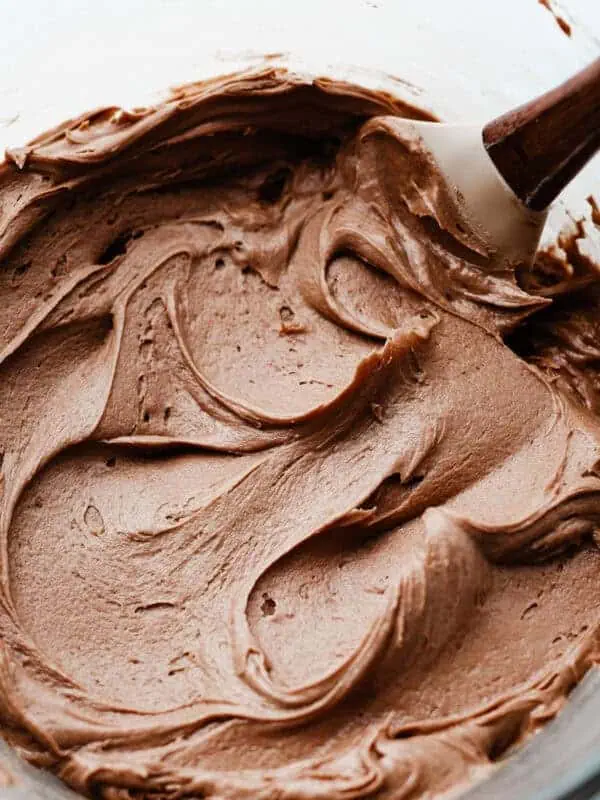
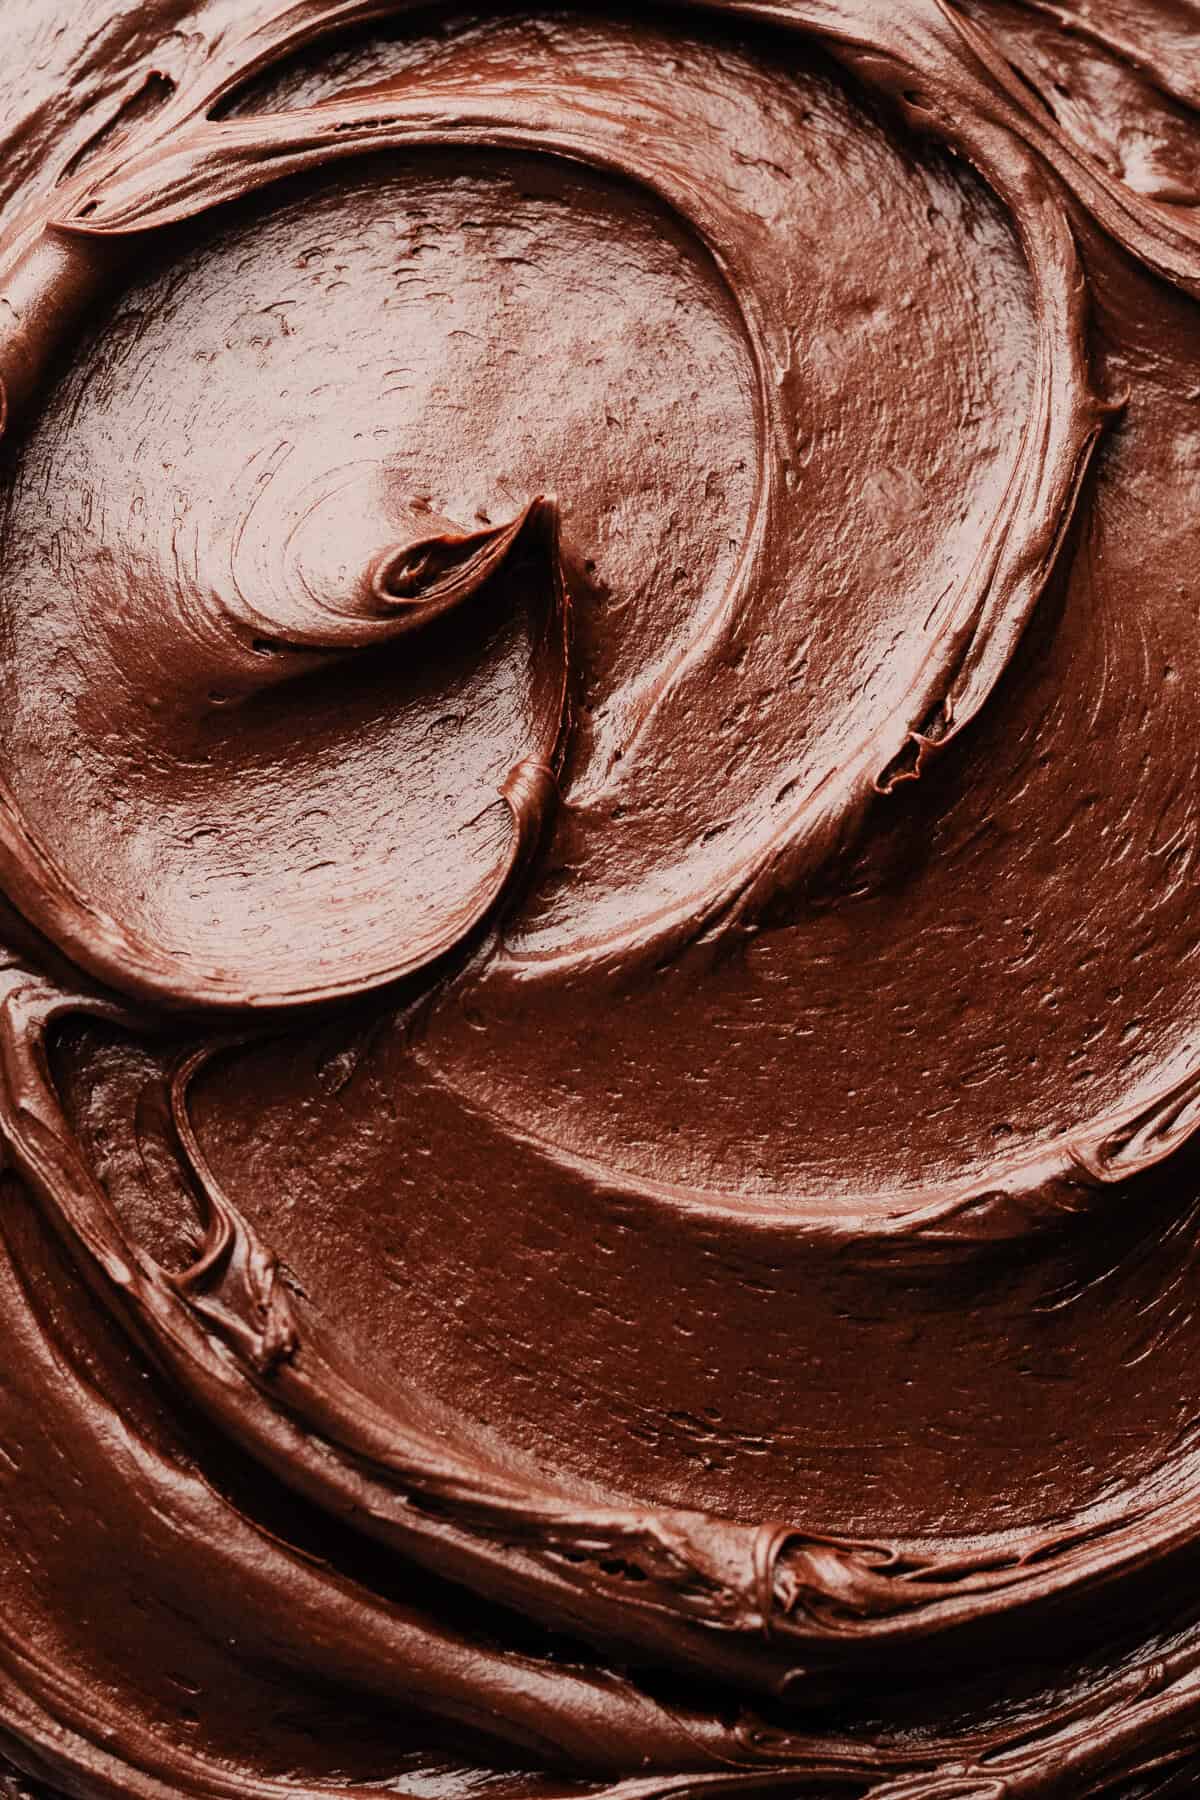
Next, the Chocolate Mousse Filling
The chocolate mousse filling is just chocolate ganache stirred into homemade whipped cream – easy enough, right? Here are my tips for making a perfectly silky filling every time!
- Chop the chocolate finely so that it all melts smoothly when you pour the hot heavy cream over it.
- Don’t let the ganache cool too much before stirring it into the whipped cream, or you’ll have to stir the mixture too much to incorporate it and the whipped cream will be over whipped
- Don’t over beat the whipped cream – stop just as soon as heavy peaks form!
Spread this into your crust, and pop it back in the fridge to chill while you make the cherry sauce!

The Boozy Cherry Sauce
This is possibly the best part of this whole glorious pie! This is a quick stovetop cherry sauce, spiked with Kirsch – the traditional Black Forest liquor. It goes well with so many things besides this pie, too! Spoon it over ice cream and keep some in the fridge for any cherry sauce emergencies. Heh.
Don’t pour this over the pie until just before you’re ready to serve it. The filled pie crust can be made a day ahead, as can this cherry sauce, and stored in the fridge.

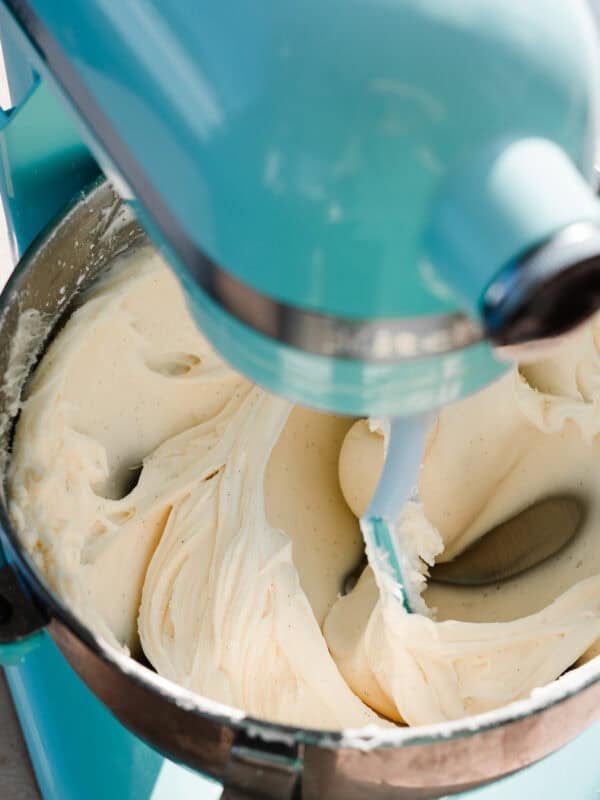
Finally, The Whipped Cream
Lastly, we’re making the mile high pile of whipped cream! The trick’s with homemade whipped cream are simple, but important.
- Use gelatin to stabilize your whipped cream – it’s a simple mixture of gelatin powder and water that you beat in while making the whipped cream. This will give it extra hold even if you are making it on a hot, humid day.
- Don’t over mix your whipped cream! Stop beating just as soon as the cream is thick enough to hold stiff peaks.
- Don’t make the whipped cream until you’re ready to serve the pie. It’s definitely not a make-ahead type of thing.

Assemble your pie! Spread on the cherry sauce and pile on the whipped cream when you’re ready to serve the pie! Take a bite, and know that this will be your go-to, show-stopper, no-bake dessert for the rest of time.

Happy baking, friends!
Did you make this recipe? Snap a photo and leave a comment!
Be sure to follow bluebowlrecipes on instagram and tag #bluebowlrecipes with your photo! You can also post a photo of your recipe to the bluebowlrecipes Facebook page. I’d love to see what you make!

No Bake Black Forest Pie
Ingredients
For the Crust
- 23 oreo cookies
- 3 and 1/2 TBSP salted butter, melted
For the Chocolate Filling
- 1/2 cup heavy cream, cold
- 6 ounces semi sweet chocolate, finely chopped, Use a good quality chocolate baking bar here, like Ghirardelli or Baker's
- 1 cup heavy cream, cold
- 1/2 tsp vanilla
- 2 TBSP powdered sugar
For the Boozy Cherry Sauce
- 2 cups fresh cherries, pitted, Can sub frozen - don't thaw them before cooking
- 3 tbsp water
- 1 and 1/2 tbsp corn starch
- 2 tbsp kirsch
- 3 tbsp granulated sugar
For the Whipped Cream
- 1 and 1/2 cups heavy cream, cold
- 1/4 cup + 2 TBSP powdered sugar
- 1 tbsp vanilla extract
For Topping
- fresh cherries
- chocolate shavings
Instructions
- Make the Crust: Finely crush the oreos using a food processor, and then stir in the melted butter. Press this mixture into a 9 inch pie plate and pop in the fridge while you make the filling.
- Make the Chocolate Filling: Add the finely chopped chocolate to a medium, heat-proof bowl. Heat 1/2 cup heavy cream in a small saucepan until just simmering. Pour over the chocolate, and let sit 5 minutes. Stir the mixture well until you have a creamy, smooth chocolate ganache. Set aside. Add the 1 cup of cold heavy cream to a large mixing bowl with the vanilla and powdered sugar. Beat on high speed just until stiff peaks form. Add the chocolate ganache and gently fold in until everything is incorporated and you have a smooth chocolate mousse. Spread this into the chilled crust. Chill in the fridge, covered, for at least 6 hours, or overnight.
- Make the Boozy Cherry Sauce: Stir together the water and corn starch in a small bowl until the starch is fully dissolved. Add this to a medium pot with the rest of the cherry sauce ingredients. Bring the mixture to a simmer over medium high heat, stirring constantly. Once it reaches a gentle simmer, cook for 2 minutes, stirring the whole time. The sauce will have thickened enough that you can drag a wooden spoon through the pot and it will hold a "part" for a moment before it runs back together. Turn the heat off and add the sauce to a bowl and pop in the fridge to chill for at least 1 hour (or until cold).
- Make the Whipped Cream: When ready to serve the pie, make the whipped cream. Beat all whipped cream ingredients in a large bowl with electric mixer on high speed. Stop just as soon as stiff peaks form - don't over mix the whipped cream! See note below if you want to stabilize your whipped cream - I usually do this.
- Serve + Store: Spread the cherry sauce over the filling just before serving the pie, and top with the freshly made whipped cream. Top with fresh cherries and chocolate shavings. Store leftovers, covered, in the fridge for 3-4 days. Yield: This makes 8 generous servings, or more if you want to cut smaller slices. You can definitely get away with smaller slices to stretch the yield since it is so rich.
- Make Ahead Tips: The pie crust filled with the chocolate filling can be made a day ahead and stored in the fridge, covered. The cherry sauce can be stored in the fridge for up to 3 days before using. Don't make the whipped cream ahead. Don't spread the cherry sauce over the filling until you're ready to serve the pie. Top with the whipped cream just before serving, as well.
hello! i’ll be making this for thanksgiving, i was wondering if there’s a substitute for the kirsch. i’ve looker everywhere but can’t find it. thank you!!
I think bourbon or brandy would work! Otherwise you could just sub water. Please let me know how you like this pie! Happy Thanksgiving!
I actually managed to find another cherry liquor and the cherry sauce was amazing!! The whole pie was so good and everyone loved it, thank you so much for the recipe and happy thanksgiving as well!
So glad to hear that it was a success!
Hi! Is it WHOLE Oreos, or just the uncreamed cookie half? Thanks!
Hi Beth! Use the whole oreos ☺️ please let me know how you like this recipe!
This was absolutely scrumptious!
Thanks, Mary! 🙂
My mousse and cherry topping are chilling in the fridge! I cannot wait to assemble this pie and gice it a taste after work!!!
I can’t wait to hear what you thought of the pie, Gracelynn! Happy baking.
I made this pie for Valentines’ Day. It was amazing. So rich and decadent. Can’t wait to make it again.
Thanks so much, Carolyn! Glad you loved this recipe. 🙂
Family loooved this pie. I loved learning to make mouse and sauces. Delish!
Glad you loved it!! ?