This post contains affiliate links. Please see our disclosure policy.
Fall Harvest Charcuterie Board is filled with all the bounty of autumn! I’ll show you exactly what types of cheese, crackers, meats, and extras to buy for your cheeseboard and how to assemble the whole thing so it’s the effortless star of the show for all your fall gatherings and holidays!

If you haven’t made a charcuterie or cheese board before, first let me tell you that it’s super easy! I’ll break down each category (cheese, crackers, etc.) to ensure you cover a variety of flavors + textures. The whole thing screams fall. Let’s dive in!
Table of Contents
- Why you’ll love this Fall Charcuterie Board:
- How to Assemble the Ultimate Fall Charcuterie Board:
- Ingredient Substitutions:
- How to Make a fabulous Charcuterie Board Step-by-Step:
- Step 1: Picking Your Cheeses.
- Expert Success Tips:
- Recipe Variations:
- Serving + Storing this Recipe:
- A Note About Yield:
- More Fall Recipes to Love:
- Fall Charcuterie Board Recipe
Why you’ll love this Fall Charcuterie Board:
- Celebration Worthy – A fall cheese board like this is stunning, and full of fall flavors, making it the perfect appetizer to bring to any occasion!
- No Bake – The best part about this is that there’s absolutely no cooking or baking required whatsoever, but it’s still full of seasonal flavors.
- Customizable – Charcuterie boards are completely customizable to whatever dietary needs or preferences you have.

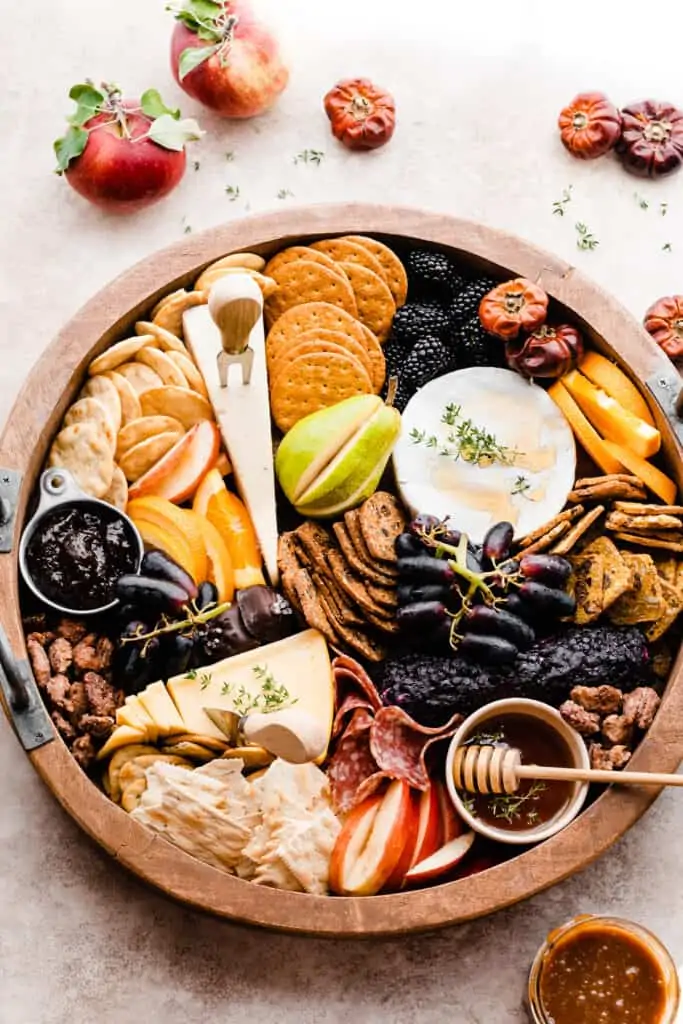
How to Assemble the Ultimate Fall Charcuterie Board:
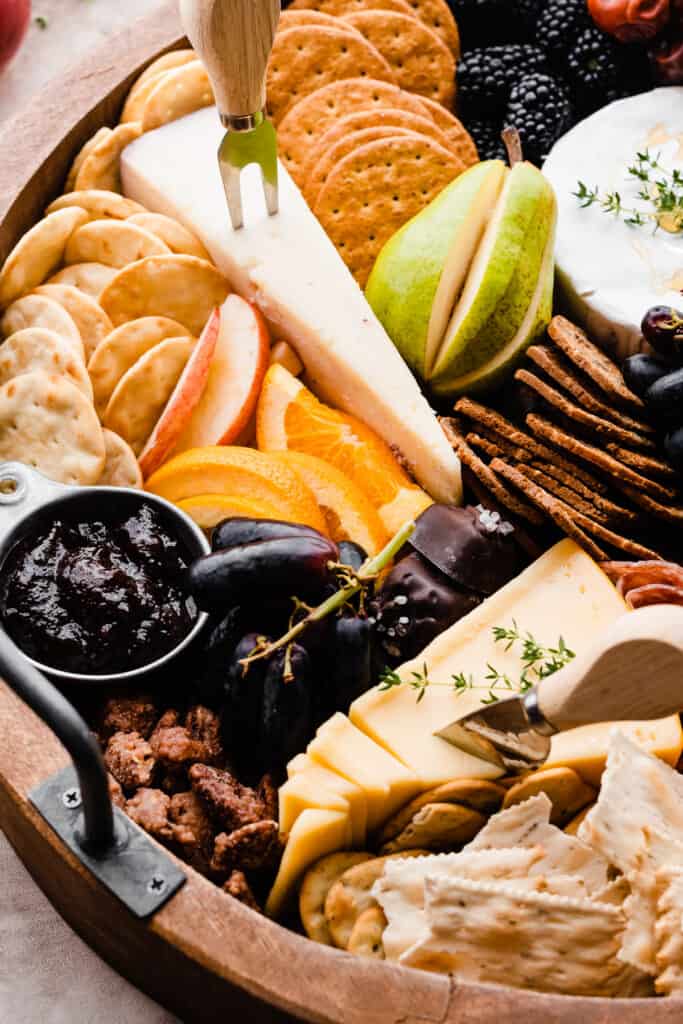
- Cheeses – Start with your cheeses – place them around the board with plenty of space in between. Keep the soft cheeses whole, and slice some of the hard cheese. Stick some cheese knives in at the end for easy serving!
- Meats – Add your meats in next.
- Fresh Fruit – Add your fruits in next.
- Crackers – Add your crackers in batches around the board.
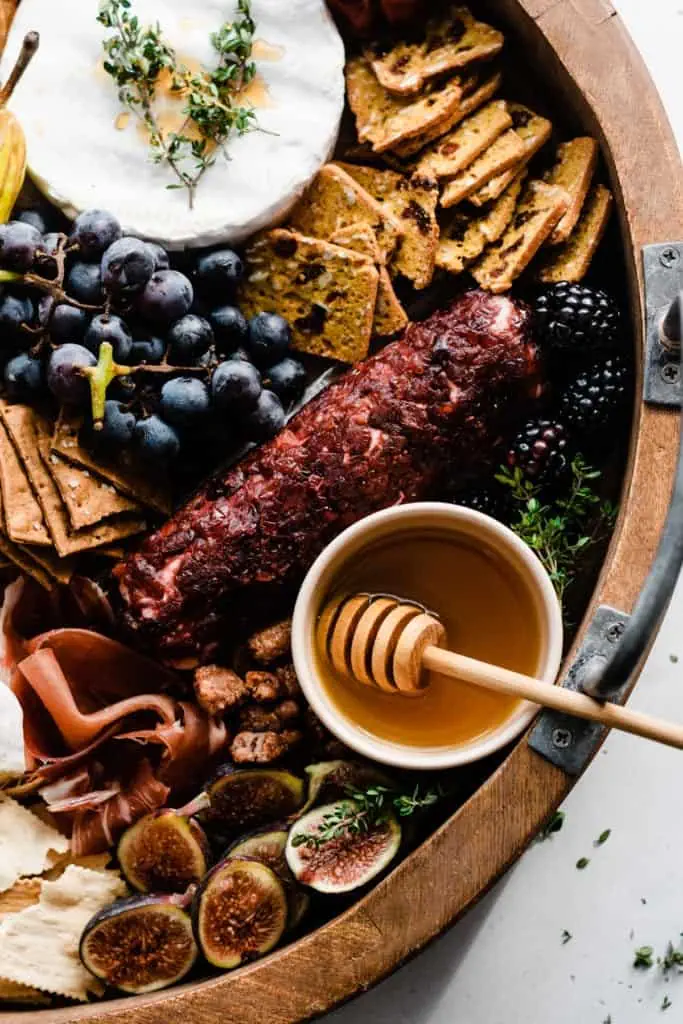
- Extras – Fill in any spaces you have left with your extras. Use small bowls for any jams or honey. Finish your board with a few fresh herbs for a fancy feel! I even added a few mini pumpkins for a festive flair.
Ingredient Substitutions:
- Dairy-free – Use your favorite dairy-free cheeses to keep this dairy free, or offer a dairy-free option on the side for any guests who need it.
- Gluten-free – Do the same thing as mentioned above with gluten-free crackers if needed.
- Fruits – Feel free to use whatever fruits you prefer, or are in season.
How to Make a fabulous Charcuterie Board Step-by-Step:
Step 1: Picking Your Cheeses.
Use a mix of flavors + textures! Here are a few great options for your fall board:
- Fromage – A soft, creamy, spreadable cheese (Trader Joe’s has an amazing one!).
- Brie – Another soft cheese – the one above is from Aldi and it’s amazing and only $3!
- Sharp Cheddar – simple and classic! A safe choice that most people will enjoy.
- Smoked Cheddar – Something with a little more punch of flavor, but still on the safe side for the less adventurous
- Flavored Goat Cheese Log – A little more unique and adventurous! I used a Cranberry one from Trader Joe’s this time.
- Toscano – This is a seasonal cheese from Trader Joe’s and it’s sort of like a white cheddar and parmesan mix – and it has a cinnamon rind which is so delicious and perfect for fall!
- Halloween Cheese – The four cheeses that look Halloween-ish are special Halloween cheeses that I found at Aldi. Seasonal finds like that are so fun to incorporate!
So, I’ve got 2 soft cheeses, 3 pretty classic options, and 1-2 more adventurous options! This way, there’s bound to be something for everyone.

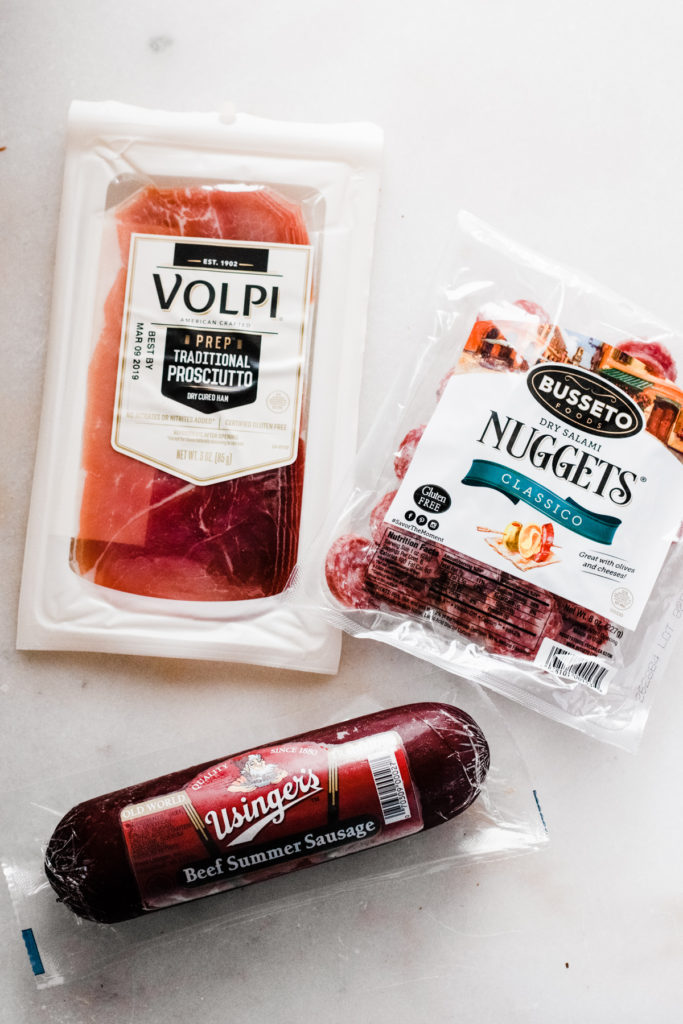
Step 2: Picking Your Meats
You’ll notice there’s very little meat on this cheese board – with a Fall Harvest theme I wanted to fit in as much fall produce as I could, so I only ended up putting Prosciutto on the board. Here are a variety of meats for you to use.
- Summer Sausage – If you’re from Wisconsin, you know that Usinger’s Summer Sausage is an absolute MUST for any sort of cheese plate. The Johnsonville one is good too, if you can’t find Usinger’s at your local grocery store.
- Dry Salami – A cheese board staple!
- Prosciutto – Another staple! I think there are different types but I just get a traditional, basic one from Trader Joe’s.
Step 3: Picking Your Crackers
I recommend getting 1 super plain cracker, and then picking something with a little cheese flavor, and something with an herb flavor, for a total of 3-4 options.
- Pita Bite Crackers – Super basic and they go with everything – plus they taste amazing.
- Rosemary Italian Style Crackers – these are a little bumped up in the flavor department
- Roasted Gorgonzola Crackers – A little cheesy, and very addictive!
- Pumpkin Cranberry Crisps – This is another seasonal find from Trader Joe’s and they’re amazing!
- Anna’s Ginger Snaps – A fun way to mix things up – this pairs well with fruits, jam, and caramel.
- Garlic Naan Crackers – These are also from Trader Joe’s and we love their flavor. (Check out more of our Trader Joe’s faves!)

Step 4: Picking Your Fruits. Grab a few of your favorite things from this list of seasonal produce to fill in the cheese platter with. Fruit is delicious paired with cheese, and it adds a nice pop of color.
- Figs – These are a delicious and less common addition to your board.
- Grapes – Grapes are a must! Grab any variety – green, purple, or red grapes.
- Apples – Try sliced Rave or Honeycrisp apples for a crisp juicy option.
- Pears – Fresh pears pair so well (hah!) with a variety of cheeses.
- Oranges – Try orange slices for a kid friendly option.

Step 5: Picking Your Extras.
This is the fun category! Your extras can be anything – pumpkin seeds, nuts, chocolates, jams and garnishes! This is a great way to add a variety of textures to your appetizer board. Fill in the gaps in your board with these items, after you’ve added the main categories. I like adding some dark chocolates, candied pecans, and a fig spread or apple butter – it goes with everything! Be sure to add some small spoons for the spreads.

Expert Success Tips:
- Choosing a Board – Choose a sturdy wooden cutting board or a dedicated cheese board. I have a slate board from World Market that I love (you can see it in action in this wintery cheese board) and for this board, I used a wooden round board that I found at Home Goods. Any large board or a variety of smaller wood boards will work.
- Make Ahead Tips – If you prep your cheese board ahead, make sure to keep the perishable items separate. You should not keep crackers or things like that in the fridge because they’ll get stale. Add those just before serving.
Recipe Variations:
- Customize It! – Use your fall favorites to customize this grazing board to make your best charcuterie board.

Serving + Storing this Recipe:
As mentioned above, you can assemble your charcuterie board up to a day ahead, but only with the meats, cheeses, and fruits. Cover tightly with plastic wrap and store in the fridge. Add the other items just before serving! Crackers will go stale in the fridge. I also recommend holding off on slicing apples and pears until close to serving so they don’t brown too much.
A Note About Yield:
It’s hard to estimate exactly how many people you can feed with a cheese board. The board I used (pictured here) is 12 x 18 and I think it has about 8-10 servings worth on it. Keep in mind that everything won’t fit on the board at once, and you can refill it as things are eaten up. If using a bigger board, or two boards, you can put more food out at once, with less refilling needed. Feel free to scale this epic charcuterie board down for a fun dinner during the fall season.

Here’s to many delicious charcuterie boards in your future! It’s the perfect time of year to enjoy all the bounty of fall in a snack board like this.
More Fall Recipes to Love:
- Apple Cider Donuts
- Pumpkin Streusel Muffins
- Pumpkin Cupcakes with Brown Butter Frosting
- Salted Caramel Apple Galette
- Maple Bacon Cupcakes
- Banana Cake with Maple Cream Cheese Frosting
Did you make this recipe? Snap a photo and leave a comment!
Be sure to follow bluebowlrecipes on instagram and tag #bluebowlrecipes with your photo! You can also post a photo of your recipe to the bluebowlrecipes Facebook page. I’d love to see what you make!

Fall Charcuterie Board
Ingredients
For the Cheese
- 1 block gouda, See above post for more suggestions
- 1 block cheddar, I love white cheddar!
- 1 log goat cheese, flavored ones are fun!
- 1 round brie
For the Crackers
- 1 box pita crackers
- 3-4 boxes of "fun" flavors or specialty crackers, See above post for suggestions
For the Meats
- 1 log salami, See above post for more suggestions
- 1 package prosciutto
For the Fruits
- 1 ripe pear, sliced, See above post for more suggestions
- 1-2 medium honeycrisp apples, sliced
- 1 bag grapes
- 1 small container fresh figs, sliced
For the Extras
- 1 container candied pecans, See above post for more suggestions
- 2 small bars of dark chocolate, chopped
For the Jams & Spreads:
- 1 jar fig jam, See above post for more suggestions
- 1 jar honey
Instructions
- Prep your Charcuterie Board: Start with your cheese. Slice some of the blocks fully, and some partially. Add a spreading knife to the brie. Add cheeses to the board, leaving space between. Then, add your crackers, and continue doing the same, filling in as you go, with the meats and sliced fruits/small bunches of grapes. Fill in any spaces you have left at the end with small bowls of jam and honey, and extras like nuts and chocolates. Serve and enjoy! Plan on refiling the board as your event or gathering progresses so it will yield lots of servings.
- Make-Ahead Tips: I don't recommend making this ahead as the crackers will go stale if kept in the fridge, and the fruit will start to brown. You could slice your cheeses a day ahead and store them in the fridge, and portion your crackers onto the board and cover it well.
Notes
Nutrition
Nutrition information is automatically calculated, so should only be used as an approximation.


Where did you get the amazing Board for your cheese board?! Love it!
Home goods! It’s so cute isn’t it?!