This post contains affiliate links. Please see our disclosure policy.
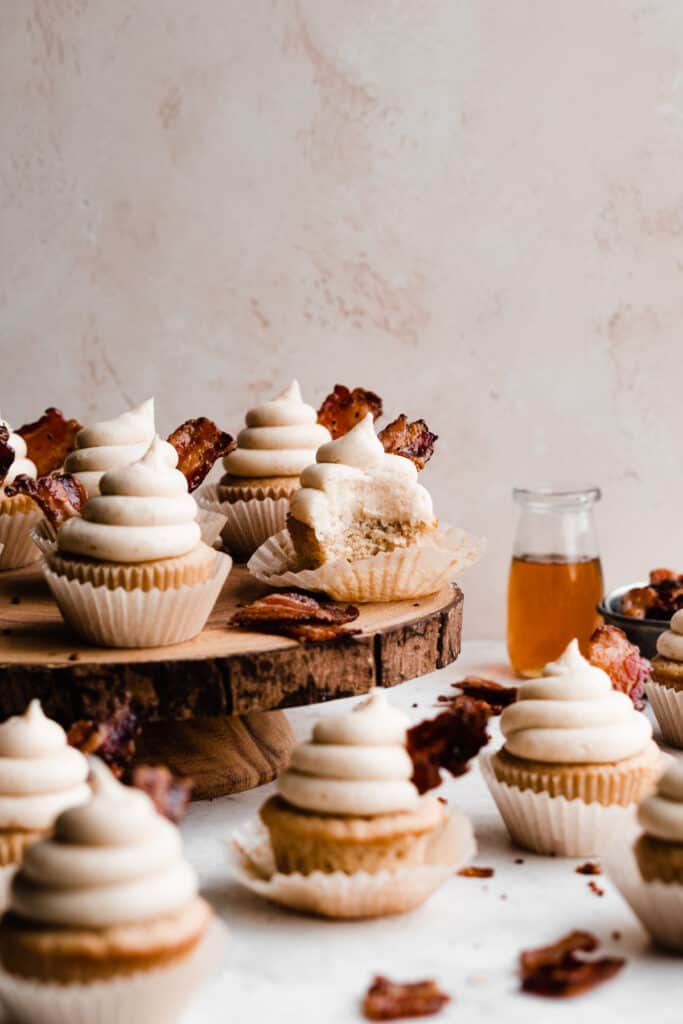
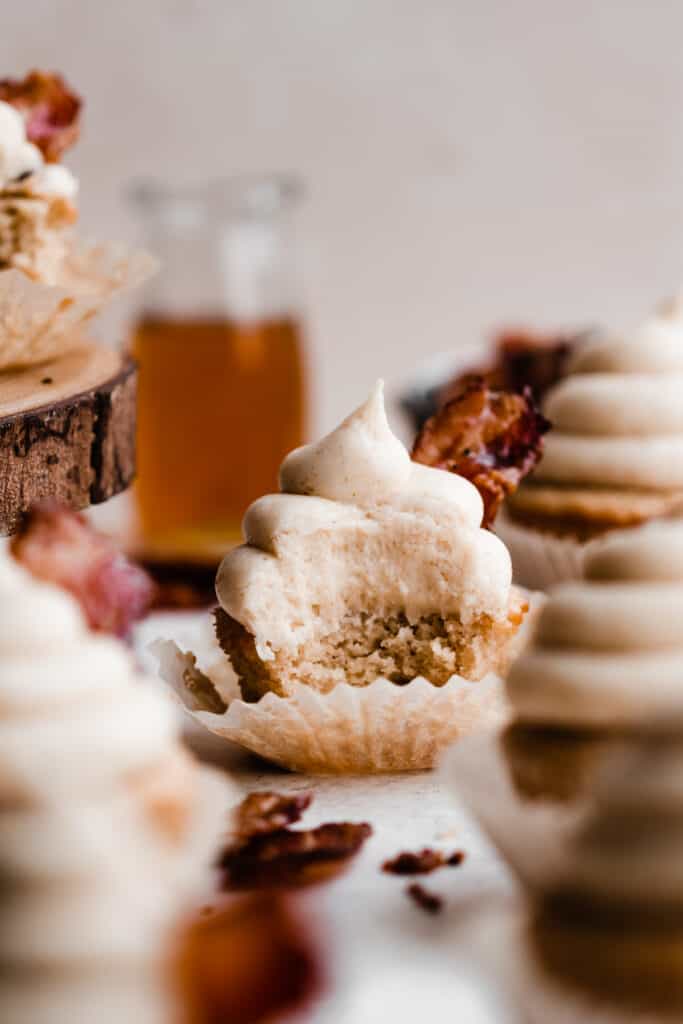
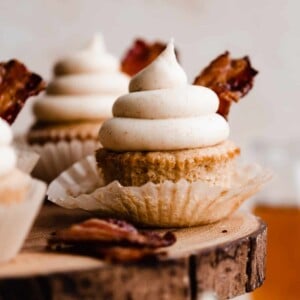
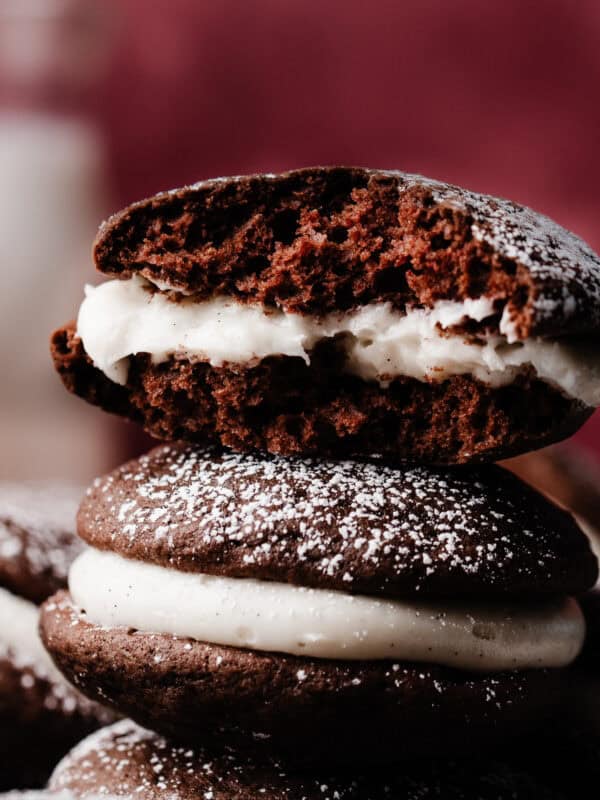
These fluffy and moist Maple Bacon Cupcakes are flavored with real maple syrup, topped with the silkiest brown butter cream cheese frosting, and are decorated with pieces of maple candied bacon. These cupcakes are always a hit at celebrations – they fly off the plate!

Table of Contents
- Why you’ll love these Maple Bacon Cupcakes:
- Ingredient Overview:
- Ingredient Substitutions:
- Time Saving Substitution:
- Special Tools:
- How to Make Maple Bacon Cupcakes Step-by-Step:
- Make-Ahead Tip:
- Serving + Storing:
- Can I freeze these cupcakes?
- Expert Baking Tips:
- FAQs:
- More Cupcake Recipes:
- Maple Bacon Cupcakes with Candied Bacon Recipe
Why you’ll love these Maple Bacon Cupcakes:
- Maple Cupcakes – These fluffy cupcakes are flavored with real maple syrup!
- Candied Bacon – The candied bacon tastes incredible and is the perfect salty sweet compliment to the maple cupcakes.
- Maple Buttercream Frosting – This maple frosting uses cream cheese, brown butter, and real maple syrup for an incredible amount of flavor!
One reader says: “The cupcakes were a hit at my housewarming party! They were just sweet enough and the frosting, which was probably the best I’ve ever tasted, was the perfect compliment. The candied bacon added just the right touch. And the brown butter really took everything up a notch.”
Ingredient Overview:
- Salted Butter – I always use salted butter for the best flavor, but feel free to use whichever you prefer.
- Bacon – Buy good quality bacon for this recipe, since it’s the star of the show.
- Cake Flour – Be sure to use cake flour rather than all-purpose flour here, as it keeps the cupcakes extra moist and light.
- Pure Maple Syrup – Please promise me you’ll use real maple syrup for this recipe! The other stuff just can’t compare. Once you taste real maple syrup, you’ll never go back.
- Sour Cream – Use full fat for the best result. Be sure to bring this to room temperature before baking.
Ingredient Substitutions:
- Sour Cream – You can use full-fat plain greek yogurt in place of sour cream.
- Bacon – Feel free to omit or use a vegan bacon if you need to keep this recipe vegetarian.
- Frosting – You can skip browning the butter in a pinch. The frosting will still be very delicious!
Time Saving Substitution:
Cake Mix – In a pinch, use your favorite cake mix for the cupcakes, then decorate with the homemade maple frosting and candied bacon.
Special Tools:
- Piping Bag – I like to use a reusable piping bag like this one.
- Piping Tip – I used a Wilton 2A tip, but you can also try an Ateco Open Star #849 piping tip for swirls.
- Cupcake Pan – You’ll need a standard size cupcake or muffin tin for this recipe.
How to Make Maple Bacon Cupcakes Step-by-Step:
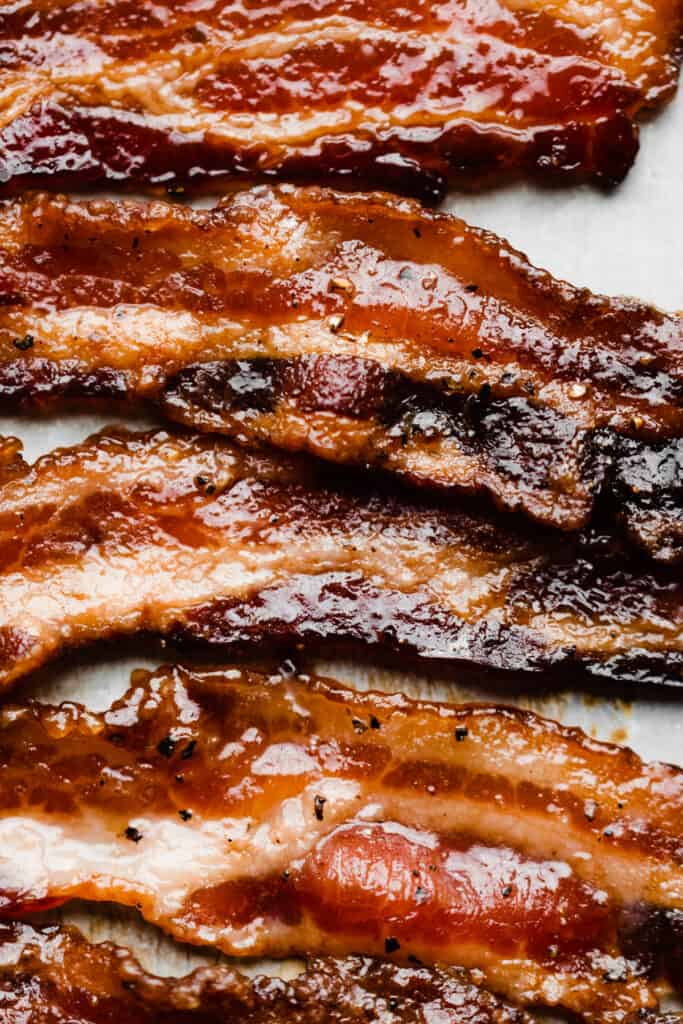
Step 1: Make the Candied Bacon. What is candied bacon? Candied bacon is bacon baked in a mixture of maple syrup, brown sugar, and a little bit of black pepper.
The outside of the bacon gets caramelized, so it’s nice and sweet with a crisp crunch. It’s incredibly easy to make & a must-try! Break it into large or small pieces to decorate your cupcakes.
Make-Ahead Tip:
The candied bacon can be made a day or two ahead and broken into pieces, and stored in an airtight container in the fridge.
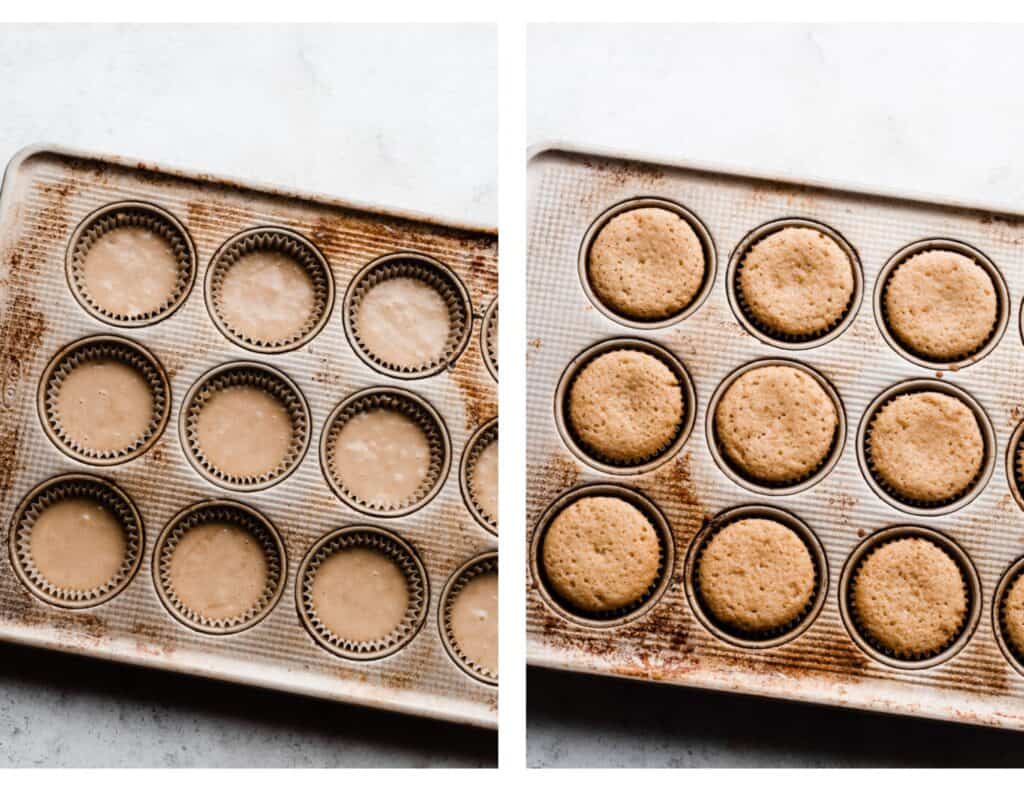
Step 2: Make the Maple Cupcakes. In a large bowl, cream together your butter and sugar. Add the wet ingredients next – the egg whites, vanilla, sour cream, and maple syrup.
Add the dry ingredients last, mixing until just combined. I’ve added just the right amount of maple so the cupcakes really do taste like maple, without being overly sweet.

Step 3: Fill the Cupcake Tins. Fill your cupcake liners about 2/3 full, and bake the cupcakes as directed in the recipe card below. Let them cool for a bit in the pan, then let them cool completely on a cooling rack before frosting them.
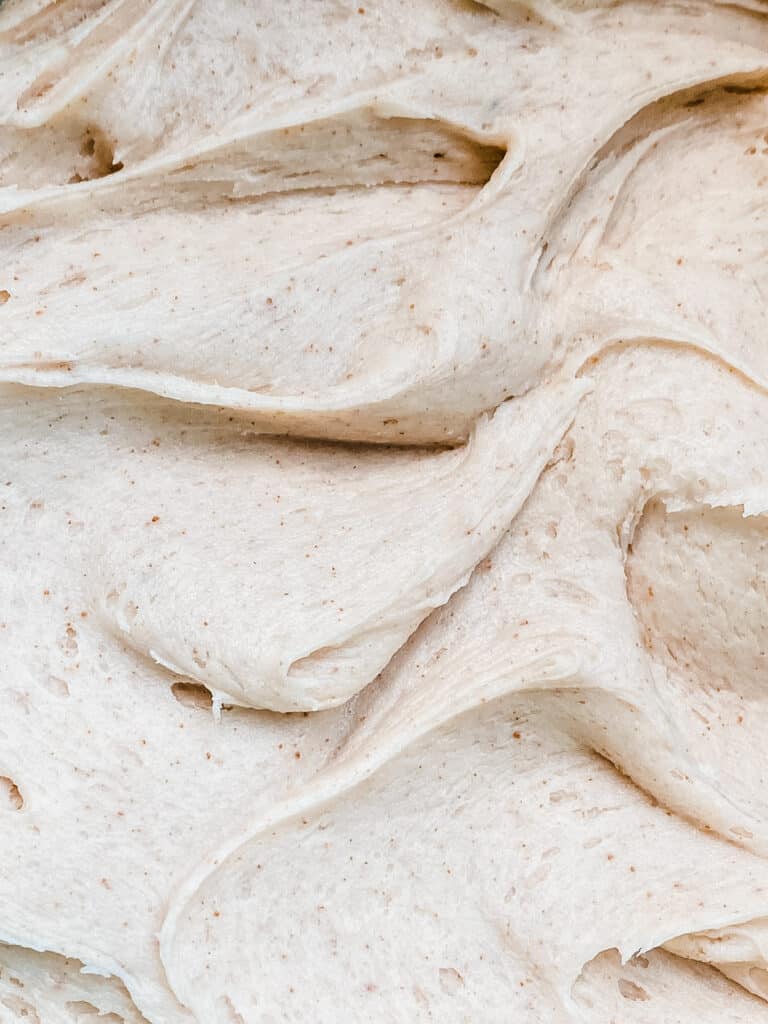
Step 4: Make the Brown Butter Frosting. This frosting is so dreamy and delicious – and it all starts by browning your butter. This is a simple step that takes just 5 minutes, and adds so much depth of flavor!
Chill your brown butter until it is back to softened butter consistency, then cream it with cream cheese, powdered sugar, maple syrup, & vanilla.
Step 5: Frost & Decorate your Cupcakes. You can do this a few different ways! Swoop the frosting on with a butter knife, or use a piping bag and tip.
This is actually a simple way to make your cupcakes look bakery worthy, and you’ll get more comfortable using a piping bag each time you try it. Once your cupcakes are frosted, add the candied bacon pieces on top.
Serving + Storing:
Cupcakes can be made a day ahead, cooled at room temperature, and stored in an airtight container for a day before frosting. Frosted cupcakes can be stored in an airtight container in the fridge for a few days.
Bring them out to room temperature before enjoying, as the frosting will solidify in the fridge. Love maple? Make my Maple Biscuits next!
Can I freeze these cupcakes?
Yes! You can freeze the room temperature cupcakes with or without frosting, for 4-6 weeks, in a freezer container. Thaw in the fridge overnight or at room temperature for a few hours.
Expert Baking Tips:
- Frosting – Be sure to bring the brown butter back to room temperature softened consistency so that the frosting doesn’t turn out runny.
- Room Temperature Ingredients – Don’t skip bringing the cold ingredients to room temperature, or the texture of your cupcakes won’t come out right.
- Oven Thermometer – An oven thermometer will tell you if your oven is actually running at the temperature you set it to. Your oven may not be accurate. Accurate oven temperature is crucial for most bakes, so I leave an oven thermometer in at all times to keep an eye on my oven’s calibration.
- Kitchen Scale – A food scale is the best way to make sure your flour is at the proper weight, since amounts will vary SO widely based on how you measure it, as well as the measuring cup you use, as they are not standardized.
FAQs:
Yes you can halve it! If doubling, I think it would be easier to make two separate batches.
I haven’t tried it, but you certainly can try! Divide the batter between two, 9-inch cake pans and bake for 12-22 minutes at 350 degrees F, until a toothpick inserted into the center pulls out moist crumbs.

More Cupcake Recipes:
Cake & Cupcakes
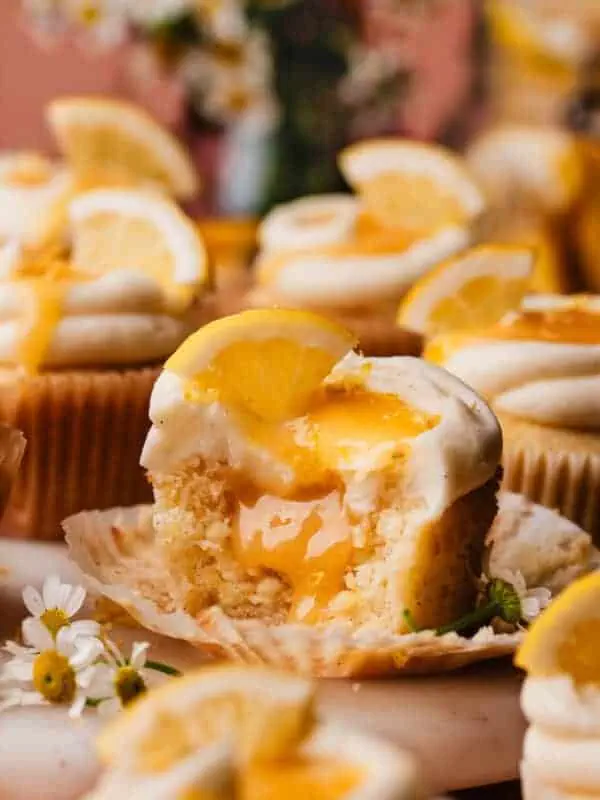
Triple Lemon Cupcakes

Cake & Cupcakes
the only chocolate cupcake recipe you’ll ever need
Cake & Cupcakes
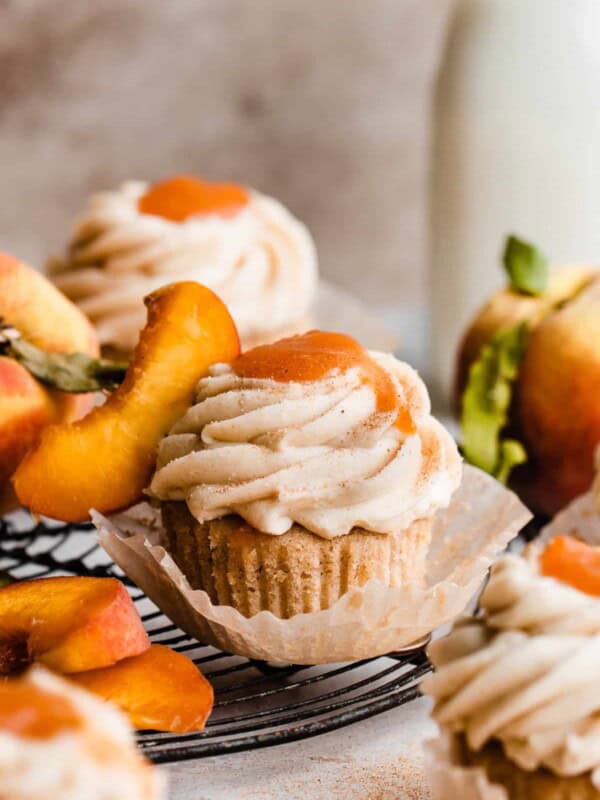
peach cupcakes with cinnamon cream cheese frosting
Did you make this recipe? Leave a comment & star rating!
Click the little stars in the header of the recipe card below to leave a comment & star rating, letting me know how you liked the recipe. I take all feedback seriously, & leaving a rating helps my small business immensely!
Maple Bacon Cupcakes with Candied Bacon
Ingredients
For the Candied Bacon
- 12 slices bacon
- 3 tbsp real maple syrup, 60 grams
- 3 tbsp brown sugar, 41 grams
- sprinkle of black pepper
For the Maple Cupcakes
- 1/2 cup salted butter, softened at room temperature, 113 grams
- 1 cup brown sugar packed, 220 grams
- 3 large egg whites, at room temperature
- 1 tsp vanilla extract
- 1/2 cup full fat sour cream, at room temp, 120 grams
- 3/4 cup real maple syrup, at room temperature, 240 grams
- 1 and 3/4 cups cake flour, spooned + leveled, 192 grams
- 1/2 tsp baking powder
- 1/4 tsp baking soda
- 1/4 tsp salt
For the Brown Butter Frosting
- 1 and 1/2 cups salted butter, softened at room temperature , 340 grams
- 8 ounces cream cheese, softened at room temperature, 226 grams
- 6 cups powdered sugar, 690
- 2 tbsp real maple syrup, 40 grams
- 2 tbsp heavy cream, 30 grams
- 2 tsp vanilla extract
- pinch of salt
Instructions
- Prep: Brown your butter ahead of time so that it has time to chill in the fridge. In a nonstick pot or pan over medium heat, melt the butter (3 sticks or 1 and 1/2 cups). Turn the heat to medium-low and continue cooking the butter – stirring constantly. The butter will get foamy, then turn golden, then start to turn brown and develop a nutty/caramely sort of aroma. Once it reaches a deep golden color, remove from the heat and pour into a container. Let it chill in the fridge so that it can come back to the consistency of room temperature softened butter. Make-Ahead Tip: The brown butter can be made up to a week ahead and stored in the fridge until ready to use.1/2 cup salted butter, softened at room temperature
- Make the Candied Bacon: Preheat the oven to 375° F. Line a baking sheet with foil and lay your bacon slices down on it. Pour the maple syrup over them, and sprinkle on the brown sugar and pepper. With clean hands, rub this around (coating just the side facing up) so it's evenly coating the bacon. Bake for 16-20 minutes, until crisp and candied. Lightly spray a clean plate or pan with nonstick spray (this will stick to a paper towel, parchment paper, etc.) and transfer the candied bacon to it to cool. Make-Ahead Tip: The candied bacon can be made a day or two ahead and broken into pieces, and stored in the fridge until ready to use.12 slices bacon, 3 tbsp real maple syrup, 3 tbsp brown sugar, sprinkle of black pepper
- Make the Maple Cupcakes: Reduce oven temperature to 350° F. In a large mixing bowl, beat the butter with an electric mixer on high speed until creamed, about 30 seconds. Add the brown sugar and beat on high speed for 2 minutes. Add 2 of the egg whites and mix on medium high for 45 seconds, then repeat with the last one. Add the vanilla and sour cream, mixing on medium low speed until just combined. Add the dry ingredients, and mix on low speed until a few streaks of flour remain. Pour in the maple syrup at that point, and keep mixing on low speed until it's just incorporated. Use a silicone spatula to gently fold in any remaining flour or maple syrup, taking care not to over mix.1 cup brown sugar packed, 3 large egg whites, at room temperature , 1 tsp vanilla extract, 1/2 cup full fat sour cream, at room temp, 3/4 cup real maple syrup, at room temperature, 1 and 3/4 cups cake flour, spooned + leveled, 1/2 tsp baking powder, 1/4 tsp baking soda, 1/4 tsp salt
- Bake: Line a cupcake tin with papers, and fill each about 2/3 full with batter. Bake for 14-18 minutes. The tops will be set when lightly touched and a toothpick inserted into the center will come out clean, or with moist crumbs – not wet batter. Let cupcakes cool in the pan a few minutes, then let cool completely on a cooling rack. Never frost warm cupcakes – the frosting will completely melt.
- Make the Brown Butter Maple Cream Cheese Frosting: Cream the browned butter and cream cheese together in a large mixing bowl until creamy. Ad the powdered sugar, 2 cups at a time, mixing between each addition. Add the maple syrup, heavy cream, vanilla, and salt, and mix until just combined. Frost your cupcakes with a butter knife, offset spatula, or piping bag and tip. See blog post for notes about the piping tip I used. Note: If your butter has been in the fridge long enough that it's completely re-solidified, you'll need to let it sit out to come to room temp, just like with regular sticks of butter. You can also speed this up gently in the microwave – pop the solid brown butter out of your tupperware and into a large mixing bowl. Microwave 6-8 seconds on each side, just until softened. Note: I went fairly heavy with the frosting because I wanted big swirls on each cupcake. If you like less frosting, you can cut the quantity down to 50-75% of the original amount.1 and 1/2 cups salted butter, softened at room temperature , 8 ounces cream cheese, softened at room temperature, 6 cups powdered sugar, 2 tbsp real maple syrup, 2 tbsp heavy cream, 2 tsp vanilla extract, pinch of salt
- Serve + Store: Break the cooled candied bacon into smaller pieces or crush into bacon bits , and top each cupcake with a few pieces. Enjoy immediately! Store leftover cupcakes in an airtight container in the fridge for 4-5 days. Let sit out at room temp for a bit before serving.
Nutrition
Nutrition information is automatically calculated, so should only be used as an approximation.
Hello, I was just wondering if the recipe has been updated since the comment about the cupcakes not rising right? I’m trying the recipe this weekend and I don’t want anything to go wrong! Thank you.
Hi Suzette! Yes it has. 🙂 Let me know how you like the recipe!
Hello,
These cupcakes sound amazing. However, I don’t see the suggested oil and amount of oil to use in the recipe. Does this recipe require oil? If so, what type and how much?
Kind Regards,
Lili
Hi Lili! The recipe doesn’t use oil – I recommend sticking to the recipe card vs. what people have said in the comments – that’s always the most updated version of the recipe with any tweaks incorporated there.
Delicious cupcakes! Unfortunately I witnessed my cupcakes bubble, rise and cave while baking. I am guessing the instructions to mix the brown sugar in for 2 minutes is too long. But I’ll try it again, mixing it for less time and test my theory. Thank you for sharing the recipe!
Hi Liz! I temporarily changed this recipe because I wanted all my cupcake recipes to have the same base – this was a mistake as my “base” recipe did not work with the maple syrup. I’ve since changed the recipe back to the correct version and that should not happen again. So sorry about that! Happy baking.
Hi! The icing is amazing!!!! However, SOS on the cupcakes… what did I do wrong?? The comments below are really having me second guess my abilities lol. Mine over flowed even though I did 2/3 full with batter, and then sunk like crazy, and then proceeded to stick to the cupcake pan and are completely stuck…I wish I could attach a picture for a good laugh. What did I do??
Hi Melanie! Oh my goodness, I am so sorry. That is completely my fault! I changed the cupcake recipe to try and standardize it with my other cupcake and cake base recipes, and I just tested it out again after seeing your comment and I had the exact same thing happen. I’ve changed the cupcake recipe back to what it was prior. I never had any issues with it the way it was, it was just silly of me to change it because I thought the cupcake base needed to match my other cupcake base recipes. I hope you will give these a try again! Again, I profusely apologize for this! Happy baking. 🙂
I am going to be making this today but I will need the correct recipe for this. Please and thank you so much for sharing your recipes. I’m so excited I finally found the perfect recipe that I have been looking for.
Hi Linda! The current recipe card is the correct recipe. Let me know how you like the recipe!
Hello! I tried making these cupcakes yesterday and the batter smelled so yummy , but I didn’t see in the instructions where to add in the vegetable oil it says to use in the recipe?
Hi Reanna! So sorry about that – it gets creamed with the butter. I just edited the recipe to fix that error. How did the cupcakes turn out for you?
I’ve made these cupcakes and they were a big hit. Would this recipe work for a cake?
Hi Lisa! I believe so as this recipe is based off of my cake base recipe. If you double this recipe, you’ll have enough batter for 3, 9-inch cake rounds. If you keep it as is, you’ll have enough for two 8-inch cake rounds, or one 9-inch square, which can be sliced in half through the center to make a two layer square cake. Please let me know what you end up making & how you like it! 🙂
I was wondering when is the oil added in the recipe do you mix it with the butter?
Hi Tamis! Yes, beat it with the butter for 1 minute. Let me know how you like these cupcakes!
Such good cupcakes! My kids and husband loved them. The brown butter frosting is a game changer!
Thanks so much, Melinda! 🙂
This looks amazing! Could full eggs be used or the yolks absolutely need to be left out? I hate to waste the yolks!
Hi Lynda! So, you can substitute 1 whole egg for two egg whites, so you’d need to use 1 and 1/2 eggs. Otherwise you can freeze the leftover yolks (here’s a helpful article – https://www.thespruceeats.com/how-to-freeze-leftover-egg-yolks-1135962) or use them up in something like my lime curd – found in my Mojito Cake recipe – https://bluebowlrecipes.com/mojito-cake/
Hope that helps! Let me know how you like the cupcakes. 🙂
Amazing recipe, loved the brown butter, total hit!
Glad to hear that, Lynda! 🙂
Hi there! I’m having a hard time finding cake flour locally. I usually use King Arthur all purpose. Would that work?
If I did the box mix method instead, would I just sub the syrup for the water on the box? Thanks for any help!
Hi Marissa! I’d recommend using this cake flour substitute- remove 2 tbsp of flour from every 1 cup, and replace with 2 tbsp of corn starch. So for the 1 cup, do that, and for the 3/4 cup, remove 1.5 tbsp flour & replace with 1.5 tbsp corn starch. Hope that helps! Let me know how you like the cupcakes ☺️