This post contains affiliate links. Please see our disclosure policy.
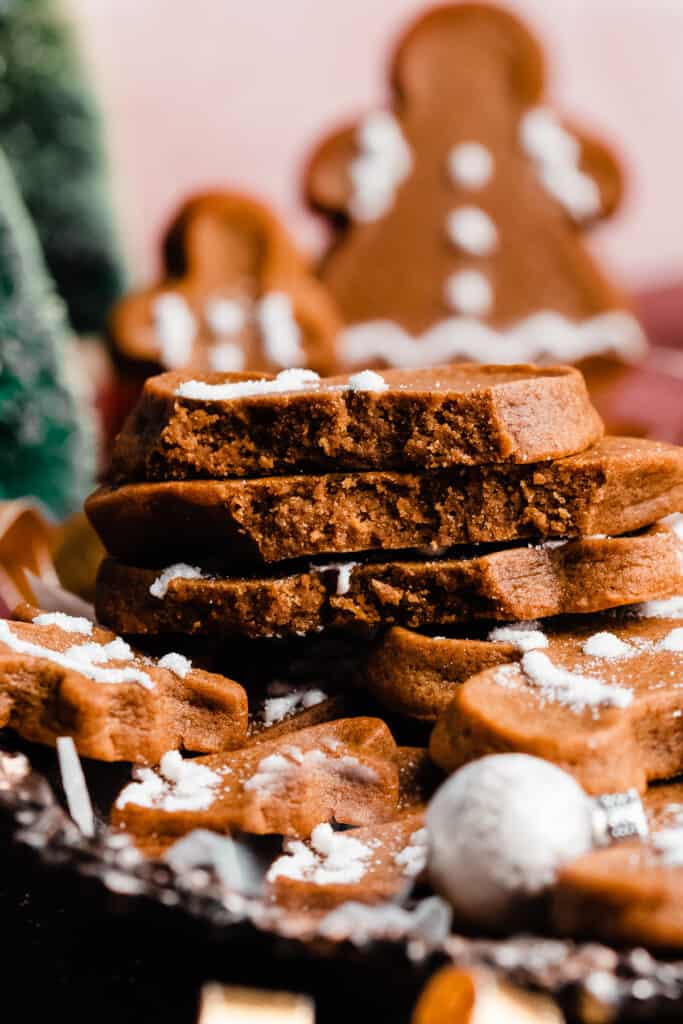
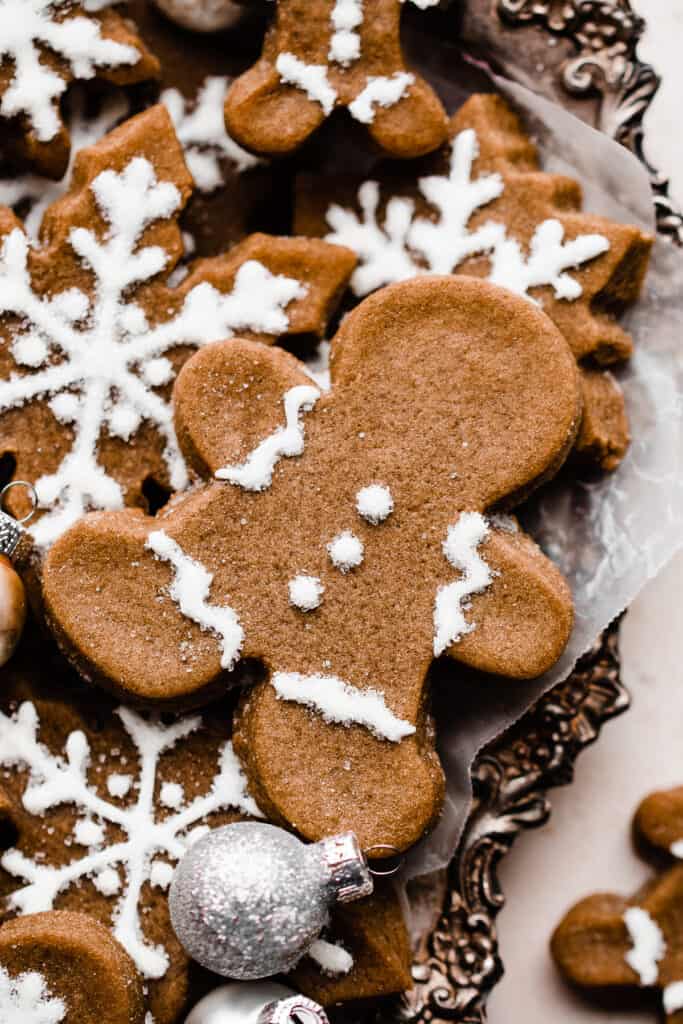
My Gingerbread Cookies are ultra thick, soft & chewy, deeply flavored, and easy to make! A simple trick makes rolling the dough a breeze, and these can easily be made vegan. Decorate with a dusting of powdered sugar or a quick royal icing, and watch them fly off the platter anywhere you take them. This truly is the WORLD’S BEST gingerbread cookie recipe – and I’ve tried them all, as a true gingerbread connoisseur.

These gingerbread cookies are easy to make – I’ve included tips and tricks for making the cutout cookie process much easier, along with lots of make-ahead tips. These festive, chewy cookies are the perfect thing to make for cookie exchanges or cookie decorating parties!
Why you’ll love these Gingerbread Cookies:
- Soft Cookies – No hard cookies here! These gingerbread are perfectly soft-baked, and are nice and thick, with a chewy texture.
- Gingerbread Flavor – These gingerbread cookies are packed with classic gingerbread flavor and warm spice flavor.
- Decorating Options – These cookies are fabulous plain, but can also be dressed up a bit with powdered sugar, royal icing, or buttercream frosting.
Ingredient Overview:
As always, the full recipe with measurements & directions can be found in the recipe card at the bottom of this post. Use the table of contents (back at the top, below the first image, to navigate).
- Butter – I always use salted buter for the best flavor, but feel free to use unsalted butter if you prefer.
- Molasses – Find this in the baking aisle at your grocery store. Do NOT use blackstrap molasses! It’s not the same thing and will taste unpleasant. Do use full flavor molasses (the Brer Rabbit brand has mild flavor, full flavor, and blackstrap. I’ve made these cookies with every type and full flavor Brer Rabbit far surpasses any other variety from any other brand.) If you love Molasses, be sure to try my Chewy Molasses Cookies, too!
- All-purpose flour – Spoon & level your flour for best results. Scooping the measuring cup directly in will lead to too much flour. Or use a scale, and weigh 130 grams of all-purpose flour per cup.
Recipe Substitutions & Variations:
- Dairy-free – Swap the butter for your favorite dairy-free buter sticks.
- Vegan – This recipe is vegan with the swap above – there are no eggs!
- Recipe Variations:
- Glaze – If you want to use a glaze, use the plain glaze from my Pumpkin Muffins (feel free to swap the maple syrup for milk), or my Buttery Maple Glaze, and lightly dunk cooled cookies into the glaze (or drizzle it on!) for a quick and easy decorating option.
- Powdered sugar: For a very simple decoration, lightly dust the cookies with powdered sugar just before serving.
- Plain – You can also serve these plain if you prefer not to add any decorations – they’re incredibly delicious on their own.
- Cookie Cake – I turned this recipe into a delicious single-layer Gingerbread Cookie Cake that can be decorated with frosting, royal icing, or a dusting of powdered sugar!
How to Make Gingerbread Cookies:
Step 1: Make the Gingerbread Cookie Dough. Cream together the butter & sugar. Then, add your molasses and mix until well combined.
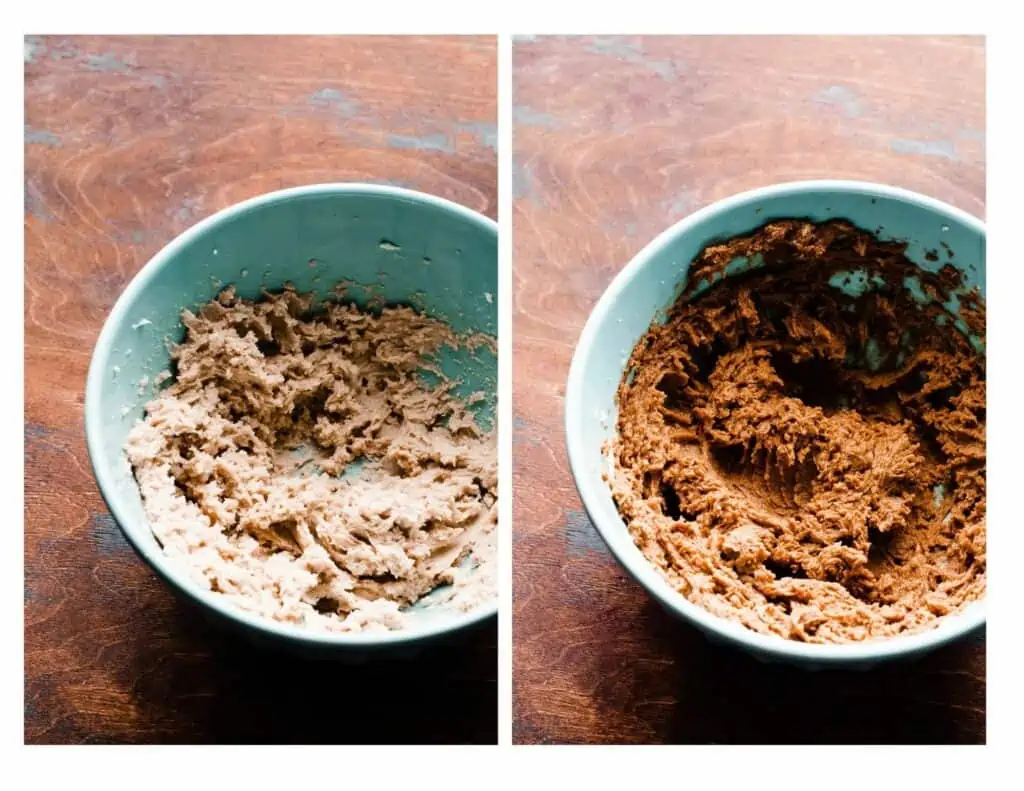
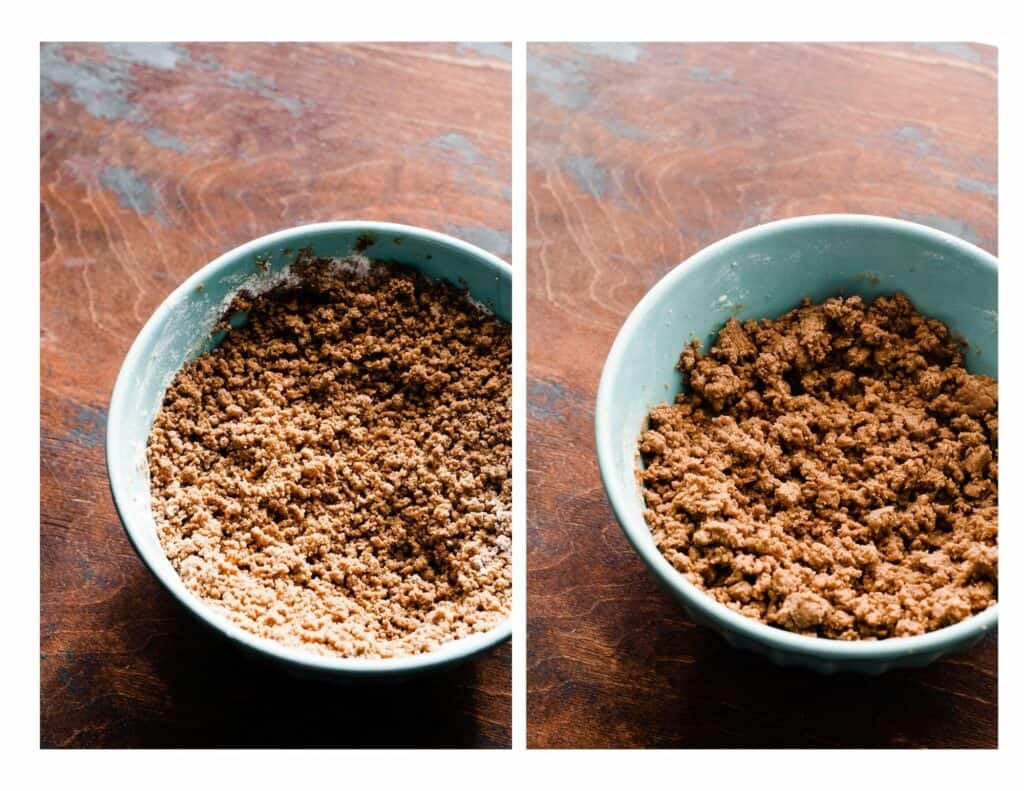
Mix in the dry ingredients until a semi soft dough forms. If it seems a bit dry, add 1-2 tsp of milk. (See photos below). If you measured your flour correctly, this shouldn’t be a problem.
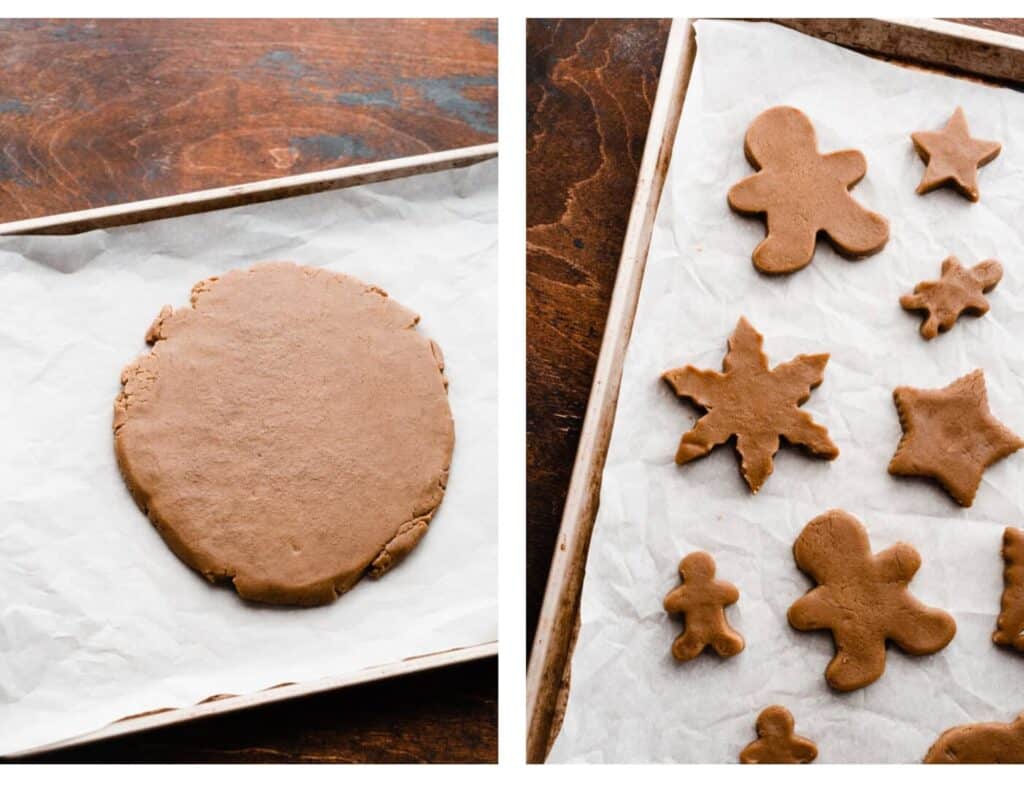
Step 2: Chill & Cut Shapes. Divide dough in half, and roll each ball of dough out between two sheets of parchment paper as soon as you’ve made it -no more trying to roll out rock-hard cookie dough!
Pop the rolled dough on a baking sheet to chill in the fridge or freezer, then cut out your shapes – make gingerbread people, trees, snowflakes, or stars!
Step 3: Bake the Cookies. Bake as directed in the recipe card below. Let cookies cool completely on a cooling rack before decorating. They’ll look a tad underdone on the tops when they come out of the oven, but set up as they cool.
Step 4: Decorate your Gingerbread. I’ve included directions and tips in the recipe card below for decorating your cookies. Use royal icing, a simple glaze, a dusting of powdered sugar, or leave them plain.
How to Make Royal Icing:
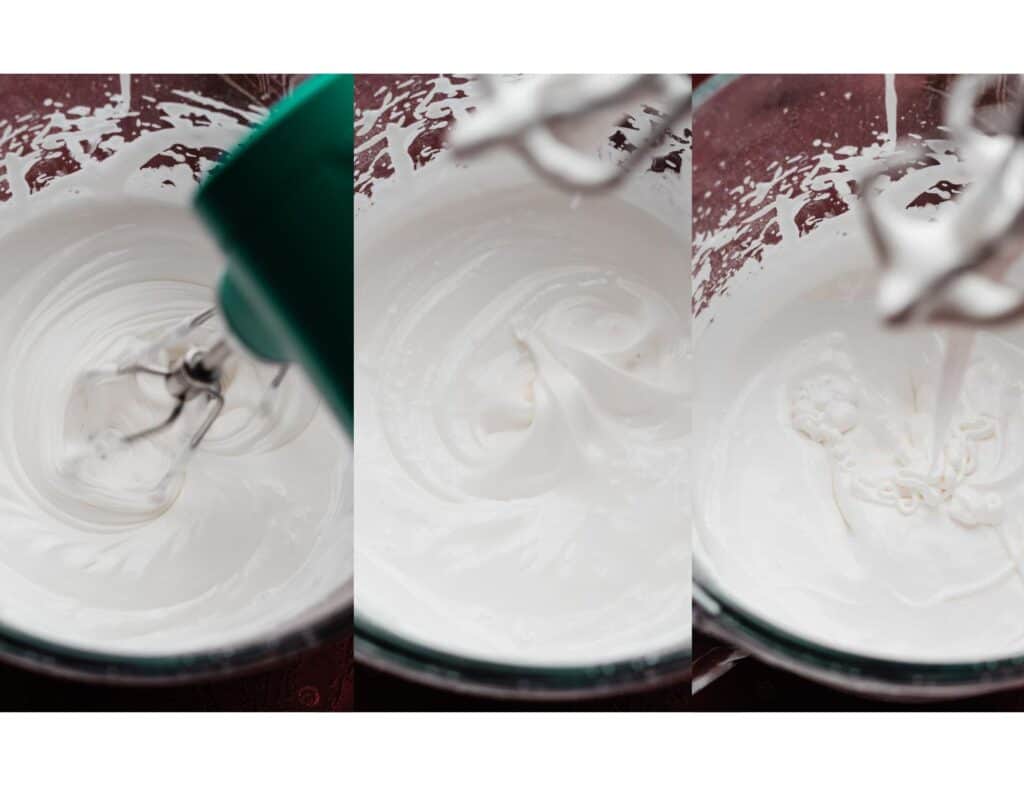
Royal icing is quite easy to make – it’s just powdered sugar, meringue powder (find this at craft or baking supply stores), and water. Beat these ingredients together in a large bowl until stiff – use the photos below as a guide.
When the icing is the right consistency, you should be able to drizzle some of it into the bowl, and watch it sit on the surface of the mixture for 5-10 seconds before melting back in. Adjust the thickness by adding more water to thin, or beating longer to thicken.
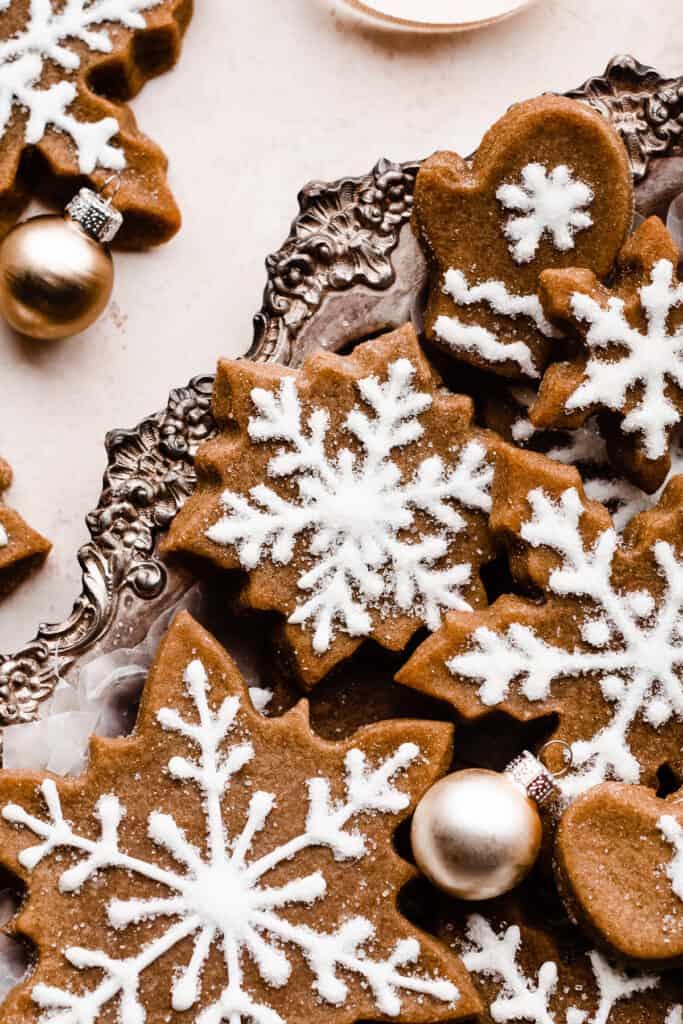
Pipe this onto your cookies using a very thin piping tip like a Wilton #1 or Wilton #2, and a pastry bag. The royal icing recipe can be found with the recipe below. Before the royal icing sets, I like to sprinkle on a little white sanding sugar for sparkle.
Expert Success Tips:
- Cookies that hold their shape – To ensure that the cookies turn out, and hold their shapes in the oven, the dough must be cold when it goes into the oven. Pop the cookie dough or cut out shapes back in the freezer to chill for 5-20 minutes (depending on how long they’ve been out) before baking if at any time they no longer feel nice and cold.
- Thick Cookies – Don’t skimp on cookie thickness! This recipe is at it’s absolute best when the dough is 3/8″ thick (or even 1/2″ thick – my preference!). This means the cookies are not only thick and chewy, but helps the cookies hold their shape, too.
- Oven Thermometer – An oven thermometer will tell you if your oven is actually running at the temperature you set it to. Your oven may not be accurate. Accurate oven temperature is crucial for most bakes, so I leave an oven thermometer in at all times to keep an eye on my oven’s calibration.
- Kitchen Scale – A food scale is the best way to make sure your flour is at the proper weight, since amounts will vary SO widely based on how you measure it, as well as the measuring cup you use, as they are not standardized.
FAQs:
Yes! The dough can be made, rolled out, and wrapped in plastic wrap and placed on a baking sheet. Store in the fridge for 1-2 days before baking. The cut out shapes can be frozen on a lined baking sheet in a single layer, then transferred to a freezer container, with parchment between layers, and frozen for 1-2 months. Bake the dough from frozen or thaw in the fridge overnight. The gingerbread cookies can be baked, cooled, and stored in an airtight container at room temp for up to 2 days before decorating.
Royal icing can be made and stored in the fridge in an airtight container, with plastic wrap over the surface, for 1-2 days before using, or leftovers can be stored in this same way and used for other decorating within 1-2 days. Simply re-mix for about 10-20 seconds with a mixer to loosen things back up after being in the fridge. The same guidelines from the recipe can be used to adjust the consistency.

Serving + Storing:
Store baked & cooled cookies in an airtight container at room temperature for 4-5 days. If they start to get a bit dry at the end, you can extend their life for a few more days by adding a piece of bread to the container. It helps keep them soft!
More Christmas Cookie Recipes:
- Peppermint Hot Chocolate Marshmallow Cookies
- Bakery-Style Peanut Butter Chip Chocolate Cookies
- Key Lime Slice & Bake Cookies
- Blueberry Lemon Cookies
- Peanut Butter & Jelly Thumbprint Cookies
- Funfetti Cake Batter Cookies
- Cherry Pie Cookies
Did you make this recipe? Leave a comment & star rating!
Click the little stars in the header of the recipe card below to leave a comment & star rating, letting me know how you liked the recipe. I take all feedback seriously, & leaving a rating helps my small business immensely!

Best Soft & Chewy Gingerbread Cookies
Ingredients
- 1 cup salted butter, softened at room temperature, 226 grams
- 1 cup dark brown sugar, packed, 220 grams (light brown sugar works too!)
- 1/2 cup molasses, 170 grams – do NOT use blackstrap, see notes below
- 3 cups all-purpose flour, spooned & leveled or weighed out , 390 grams
- 2 1/2 tsp ground ginger
- 1 1/2 tsp cinnamon
- pinch of nutmeg
- 1/2 tsp baking soda
- 1/2 tsp salt
Royal Icing
- 2 cups powdered sugar, 230 grams
- 1 and 1/2 tbsp meringue powder, See note below
- 4-6 tbsp water, 56 to 85 grams
Instructions
- Make the Cookie Dough: Beat butter in a large mixing bowl with an electric mixer on high speed until creamed. Add the brown sugar and mix until well creamed together, about 1 minute. Add the molasses and mix until combined. Add the dry ingredients, and mix until a dough forms. Add 1-2 tsp of milk if your dough is a bit crumbly (see photos above).1 cup salted butter, softened at room temperature, 1 cup dark brown sugar, packed, 1/2 cup molasses, 3 cups all-purpose flour, spooned & leveled or weighed out , 2 1/2 tsp ground ginger, 1 1/2 tsp cinnamon, pinch of nutmeg, 1/2 tsp baking soda, 1/2 tsp salt
- Roll and Chill: Divide the dough into two halves, and roll each one out to 3/8" thickness between sheets of parchment paper. (Use a ruler to check this, or just eyeball halfway between 1/4 and 1/2 inch. This is the perfect thickness for these cookies – trust! Even 1/2" is perfect – but don't go lower than 3/8") Place the rolled dough, still sandwiched in parchment paper, on a baking sheet and cover loosely with a clean kitchen towel. Chill for 1-2 hours in the fridge or shorter in the freezer, until completely chilled and firm.
- Cut out Cookies: Preheat your oven to 350° F. Line baking sheets with parchment paper or silicone baking mats. Cut shapes out of the chilled dough and place cookies a couple of inches apart on your prepared baking sheet. If the cookies are no longer firm and cold to the touch from working with the dough, pop the pan back in the fridge or freezer for 5 to 15 minutes to re-chill so that the cookies hold their shape when baked (it's fine to bake them from frozen).While the cookies are baking, combine your dough scraps, roll back out, and cut out more cookies. Repeat this until all remaining dough is gone! You will need to chill the dough for a bit again once you roll the scraps back out so that it's firm enough to cut the shapes easily. (Roll it back out between the parchment each time to keep things easy.)
- Bake: Bake cookies for 8-9 minutes. The cookies should appear just set, and will look a tad puffy. The centers may look a tad underdone. Don't be tempted to over bake them! They will set up to the perfect soft baked cookies. Let them cool on baking sheet for about 10 minutes before and transferring to a wire rack to finish cooling. Tip: Bake a single test cookie first if you’re worried you’ll underbake them – you’ll see that 8 minutes yields the perfect cookie! HOWEVER – the cookies may take a few additional minutes if your oven is running cold (check with an oven thermometer), or if you use a light-colored cookie sheet vs. a dark colored one. If you have other pans of cookies in the oven at the same time, this will also result in the cookies taking a little longer to bake.
- Decorate: Decorate by dipping the cooled cookies in this glaze (swap the maple syrup for milk, if desired), dusting them with powdered sugar, or piping them with royal icing.
- Make Royal Icing: Combine all ingredients in a large bowl, starting with 4 tablespoons of water, and mix on high speed with an electric mixer for about 1 and 1/2 minutes. When the icing is the right consistency, you should be able to drizzle some of it into the bowl, and watch it sit on the surface of the mixture for 5-10 seconds before melting back in. If it's too thick, add 1 tablespoon of water at a time. If it's too thin, beat it for another 30 seconds to a minute, or add a bit more powdered sugar, a little at a time, beating between each addition. Add the royal icing to a piping bag fitted with a wilton #1 tip (this is what I use to create the details on the cookies pictured). Pipe desired designs. Snowflakes are easy – you basically draw lines to connect the points, then make little Vs on each line. You can even use gel food coloring to tint the royal icing. While the icing is still wet, sprinkle on a little white sanding sugar for a pretty sparkle (optional, but that is what I use).2 cups powdered sugar, 1 and 1/2 tbsp meringue powder, 4-6 tbsp water
- Serve + Store: Enjoy cookies once decorated! Be sure to let the icing set completely before storing. Store cooled, set cookies in an airtight container at room temp for 4-6 days, or in the fridge for 6-8 (let cookies come to room temperature for a bit if they've been chilled before serving).
- Cookie Dough and Cookie Make-Ahead Tips: The dough can be made, rolled out, and covered well and stored in the fridge for 1-2 days before baking. The cookies can be baked, cooled, and stored in an airtight container at room temp for 1-2 days before decorating. Royal Icing Make-Ahead Tips: The royal icing can be made and stored in the fridge in an airtight container for 1-2 days before using, or leftovers can be stored in this same way and used for other decorating within 1-2 days. Simply re-mix for about 10-20 seconds with a mixer to loosen things back up after being in the fridge. The same guidelines from above can be used to adjust the icing's consistency.
Notes
Nutrition
Nutrition information is automatically calculated, so should only be used as an approximation.


Hello Stephanie! I’ve made many of your other recipes in the past, and they’ve all turned out amazing, so I’m excited to try this one out! I was just curious if you could also use this recipe for making the pieces of a gingerbread house or if you think it’s more suited for the standard cutout cookies. Thank you, and I appreciate the help! Happy Holidays!
Hi Valeria! Thanks so much for trusting my recipes! I’d love to hear what you’ve tried (please leave a review on the recipes, if you can – it’s SO helpful for my small business!). For a gingerbread house, I believe a few readers have used my recipe, BUT you will need to bake the gingerbread longer, so it becomes sturdy enough. If you bake them as the recipe directs, they will be soft and chewy but not good for construction. I don’t know the bake time off the top of my head but I’d bake a test piece first to see how long it takes for it to firm up. You can also roll the dough thinner in this case (I wouldn’t go thinner than 1/4” though) to help stretch the yield of the recipe and to reduce the bake time since they’ll crisp up faster in a thinner layer of dough. Hope that helps! Let me know how you like the recipe! Happy Holidays!
Hello, can you clarify the measurement for the meringue powder? It says 2 and 1 tablespoon…what amount is the 2? Tablespoons? So 3 tablespoons? Thanks for your help!
Hi Connie! I’m seeing a measurement of 1 and 1/2 tablespoons in the recipe card. So it’s 1.5 tablespoons, which is also equal to 4.5 teaspoons. Let me know how you like the recipe!
Thanks for the clarification! I’ll let you know how they come out!
These cookies are amazing!! Best gingerbread cookies ive had!
So glad to hear you enjoyed this recipe, Megan!