This post contains affiliate links. Please see our disclosure policy.
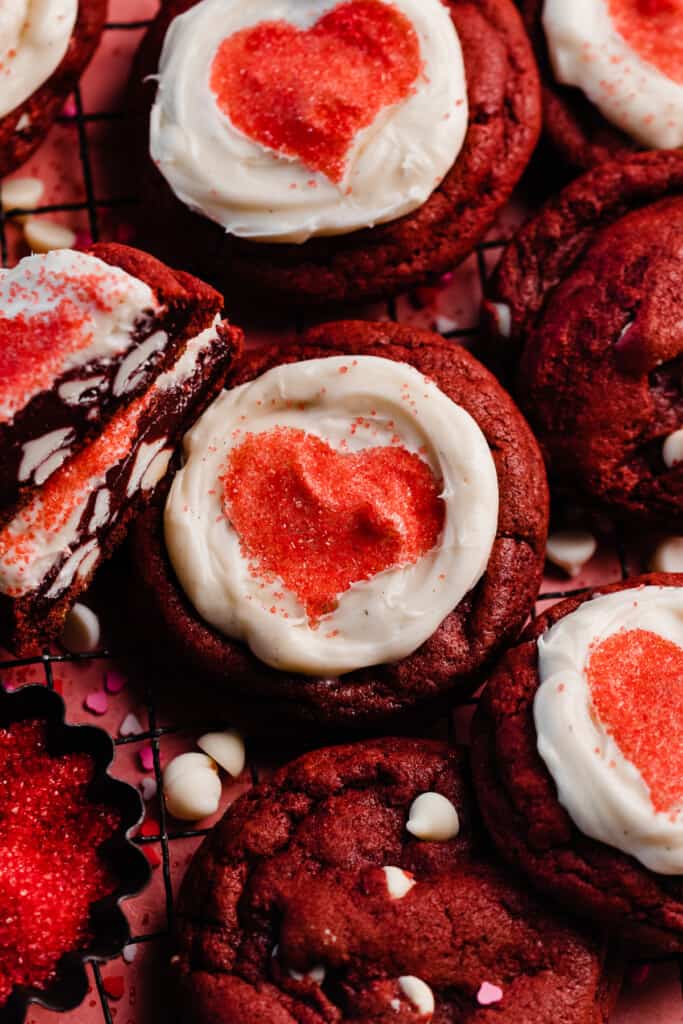
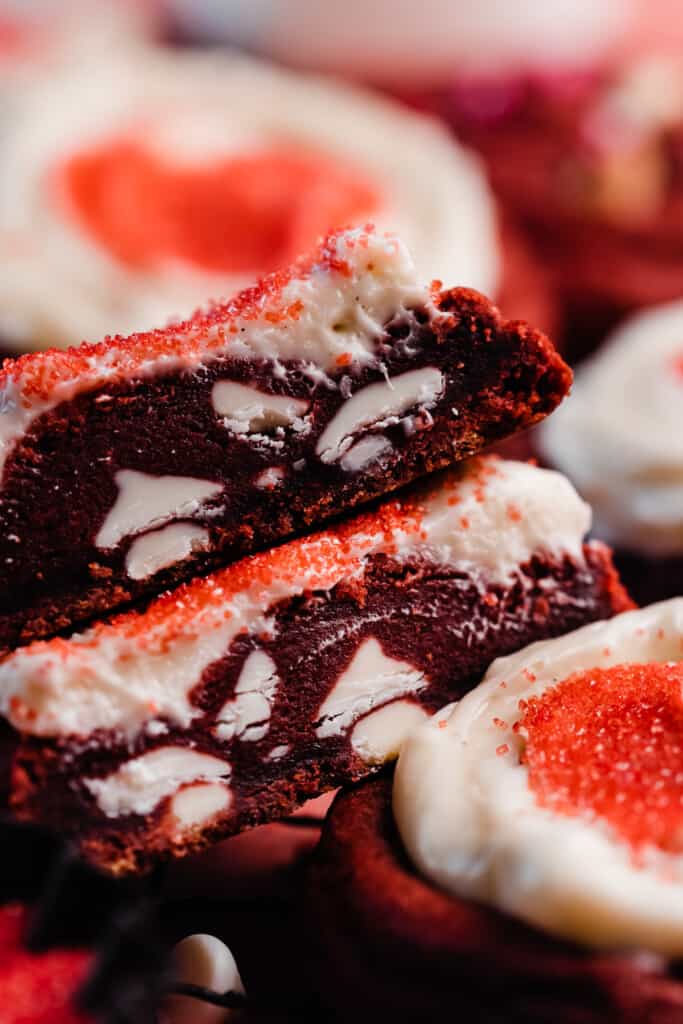
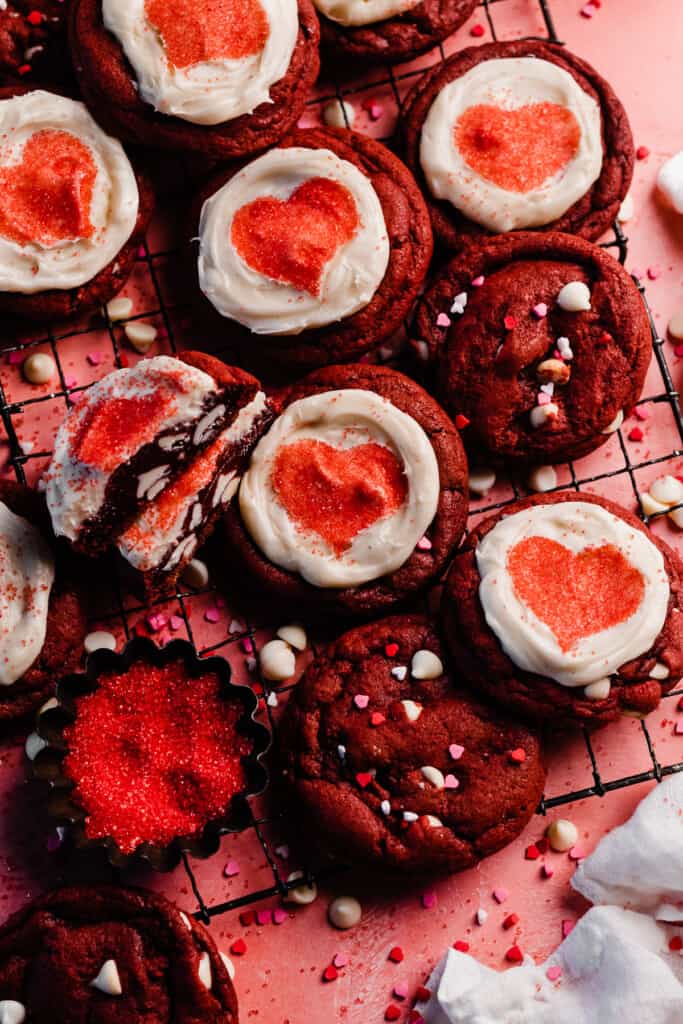
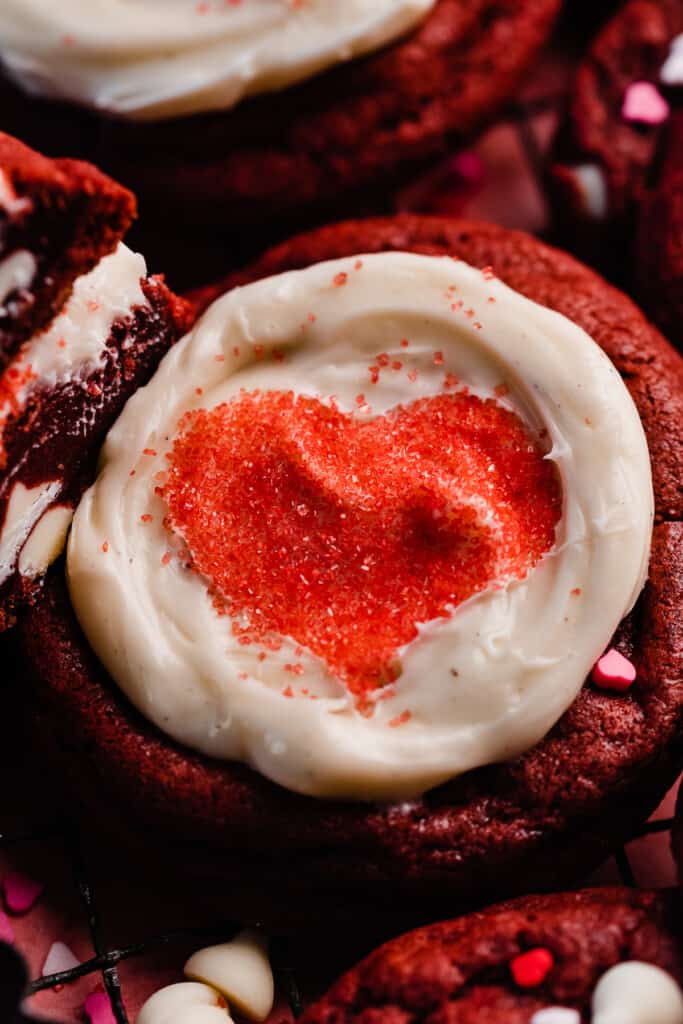
Red Velvet Cookies are thick & fudgy cookies studded with white chocolate chips and frosted in the silkiest cream cheese frosting! A split baking temperature trick ensures true bakery-style cookies with a crisp exterior and fudgy insides that stay perfectly soft even when completely cooled!

Why you’ll love these easy Red Velvet Cookies:
- Chewy Red Velvet Cookies – A red velvet cookie should be thick & chewy (these are almost fudgy inside!), with a subtle chocolate flavor and a hint of tang. These are just that – with white chocolate chips baked in!
- Simple Ingredients – These cookies use mostly pantry staple ingredients that you likely have on hand already.
- Cream Cheese Frosting – A silky, tangy cream cheese frosting is the perfect compliment to these cookies. They taste exactly like classic red velvet cake in cookie form!
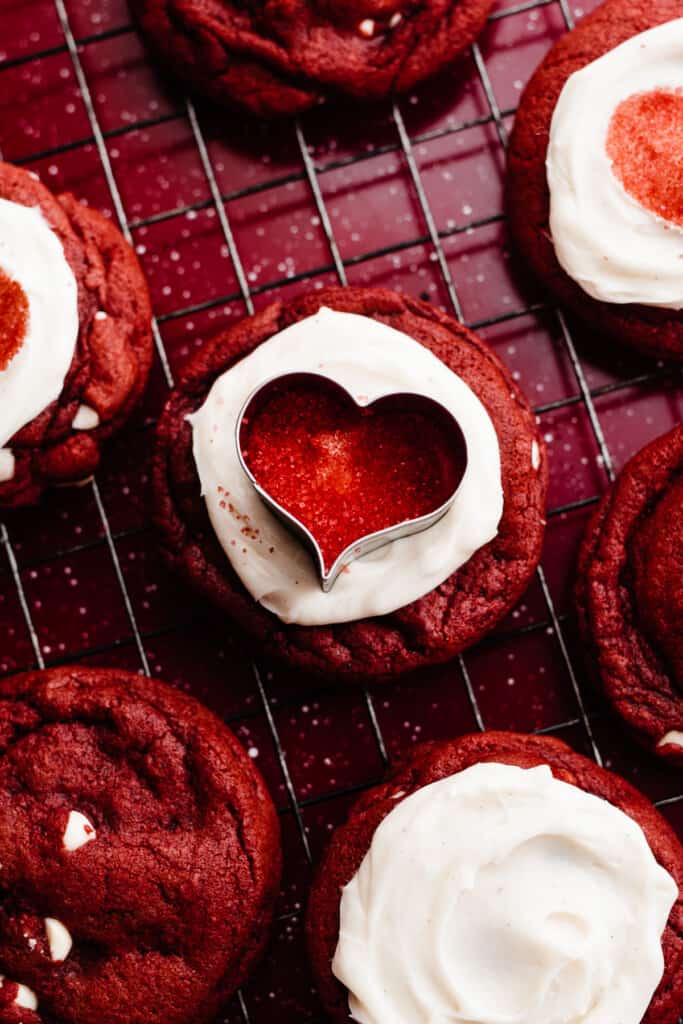
- Easy to Decorate – Even the least artistic baker can decorate these cookies! A mini heart cookie cutter becomes a stencil for our sprinkle hearts – it’s the easiest way to decorate festive Valentine’s Day cookies! (My Red Velvet Brownies are even easier with no decoration at all!)
Ingredient Overview:
As always, the full recipe with measurements & directions can be found in the recipe card at the bottom of this post.
- Butter – I always use salted buter for the best flavor, but feel free to use unsalted butter if you prefer.
- All-purpose flour – Spoon your flour into the measuring cup, then level it with a flat utensil for best results, or use a scale. Scooping the measuring cup directly into your flour will lead to too much flour, and a potentially dry bake.
- Gel Food Coloring – Use gel food coloring, not liquid food coloring that you find in grocery stores. See more on this in expert success tips below (use the table of contents above to navigate).
- Sugar – Using a mix of white sugar and brown sugar creates the perfect balance of sweetness and helps the cookies spread just the right amount.
Recipe Variations:
- Dairy-free – Use your favorite trusted dairy-free butter and cream cheese to make this recipe dairy-free.
- Gluten-free – I have not tested a gluten-free version of this recipe, but my cookie recipes almost all follow the same “base” recipe, and readers have reported success with using a 1:1 gluten-free flour like Bob’s Red Mill.
- Chocolate Chips – I’ve made these cookies plain, with semisweet chocolate chips, and with white chocolate chips. They taste best with white chocolate chips – it plays into the flavor of the cream cheese frosting and provides a delightful little surprise as you bite into the cookies. However, you can omit them or use semi-sweet if you aren’t a fan of white chocolate.
- White Chocolate Drizzle – Decorate cookies with a white chocolate drizzle in place of the frosting, if you prefer. Melt 2/3 cup of white chocolate chips or melting wafers in a microwave-safe bowl, in 20 second intervals, stirring between each until almost melted. Stir vigorously and the residual heat will melt the last bits. Add 1-2 tsp of vegetable oil to thin for easy drizzling. Cookies decorated like this can be stored at room temperature.
How to Make Red Velvet Cookies:
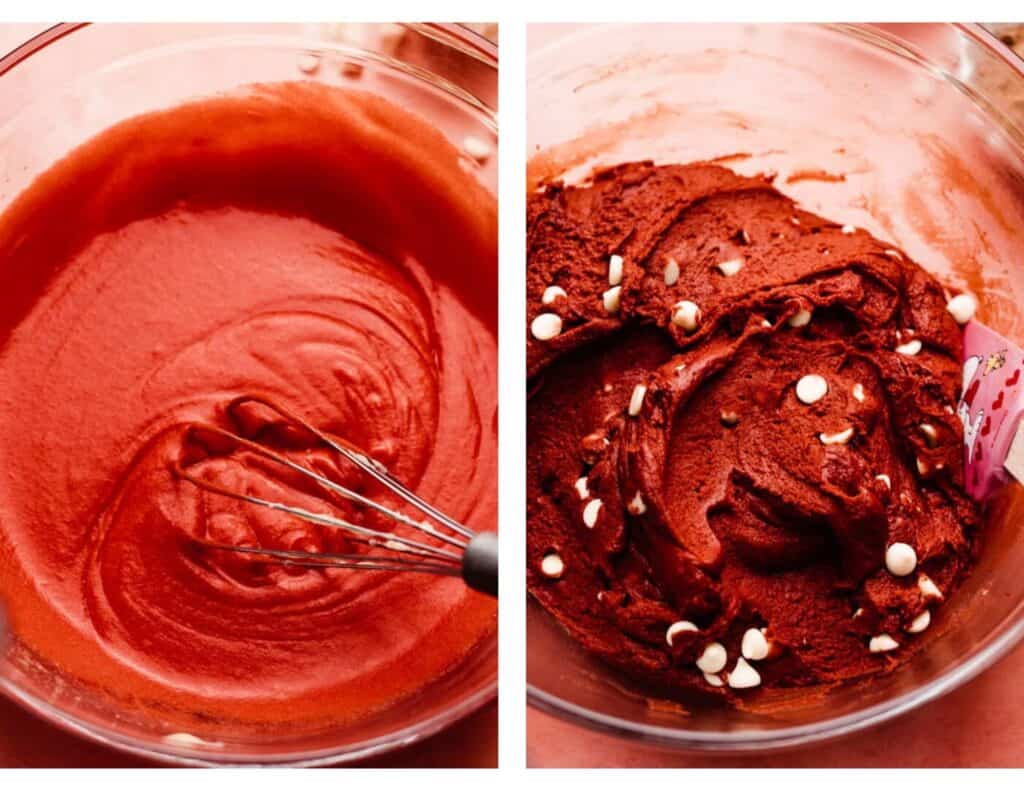
Step 1: Make the Cookie Dough. In a large bowl, whisk together the wet ingredients – melted butter, sugars, eggs, vanilla, vinegar, and red food coloring. Then, stir in the dry ingredients and the white chocolate chips (optional).
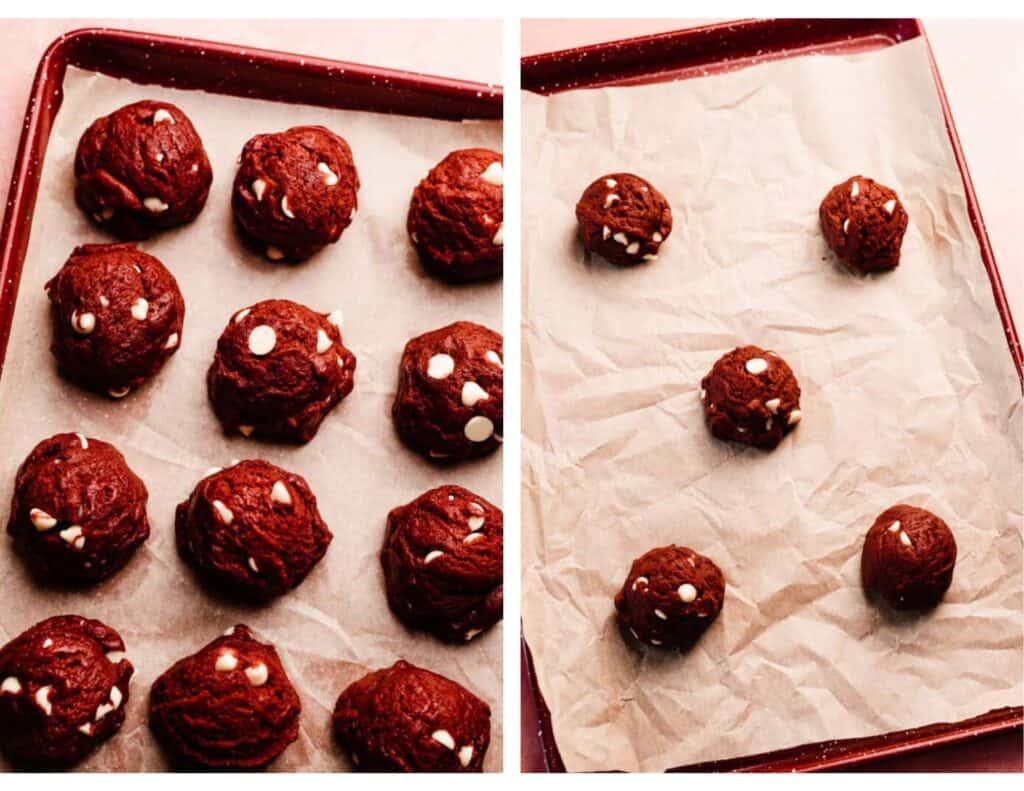
Step 2: Chill the Cookie Dough. Scoop dough into balls 65 grams in size, and chill in the fridge for at least 2 hours (or up to 2 days, in an airtight container) or in the freezer for at least 30 minutes (or up to 2 months, in an airtight container).
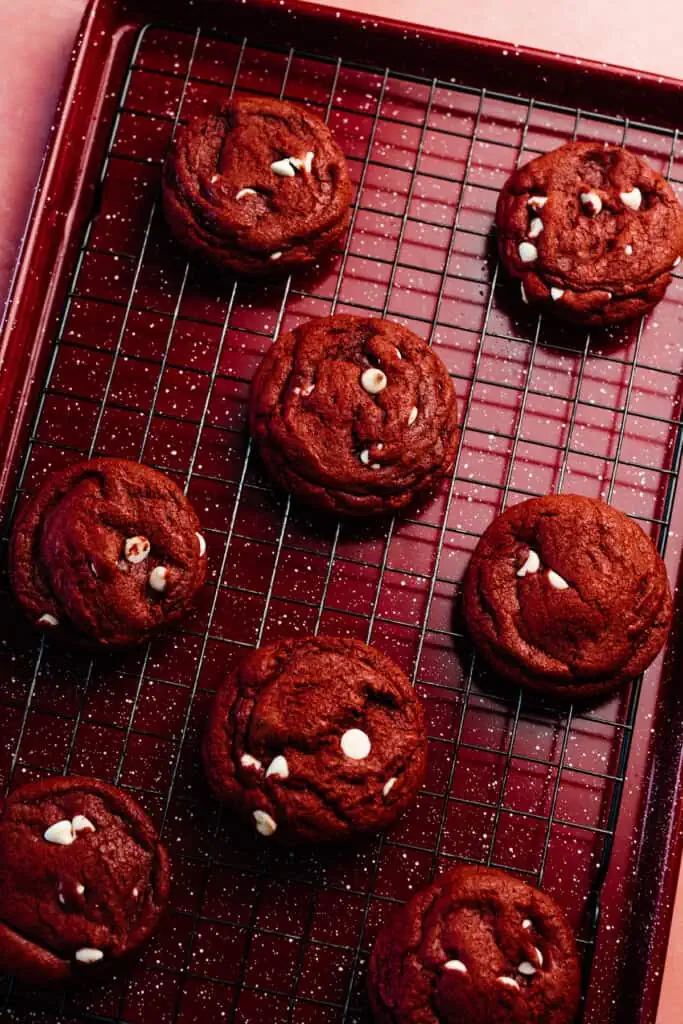
Step 3: Bake. Bake cookies on a baking sheet lined with parchment paper. Bake as directed in the recipe card below for best results.
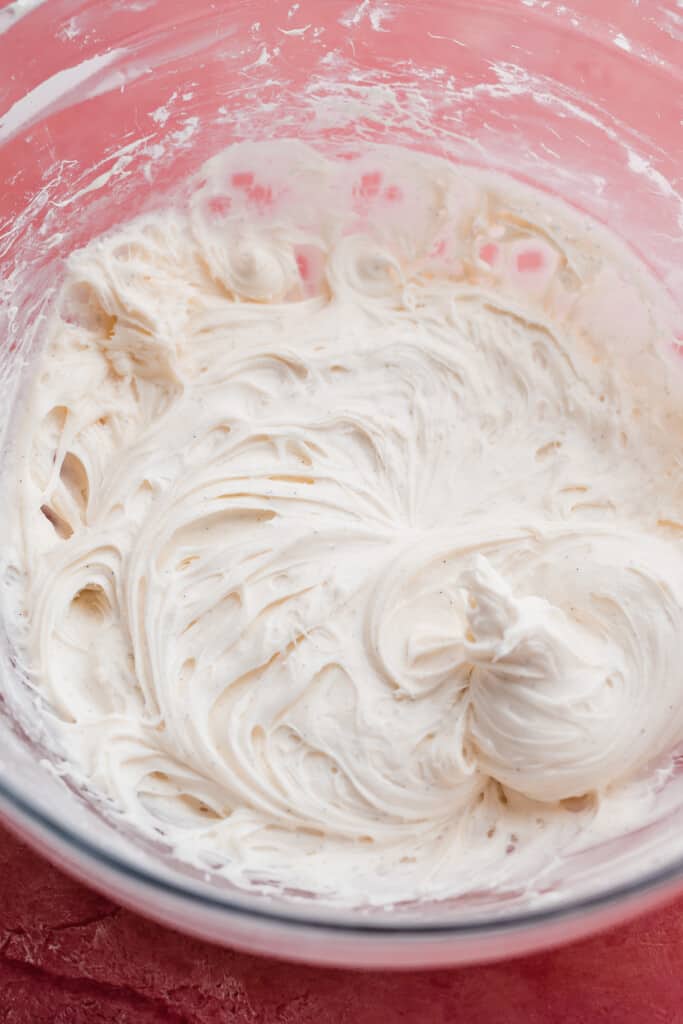
Step 4: Make Cream Cheese Frosting. In a medium bowl, beat together softened butter, cream cheese, powdered sugar, vanilla extract, and a pinch of salt.
Step 5: Decorate Cookies. Frost the cooled baked cookies. Place a small heart cookie cutter on top of the frosting, then fill the inside with red sprinkles. Tap out the excess before removing the cookie cutter.
Serving + Storing:
Once frosted, enjoy cookies immediately, or transfer to an airtight container to refrigerate until ready to serve. Cookies must be stored in the refrigerator if frosted, and will keep for 4-5 days in an airtight container in the fridge.
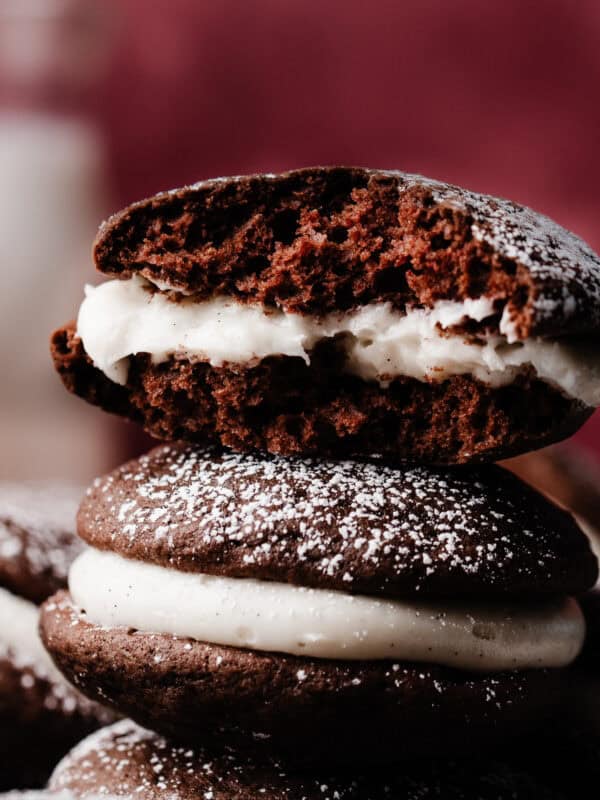
Store any unfrosted cookies in an airtight container at room temperature for 3-4 days. These cookies (along with my Black Forest Truffles!) are fun treats to hand out for the holidays.
Expert Success Tips:
- Oven Thermometer – An oven thermometer will tell you if your oven is actually running at the temperature you set it to. Your oven may not be accurate. Accurate oven temperature is crucial for most bakes, so I leave an oven thermometer in at all times to keep an eye on my oven’s calibration.
- Split Temperature Baking – Baking the cookies for the first 4 minutes at 400 degrees F, then at 365 degrees F for the remaining 4-5 minutes ensures a true bakery-style cookie with a crisp exterior and fudgy insides.
- Kitchen Scale – A food scale is the best way to make sure your flour is at the proper weight, since amounts will vary SO widely based on how you measure it, as well as the measuring cup you use, as they are not standardized.
- Gel Food Coloring – Use red gel food coloring rather than the typical food coloring you find in the baking aisle at the grocery store. Gel food coloring is much more concentrated and you will only need a few drops as opposed to half the bottle (that much excess liquid could alter the recipe).
FAQs:
Yes, you can do either with this cookie recipe!
Red Velvet flavor is like a muted chocolate flavor, with a hint of tangy flavor. In these cookies, the hint of tangy flavor comes from a little bit of white vinegar. Red velvet is typically paired with a cream cheese frosting, which is how I frosted these!
Special Tools:
- Red Food Coloring – Use red gel food coloring rather than the liquid food coloring you find in the grocery store. It’s much more concentrated and you won’t have to add excess liquid to the recipe (causing your cookies to spread too much) in your attempts to get a deep red color. I like this deep red gel food coloring for a nice red velvet color. It will make a d deep red (not pink!) and has a dropper bottle for ease of use.
- Heart Cookie Cutter – I used the smallest heart in this set of heart cookie cutters as my sprinkle stencil. You can use the other sizes to make my Raspberry Lemon Heart Sugar Cookies!
- Red Sprinkles – I used red sanding sugar sprinkles to make my red hearts. You could use pink, or skip the heart shape and sprinkle on any other sprinkles you like!
- Offset Spatula – An offset spatula makes frosting cookies and cakes a breeze! I use it for spreading batters as well.
More Unique Cookie Recipes:
- Butterbeer Cookies
- Peach Cobbler Cookies
- Birthday Cheesecake Stuffed Funfetti Cookies
- Eggless Chocolate Chip Cookies
- Caramel Apple Cider Cookies
- Black Forest Cookies
Did you make this recipe? Leave a comment & star rating!
Click the little stars in the header of the recipe card below to leave a comment & star rating, letting me know how you liked the recipe. I take all feedback seriously, & leaving a rating helps my small business immensely!

Red Velvet Cookies with Cream Cheese Frosting
Ingredients
For the Cookies
- 1/2 cup + 7 tbsp salted butter, melted & cooled slightly (15 tbsp in total), 211 grams, or 15 tbsp
- 3/4 cup granulated sugar , 156 grams
- 3/4 cup brown sugar, packed, 163 grams
- 2 large eggs, at room temperature
- 1 and 1/2 tsp vanilla extract
- 2 tsp white vinegar, 10 mL
- 4-7 drops red gel food coloring
- 2 and 3/4 cups + 2 tbsp all-purpose flour, spooned & leveled or weighed out , 374 grams
- 1/4 cup cocoa powder, 22 grams
- 1 tsp baking soda
- 1 tsp baking powder
- 1/2 tsp salt
- 1 cup white chocolate chips
For the Cream Cheese Frosting
- 1/4 cup salted butter, softened at room temperature , 57 grams
- 8 ounces cream cheese , 226 grams
- 2 cups powdered sugar , 230 grams
- 1 tbsp vanilla extract
- pinch of salt
For Decorating
- 1 small heart cookie cutter
- red sanding sugar sprinkles
Instructions
- Make Cookie Dough: Melt butter in a large mixing bowl. Allow to cool for 5-10 minutes. Add the sugars and whisk well to combine. Add the eggs, vanilla, and white vinegar, and whisk until smooth and combined, about 30-45 seconds. Add the red food coloring and whisk in. You'll have a vibrant red – this will become muted after adding the dry ingredients. Stir in the dry ingredients, adding the white chocolate chips last. (It will seem like the dough isn't going to come together at first but it will – it takes some elbow grease! Or, you can get out your mixer for this step.)1/2 cup + 7 tbsp salted butter, melted & cooled slightly (15 tbsp in total), 3/4 cup granulated sugar , 3/4 cup brown sugar, packed, 2 large eggs, at room temperature , 1 and 1/2 tsp vanilla extract , 2 tsp white vinegar, 4-7 drops red gel food coloring, 2 and 3/4 cups + 2 tbsp all-purpose flour, spooned & leveled or weighed out , 1/4 cup cocoa powder, 1 tsp baking soda, 1 tsp baking powder, 1/2 tsp salt, 1 cup white chocolate chips
- Scoop & Chill: Scoop the dough into balls that are 65 grams in size. This is about 2.5 tbsp each. Place cookie dough balls into an airtight container lined with parchment paper (to prevent sticking) and refrigerate for at least 2 hours or freeze for at least 30 minutes. Make-Ahead Tip: Cookie dough balls can be chilled in an airtight container in the fridge for up to 2 days, and can be frozen for up to 2 months. Bake from frozen, adding 1-2 minutes to the second part of the bake time as needed.
- Bake Cookies: Preheat your oven to 400 ℉. Place 5-6 cookies on a parchment paper lined baking sheet, and bake one at a time. Bake for 4 minutes at 400℉, then turn the temp down and bake at 365℉ for 4 to 5 minutes.This will give you a nice crisp exterior, while keeping the cookies soft and gooey on the inside. The edges will appear and feel just set, and the tops will seem fairly set as well. For perfectly round cookies, swirl each cookie inside of a round cutter (or use an upside down glass) as soon as they come out of the oven. If the cookies move on the baking pan easily, that's a good sign they're fully baked!Place cookie sheet on a wire rack to cool for 10 minutes or so, then transfer cookies to cooling racks to cool completely before frosting. Or dig in once they've had a chance to cool for 10-15 minutes!
- Make Cream Cheese Frosting: In a medium bowl, beat together the butter, powdered sugar, cream cheese, vanilla, and salt until combined and creamy. Don't over mix! If your frosting became a bit weepy, pop it in the fridge or freezer to quickly firm back up.1/4 cup salted butter, softened at room temperature , 8 ounces cream cheese , 2 cups powdered sugar , 1 tbsp vanilla extract , pinch of salt
- Decorate Cookies: Use a small cookie scoop to drop balls of frosting onto each cookie, then use an offset spatula to spread it out, leaving the edges of the cookie visible. Place the heart cookie cutter in the center, and fill with sprinkles. Tap out the excess, then remove the cookie cutter.1 small heart cookie cutter, red sanding sugar sprinkles
- Serve & Store: Once cookies are decorated, enjoy immediately! Or, store cookies in an airtight container in the fridge until ready to enjoy. Frosted cookies must be stored in the fridge, and will keep in an airtight container for 4-5 days. Unfrosted cookies can be stored at room temperature in an airtight container for 4-5 days.
Nutrition
Nutrition information is automatically calculated, so should only be used as an approximation.


For the cookies, is it a 1/2 c plus 7 Tablespoons melted butter? Your directions say 1/2 cup 7 T
Hi Sharon! It’s 1/2 cup plus 7 tbsp, for a total of 15 tbsp or 211 grams. Let me know how you like the recipe!
Another winner of a recipe! Stephanie’s directions are always so clear and easy to follow! She is also super responsive if you have questions. This account is my favorite on instagram!
Thanks so much, Sue! I appreciate your kind comment.