This post contains affiliate links. Please see our disclosure policy.
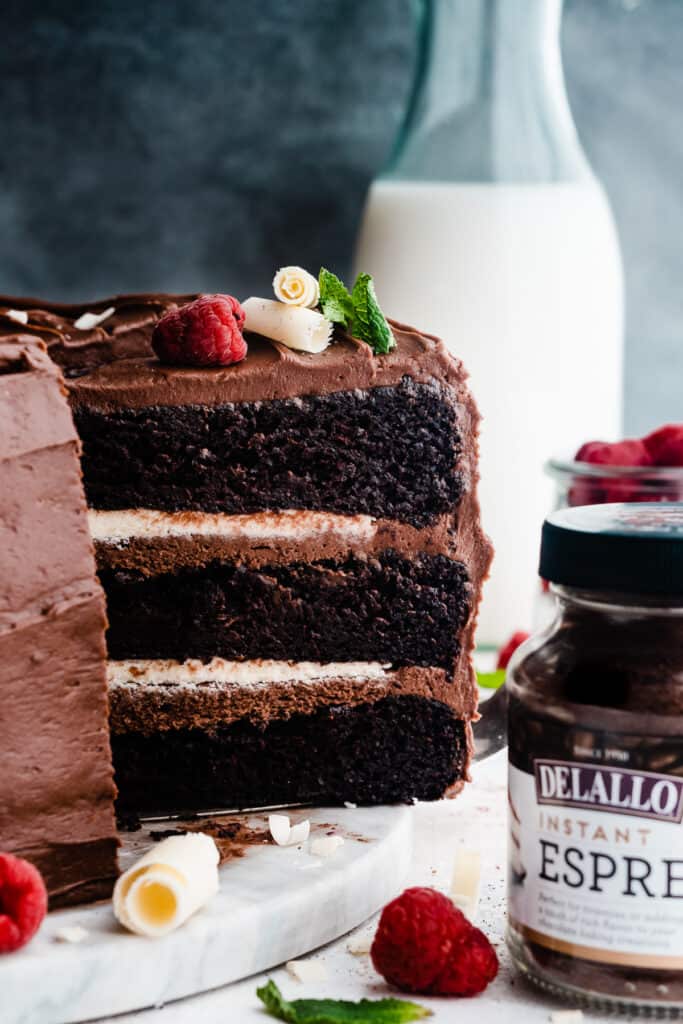
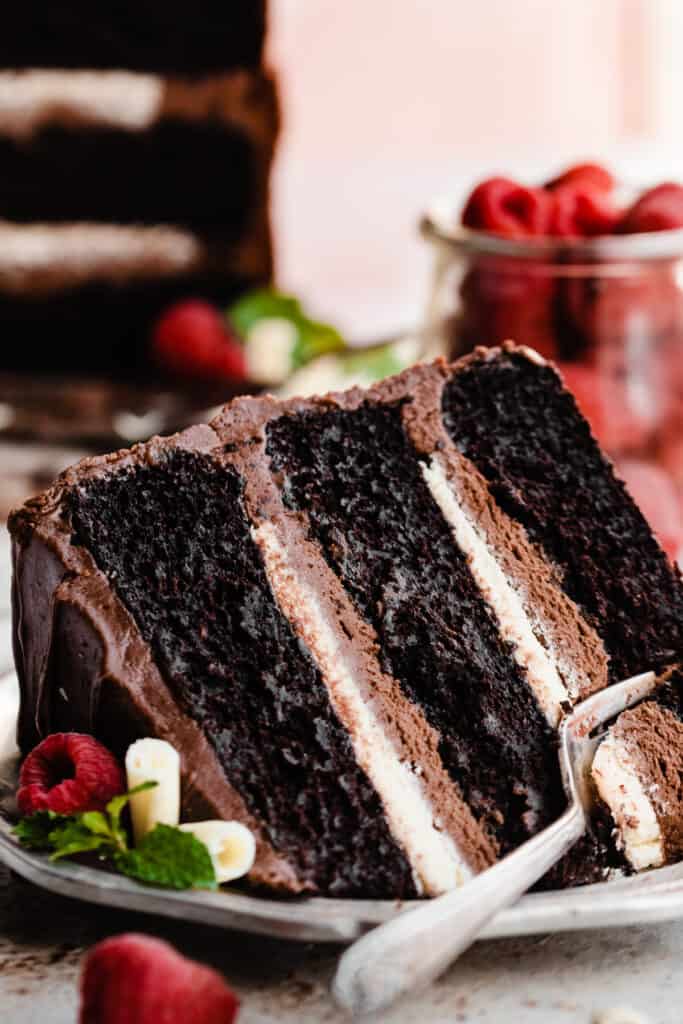
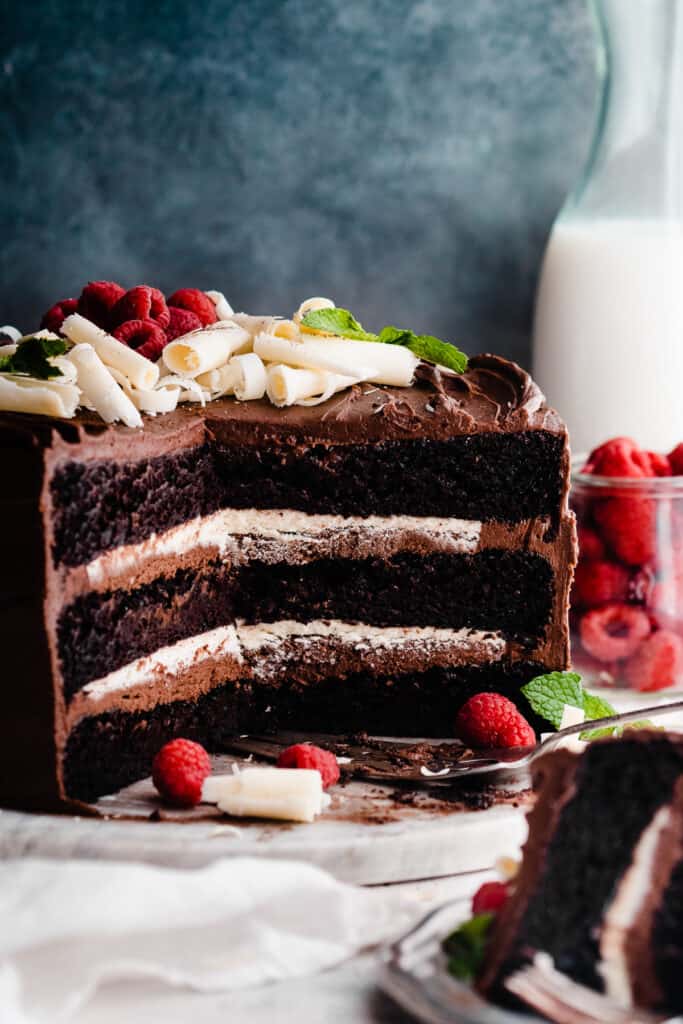
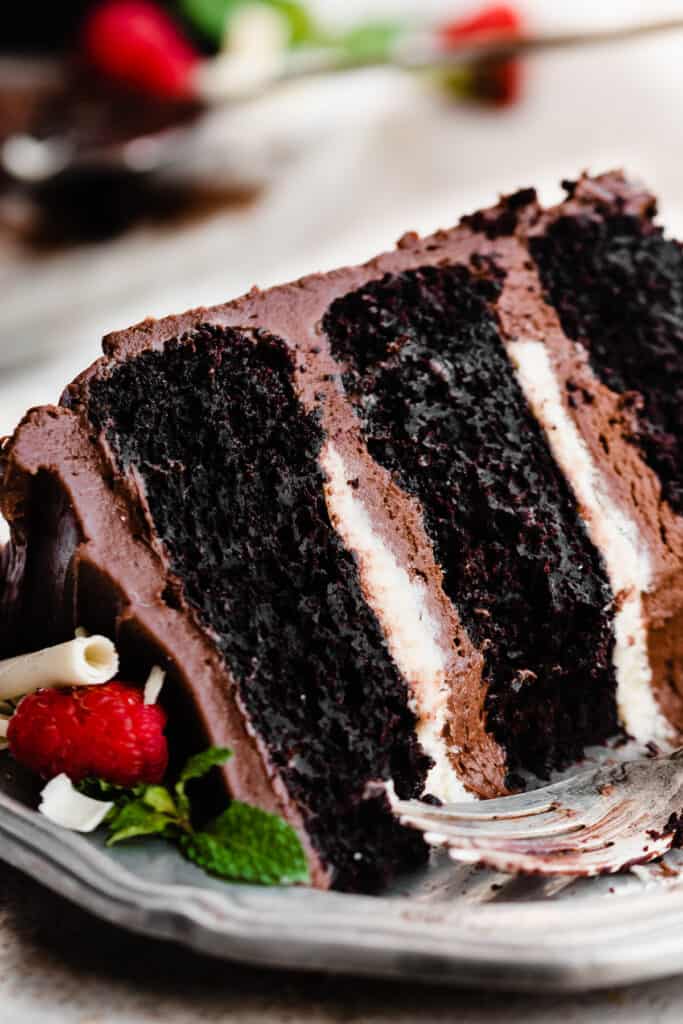
Tuxedo Cake is truly a celebration cake! It has three rich layers of moist chocolate cake, filled with a whipped white chocolate ganache. Cover the whole thing in a silky chocolate fudge frosting and top with white chocolate curls and fresh berries.

This recipe is sponsored by our friends at DeLallo. Thanks for supporting the brands that make Blue Bowl possible! All opinions are my own.
Table of Contents
Why you’ll love this Chocolate Tuxedo Cake:
- Rich Chocolate Cake – This layer cake is ultra moist and full of rich chocolate flavor! It’s the perfect cake for a special occasion. (For a less rich version, try my German Chocolate Cake!)
- Silky Whipped White Chocolate Ganache – Whipped white chocolate filling elevates this cake and is the perfect compliment to the chocolate flavors.
- Approachable yet Elevated Dessert – This dessert is certainly fancy enough for a black tie event, but is approachable to make! I have broken down each and every step in the blog post and recipe card below to make things as easy as possible.
Ingredient Overview:
- Butter – I always use salted buter for the best flavor, but feel free to use unsalted butter if you prefer. We’re using this instead of vegetable oil in this cake to add extra richness!
- DeLallo Instant Espresso Powder – DeLallo’s Instant Espresso Powder intensifies the chocolate flavor of this cake without making it taste like coffee. It’s one of my best baking tricks!
- Sour Cream – Use full fat sour cream at room temperature for best results.
- All-purpose flour – Spoon & level your flour for best results, or use a scale. Scooping the measuring cup directly in will lead to too much flour.
- Eggs – Use large eggs, at room temperature.
- White Chocolate – Use good-quality baking bars.
- Cocoa Powder – Use natural cocoa powder, not dutch process.
Recipe Variations:
- Dairy-free – Use your favorite dairy-free products to make this cake dairy-free.
- Gluten-free – I haven’t tested a gluten-free version of this recipe, but let me know if you do try it!
- Greek Yogurt – This will work in place of the sour cream in a pinch.
- White Chocolate – If you don’t love white chocolate for the filling, you could use chocolate ganache and whip it for the filling instead, although that technically changes this from a Tuxedo Cake to a triple chocolate cake. Or, you could use a trusted white chocolate mousse recipe.
- Dark Chocolate Ganache – Add a dark chocolate ganache drip on top of the cake if you are a dark chocolate lover. Follow the drip recipe in my Cookie Dough Cake, using dark chocolate or semi-sweet chocolate.
- Cupcakes – This recipe currently doesn’t work the best as cupcakes – they sink a bit in the middle during the bake. I am working on a fix and will update this as soon as I have one!
- Egg-Free – Make the cake layers from my Eggless Chocolate Cake, then frost and fill with the components from this recipe!
How to Make this Tuxedo Cake:
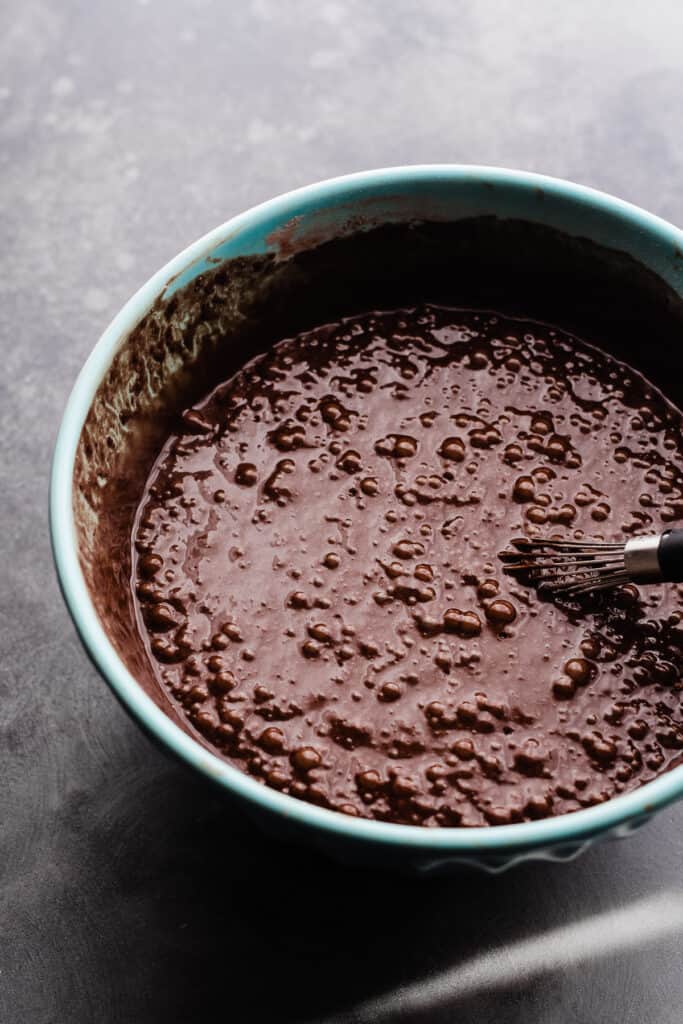
Step 1: Make the Cake Batter. Bloom the cocoa powder in hot water – this is just a fancy term that means dissolving the cocoa in hot water to activate it and intensify the chocolate flavor. Whisk together the dry ingredients, then stir in the wet ingredients. It’s as simple as that!
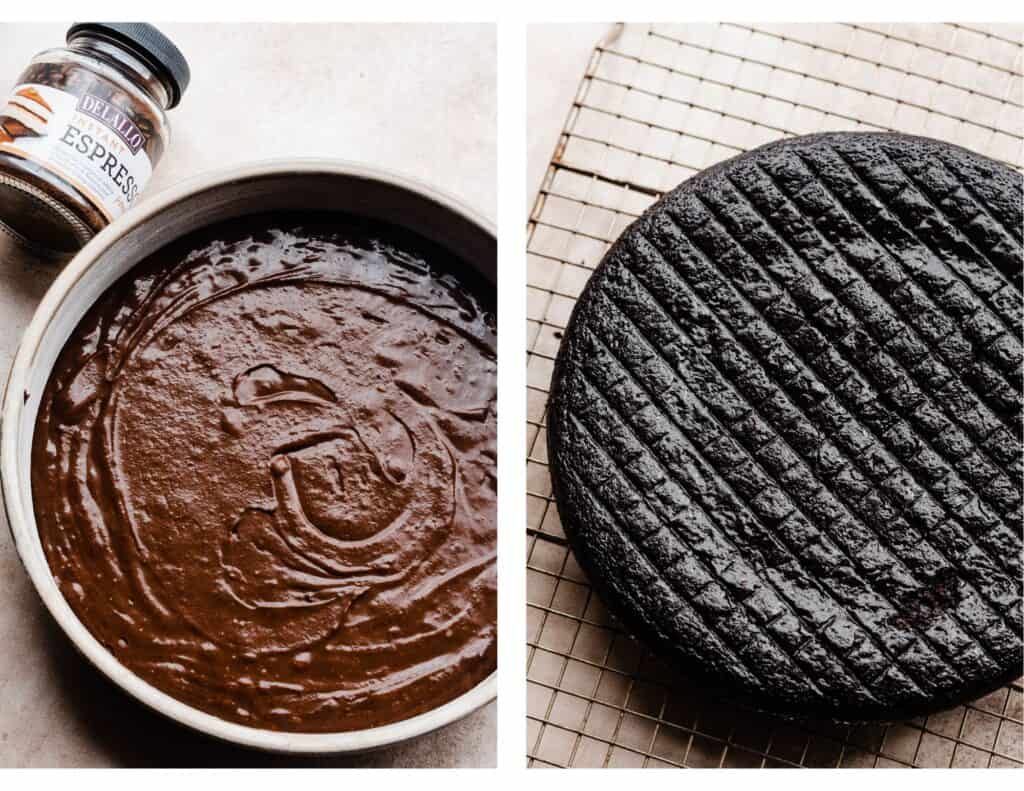
Step 2: Bake the Cakes. Divide the mixture between your prepared pans and bake as directed in the recipe card below. Let cake layers cool completely on a wire rack.
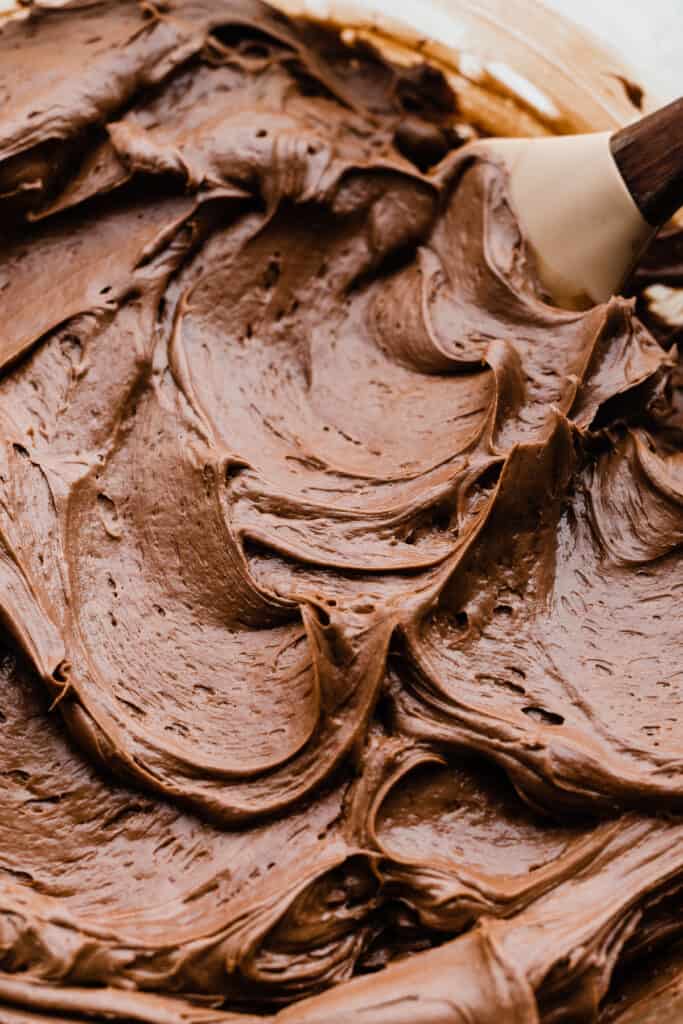
Step 3: Make the Chocolate Buttercream. Beat the in a large bowl with an electric mixer or stand mixer, then mix in the powdered sugar and remaining ingredients. Mix in the softened, cubed cream cheese last. This helps ensure that it won’t won’t be weepy.
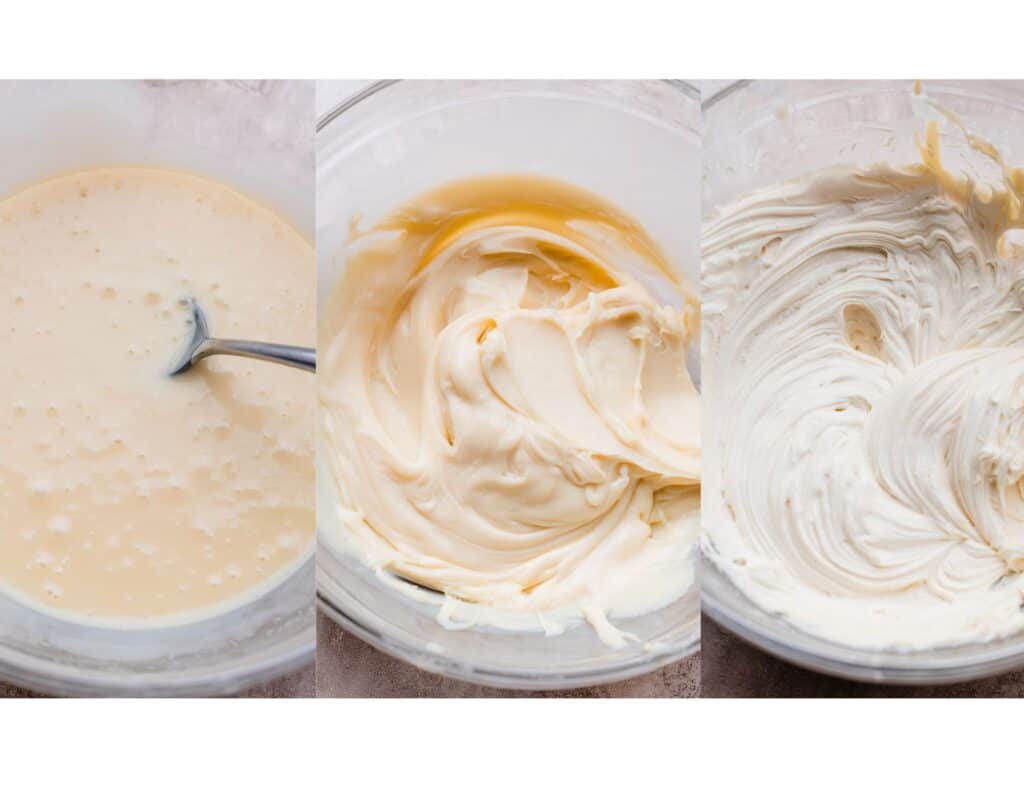
Step 4: Make the Whipped White Chocolate Ganache. Make this once you’re ready to assemble the cake. Stir simmering heavy cream into chopped white chocolate, then chill until stiff. Then, whip it with an electric mixer.
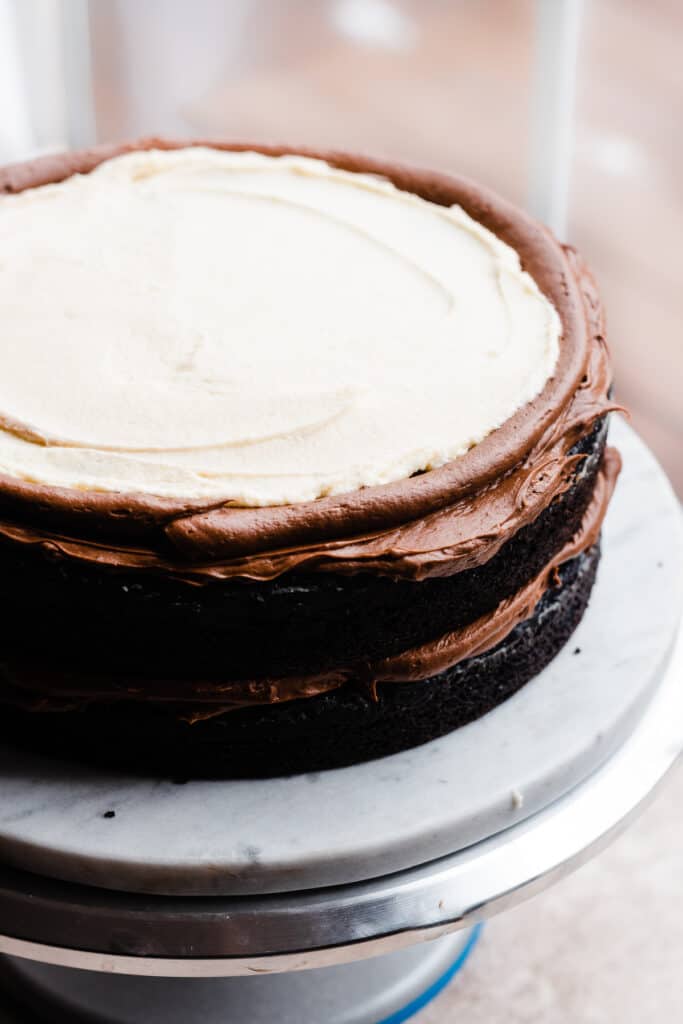
Step 5: Assemble the Cake. Frost the first layer with an even layer of frosting, then pipe a border around the cake layer, and fill with white chocolate ganache. Repeat this with the 2nd layer, then add the final layer on top.
I like to chill the cake between layers to keep everything nice and stable.
Serving + Storing this Tuxedo Cake:
Chill the assembled cake for at least 30 minutes or up to 24 hours before slicing and serving. If chilled longer than 30 minutes, let come to room temperature for 30 minutes or so before slicing and serving so it’s not so stiff from being in the fridge. Store leftovers in an airtight container or on a covered cake plate, with plastic wrap pressed against the cut portion of the cake. This cake stays moist in the fridge for 4-5 days.
Expert Success Tips:
- Don’t Over Bake – As always, follow the doneness cues given below for best results. An oven thermometer also helps ensure a successful bake – not all ovens are calibrated correctly, and they can become off over time.
- Don’t Over Mix – Whisk the dry ingredients in just until they’re combined and the batter smoothes out.
- Espresso Powder – Don’t leave out the espresso powder! DeLallo’s Instant Espresso Powder enhances the rich chocolate flavor of this cake and frosting, and is an essential part of the recipe.
- Scale – A food scale is the best way to make sure your flour is at the proper weight, since the amount you get will vary SO widely based on how you measure it, and the measuring cup you use, as they are not standardized.
- Keeping Cream Cheese Stable – Beat together your butter and powdered sugar, then other ingredients, and add the cream cheese last. Sugar is hydroscopic, meaning it attracts water, so dissolving it (mixing it well) into the butter first helps prevent it from drawing moisture out of the cream cheese (it has a moisture content of 55%!), which can make things weepy.

FAQs:
A tuxedo cake layers chocolate and white chocolate flavors, giving the appearance of tuxedo with it’s black and white colors. It’s also a fancy enough cake to serve at a formal function!
Yes, you can halve it to make two 8-inch round cake layers, or one 9×9 square cake.
Yes, you can freeze the baked, cooled cake layers. Wrap tightly in plastic wrap and freeze for 1-2 months. Defrost in the fridge overnight before assembling and serving.
Cake layers can be baked, cooled, and wrapped in saran wrap for up to 24 hours before assembling. Frosting can be made 1-2 days ahead and kept, covered, in the fridge. Let come to room temp a bit and beat with your mixer to bring it back to spreadable consistency. I don’t recommend making the ganache ahead.
How do I make Chocolate Curls?
- Melt 3 ounces chopped white chocolate with 1 tbsp of shortening or vegetable oil in 20 second intervals, stirring between each, until smooth. Pour this over the backside of a cookie sheet, spreading it as thin as possible. Place in the freezer for a few minutes – you want it to be solid, but you should *just* be able to leave a print from your finger, without making a depression. Then, use a cookie flipper or something similar with a blunt metal edge to scrape down the sheet pan (from the short side across, to cover the longest distance), to create curls. If the chocolate breaks, it’s too cold – let it sit out for 30 seconds or so and keep trying. If it gets too soft, pop it back in the freezer. Touching them as little as possible, transfer the curls to a plate to freeze until ready to use.
Special Tools:
- Cake Pans – These are my absolute favorite 9-inch cake pans! I’ve had them for 6+ years and use them for every cake recipe, and they are still in great shape.
- Offset Spatula – Offset spatulas make cake assembly so easy! They can also be used for spreading cake and brownie batters evenly.
- Cake Turntable – If you make at least a few cakes a year, a cake turntable makes the process a breeze!
More Cake Recipes to Love:
- Perfect White Birthday Cake
- Salted Butterscotch Crunch Cake
- White Forest Cake
- Mini Chocolate Cake
- Peach Cobbler Cake
- Mojito Cake
Did you make this recipe? Leave a comment & star rating!
Click the little stars in the header of the recipe card below to leave a comment & star rating, letting me know how you liked the recipe. I take all feedback seriously, & leaving a rating helps my small business immensely!

Tuxedo Cake with Whipped White Chocolate Ganache
Ingredients
For the Cake Layers:
- 2 cups hot water
- 1 and 1/2 cups 2 tbsp natural cocoa powder, Do not use dutch process. 157 grams
- 3 cups cake flour, spooned & leveled, 330 grams
- 2 and 1/4 cups light brown sugar, packed, 482 grams
- 1 cup granulated sugar , 206 grams
- 3 tsp baking soda
- 1 and 1/2 tsp baking powder
- 3/4 tsp salt
- 2 tbsp DeLallo Instant Espresso Powder
- 1 and 1/2 cups full sour cream, at room temperature , 360 grams
- 1/4 cup milk, at room temperature , 60 mL, I used 2%
- 4 large eggs, at room temperature
- 1/2 cup vegetable oil , 106 mL
- 1 and 1/2 tsp vanilla extract
For the Frosting:
- 1 and 1/2 cups salted butter, softened at room temperature , 3 sticks. 24 tbsp, or 339 grams
- 7 and 1/3 cup powdered sugar
- 2 tbsp heavy cream
- 3 tbsp corn syrup, optional, adds shine to the frosting
- 1 cup + 2 tbsp natural cocoa powder, You can use dutch process here if you want a really dark chocolate flavor
- 1 tbsp vanilla extract
- 3/4 tsp to 2 tsp DeLallo Instant Espresso Powder, adding more here will add a bit of a coffee taste to the frosting since it's not being baked
- pinch of salt
- 12 Ounces cream cheese, softened at room temperature , use the full fat blocks
White Chocolate Ganache
- 3 ounces heavy cream
- 8 ounces white chocolate
For Decorating
- white chocolate shavings or curls (see note below)
- fresh berries
- mint sprigs
Instructions
- Prep: Grease three 9-inch cake pans with shortening and place parchment paper rounds in the bottom. Grease those as well, then flour the pans, tapping out the excess. If you skip any part of this, the cake will stick. Set aside. Preheat oven to 350 ° F.
- Make the Cake Batter: Measure the hot water into a 4-cup glass measuring cup or medium bowl, then whisk in the cocoa until completely dissolved. Set aside to let come down to room temp. In a large mixing bowl, whisk together all the dry ingredients (including the sugars and DeLallo Instant Espresso Powder). Next, add the wet ingredients, including the room temp (not steaming hot!) cocoa and water mixture, and whisk until combined. There may be a few small lumps – that's fine.
- Bake: Divide the batter between the prepared pans and bake for 22 to 27 minutes, or until a toothpick inserted in the center comes out with moist crumbs on it (not wet batter). Let the cakes cool in the pans for 10 minutes, then run a butter knife around the edge and invert onto cooling racks. Let cool completely. Tip: I recommend rotating cake pans halfway through since every oven will have hot spots and this ensures an even bake.
- Make the Frosting: Beat butter in a large mixing bowl on high speed until creamy – 30 seconds to 1 minute. Add powdered sugar, 2 cups at a time, mixing between each until creamy. Add 1-2 tbsp of heavy cream to help things come together. Add vanilla extract, cocoa powder, corn syrup, espresso powder, and salt and mix. Add cubed room temperature cream cheese, and mix well. (Adding this last prevents a weepy frosting – see more in blog post).
- Make the Ganache: Add the finely chopped white chocolate to a medium bowl. Heat the heavy cream to a simmer in a small saucepan over medium heat. Pour over the white chocolate, and let sit for 5 minutes. Stir until completely smooth – microwave in 10 second intervals if any lumps remain. Pop this in the fridge or freezer for 12 minutes to thicken, stirring halfway through.Once the white chocolate is ready, beat it with an electric mixer on high speed for about 1-2 minutes to whip the ganache. Then, use it immediately.
- Assemble Cake: Place the first cake layer on a cake stand on top of a turntable. Spread 1 and 1/2 cups of chocolate frosting over the layer. Pipe a border of frosting around the cake layer and fill with 1/2 cup of the whipped ganache, spreading it evenly. Place the second cake layer on top and chill for 5-10 minutes to set things so the layers don't slide around. Repeat with the second layer. Add the final layer upside down for a flat top, and give the cake a thin layer of frosting on top and on the sides. Use a cake scraper to smooth out and remove excess. This is your crumb coat, so don't fret if it isn't perfect. Pop the cake in the fridge for 30 minutes or until the frosting is set. Then, apply the remaining frosting, using the cake scraper to smooth the top and sides of the cake. Chill the entire cake in the fridge for 30 minutes, or until set, before covering it (with plastic wrap or a cake lid) or serving it.Tip: If your frosting is getting too soft at any point from sitting out, pop it back in the fridge for a bit to firm back up.
- Serve & Store: Decorate the top of the cake with white chocolate shavings or curls. Serve the cake once chilled as directed above. Slice into as many slices as desired! Store leftovers in an airtight container (or in a cake plate with plastic wrap pressed over the cut portion) in the fridge for 3-5 days.
- Make Ahead Tips: Frosting can be made 1-2 days ahead. Cover tightly and store in the fridge. Let it come to room temp a bit before using, and mix it again to get it spreadable.Cake layers can be made 1-2 days ahead. Let cool completely, then place each layer on a plate, stick 2 toothpicks in the top of each layer, and cover tightly with plastic wrap. The top of the cake is so moist, so the toothpicks will prevent sticking. Store at room temp overnight, or in the fridge for 2 days.
Notes
Nutrition
Nutrition information is automatically calculated, so should only be used as an approximation.


If you’re considering making this…. DO IT. It is so worth it! It made a lot, and we sliced it up and froze individual servings.. HA! We pulled those bad boys out so fast and this cake did not last long. It was the best.
So glad to hear you enjoyed this recipe, Katelyn!
My husband has asked for French silk pie for his last 29 birthdays until this year – he asked me to make this for his birthday cake! It’s that good.
Two things: if you don’t have tall cake pans USE 4 PANS INSTEAD OF 3! Learned the hard way. And it takes longer to cook than the recipe says. Mine took about 33 minutes.
Really delicious! Thank you!
Glad to hear that this recipe was a hit with you and your husband, Mindy! I’m always honored to hear that my recipes have helped make a family celebration special. Happy baking!
This cake looks spectacular–and thanks for the tip about keeping the cream cheese in the frosting from weeping.
Quick question: the Ingredient Overview says the cake uses butter, but the recipe itself specifies oil. If I use butter, should I cream it with the sugars, or just melt it?
Hi John! Thanks for catching that. I changed the recipe and it used to use butter but now uses oil. It makes the cake much more moist & doesn’t impact the flavor. I recommend sticking to what the recipe card says! I hope you enjoy this cake. Please let me know how you like it.
Such a GREAT chocolate cake!! The flavors go together perfectly.
Thanks so much, Noelle!
Amazing my family LOVED this cake. So perfect!
Thanks so much, Greta!
Fantastic recipe! Wife and I love it!
Thanks so much, Vince!
Best chocolate cake !!!!
Thanks, Emily! So glad you liked it.
Can’t wait to try this one! Could you please tell me how much cream cheese to add? Also, if I am making the frosting ahead, do I still need to add the cubed cream cheese?
Hi, it’s 12 ounces! I have updated the recipe card, thanks so much for catching that. Let me know how you enjoy the cake! ☺️
This cake turned out excellent! My family could not get enough of it. The flavor was rich and satisfying. We will be making it again.
Thanks so much, Molly! 🙂