This post contains affiliate links. Please see our disclosure policy.
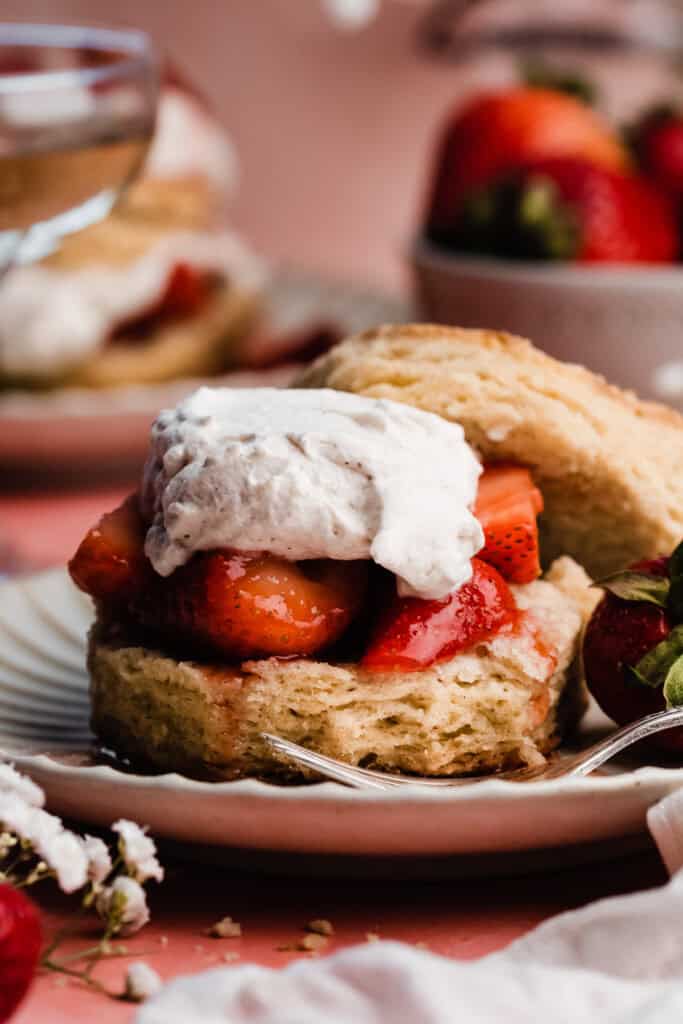
Strawberry Shortcakes are an impressive yet easy dessert to make at home. Tender & fluffy biscuits are filled with fresh, juicy strawberries and a cloud of heavenly homemade vanilla bean whipped cream. This easy Strawberry Shortcake recipe is perfect to enjoy all strawberry season long!

Table of Contents
- Why You’ll Love these Classic Strawberry Shortcakes:
- Ingredient Overview:
- Recipe Variations & Substitutions:
- How to Prepare the Strawberries:
- How to Make the Strawberry Shortcake Biscuits:
- How to Make Homemade Whipped Cream:
- Serving + Storing Strawberry Shortcake:
- Expert Success Tips:
- FAQs:
- Special Tools:
- More Summer Dessert Recipes To Love:
- Homemade Strawberry Shortcakes with Strawberries and Perfect Whipped Cream Recipe
Why You’ll Love these Classic Strawberry Shortcakes:
- Fresh Strawberries – Strawberries are most delicious during their peak season, from May through July – and they really shine in this recipe!
- Whipped Cream – Fresh vanilla bean whipped cream is lightly sweetened and perfectly compliments the juicy berries.
- Homemade Biscuits – Tender and flaky biscuits are buttery and delicious, without being too sweet.
- Easy to Make – If you’ve never made anything like this before – don’t fret. I promise it’s really simple, and completely worth the effort. Even novice bakers can make this!
Ingredient Overview:
(As always, the full strawberry shortcakes recipe with measurements & directions can be found in the recipe card at the bottom of this post.)
- All-Purpose Flour – Spoon your flour into the measuring cup, then level it with a flat utensil for best results, or use a scale. Scooping the measuring cup directly into your flour will lead to too much flour, and a potentially dry bake.
- Butter – I always use salted buter because in my experience, it lends the best flavor, but feel free to use unsalted butter if that’s what you prefer. Your butter must be very cold.
- Buttermilk – The acidity in the milk helps give the biscuits their fluffy rise. I don’t recommend substituting! The vinegar/lemon juice substitutes do not produce the same rise as the real deal. However, I do have a substitution note below if you’re in a jam.
- Heavy cream – A light brushing of heavy cream helps the biscuits brown beautifully on top.
- Fresh Strawberries – Make sure to use fresh, ripe strawberries here – this is one time that frozen will not work. Save them for my Strawberry Rhubarb Crumble or my 10-Minute Strawberry Compote!
- Vanilla Extract – Use real vanilla for best results.
Recipe Variations & Substitutions:
- Shortcut Shortcake – In a pinch, you can use grocery store pound cake or angel food cake instead of making the biscuit recipe. Slice and serve with the homemade whipped cream & strawberries.
- Mixed Berries – Mix it up with your favorite berries! Use a mixture of 1/3 blueberries, 1/3 blackberries, and 1/3 strawberries for a berry fun twist. Heh.
- Buttermilk – Please use buttermilk for best results. However, if you’re in an absolute pinch, you can use whole milk or add 1 tbsp of white vinegar or lemon juice to a 1-cup glass liquid measuring cup, then fill with milk until you reach the 1-cup line. Stir, then let rest for 5 minutes before using.
- Ice Cream – Serve these with cool whip or ice cream if you’re short on time!
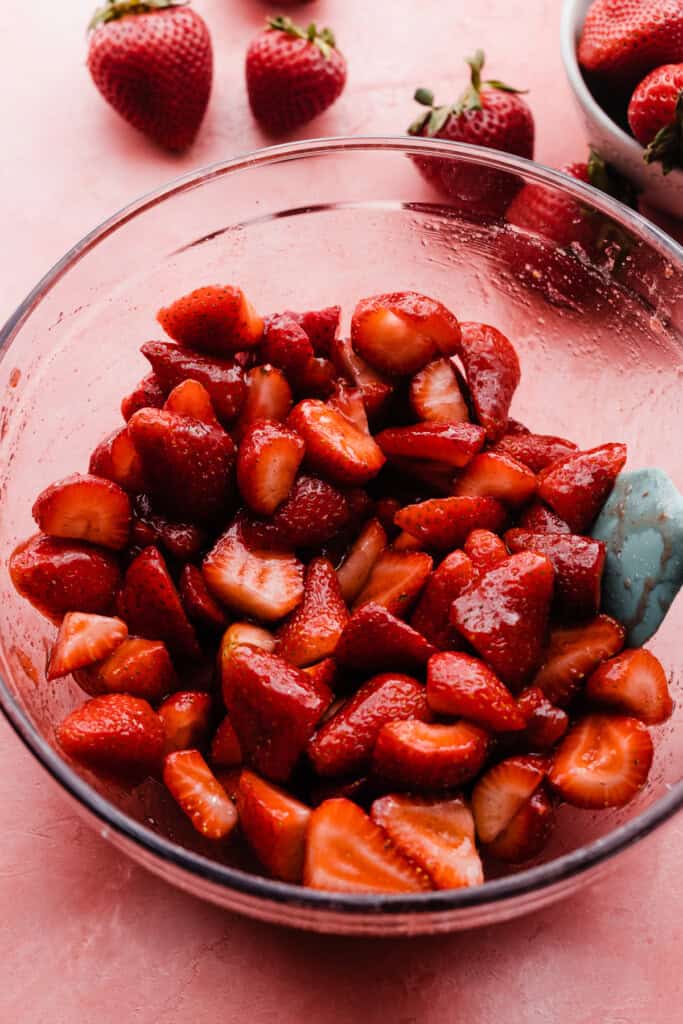
How to Prepare the Strawberries:
Step 1: Slice & Prepare Strawberries. This is the easiest part – while your biscuits are baking, quarter your strawberries and toss with a little bit of granulated sugar and a spoonful of strawberry jam. Let this sit while you finish everything else, so that the strawberries have time to release their juices.
How to Make the Strawberry Shortcake Biscuits:
Step 1: Whisk the Dry Ingredients & Cut in the Butter. Whisk together the dry ingredients in a large bowl. Add cubed, cold butter and cut in with a pastry cutter, until you have small pieces of butter of different sizes, coated in the flour.

Step 2: Add Buttermilk & Gather Dough. Stir in the buttermilk and gently gather the dough into a ball, flicking a bit more milk onto any dry spots in the dough, until it comes together like in the right hand photo below.
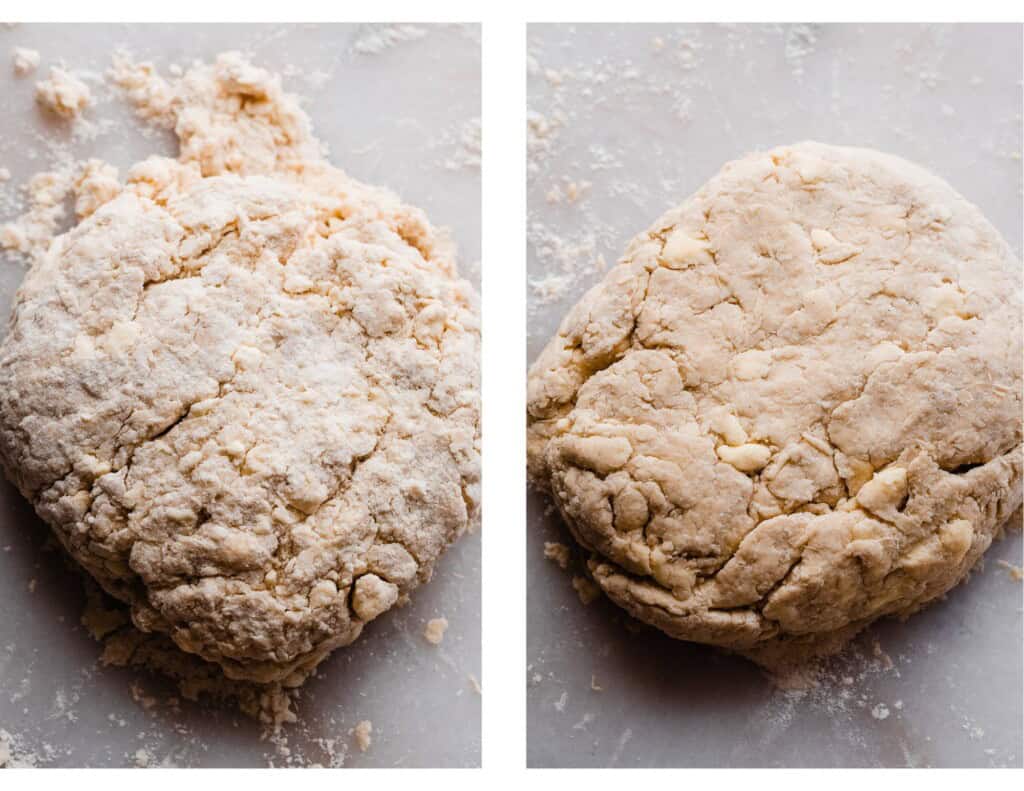
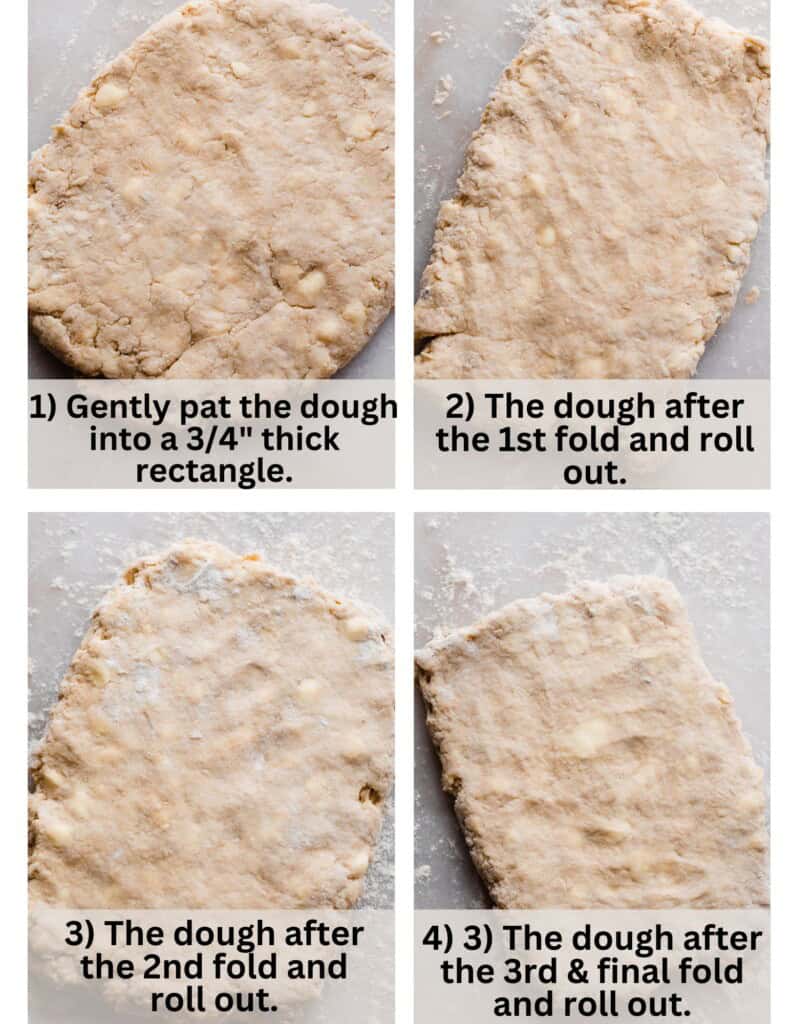
Step 3: Fold & Turn the Dough. Pat the dough into a rectangle 3/4″ thick. Fold it in thirds, like pictured below – as if you were folding a letter vertically. Rotate 90 degrees and pat it back to 3/4″ thick.
Repeat two more times, for a total of three folds & roll outs. Below is what the dough will look like after each fold, turn, and roll. This is the same method used in my Maple Biscuits and Blueberry Scones – it produces flaky layers!
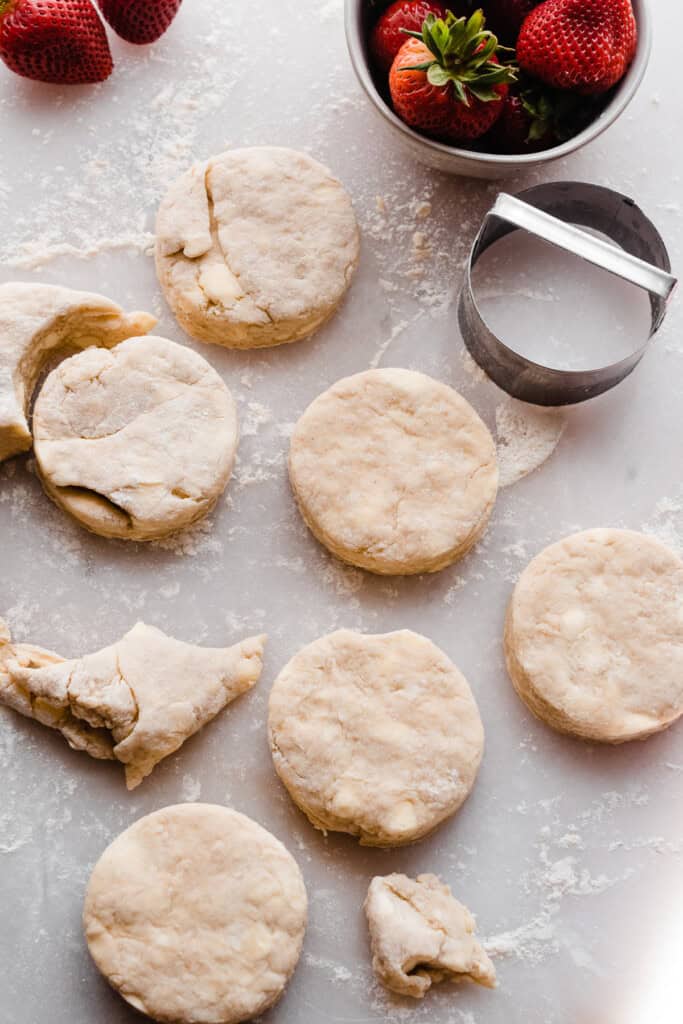
Step 4: Cut the Biscuits. Cut biscuits using a biscuit cutter or any round cutter about 3 inches in diameter. Do NOT twist your cutter! This seals off the edges of the biscuit, preventing them from rising as tall.
Step 5: Chill & Bake. Place the biscuits on a prepared baking sheet, and chill for 10 minutes. Place chilled biscuits in a greased 10-inch cast iron skillet, brush the tops with heavy cream and sprinkle on a little coarse sugar. Bake them until deeply golden brown!
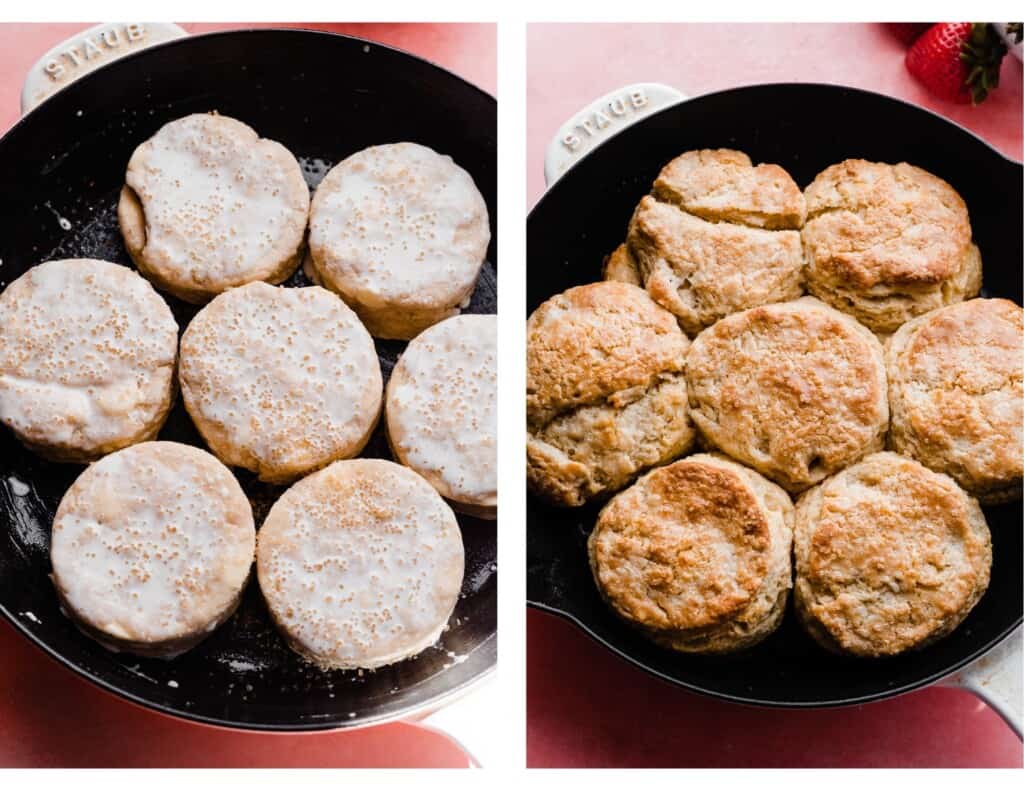
Look how beautiful those biscuits look! They’re so easy that I once made 3 batches in a row. They’re flaky, delicious, and just the right amount of sweet.
How to Make Homemade Whipped Cream:
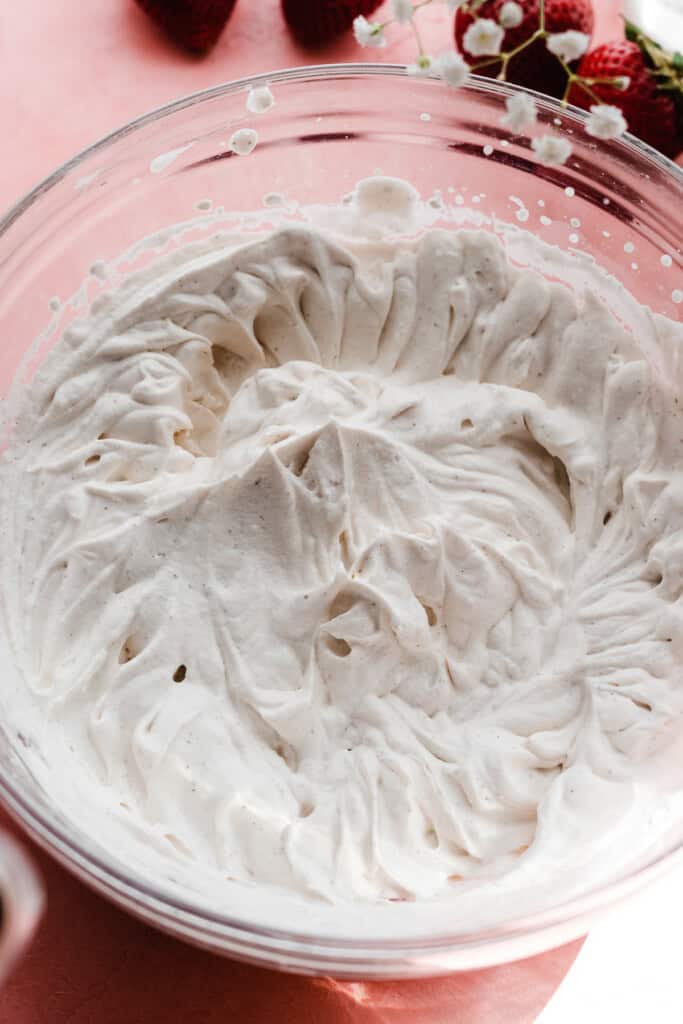
Step 1: Make the Whipped Cream. Make sure your heavy cream is nice and cold before you begin. Beat together powdered sugar, vanilla extract & heavy cream, on medium high speed until stiff peaks form.
Tip: You can make whipped cream with an electric mixer or in a stand mixer, fitted with the whisk attachment.
Serving + Storing Strawberry Shortcake:
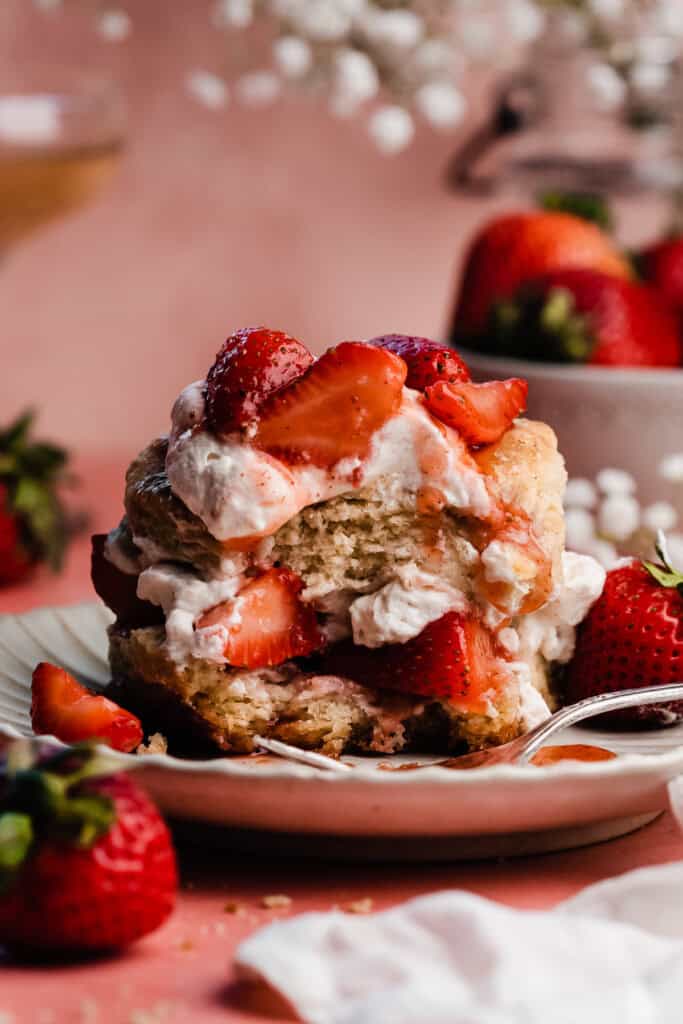
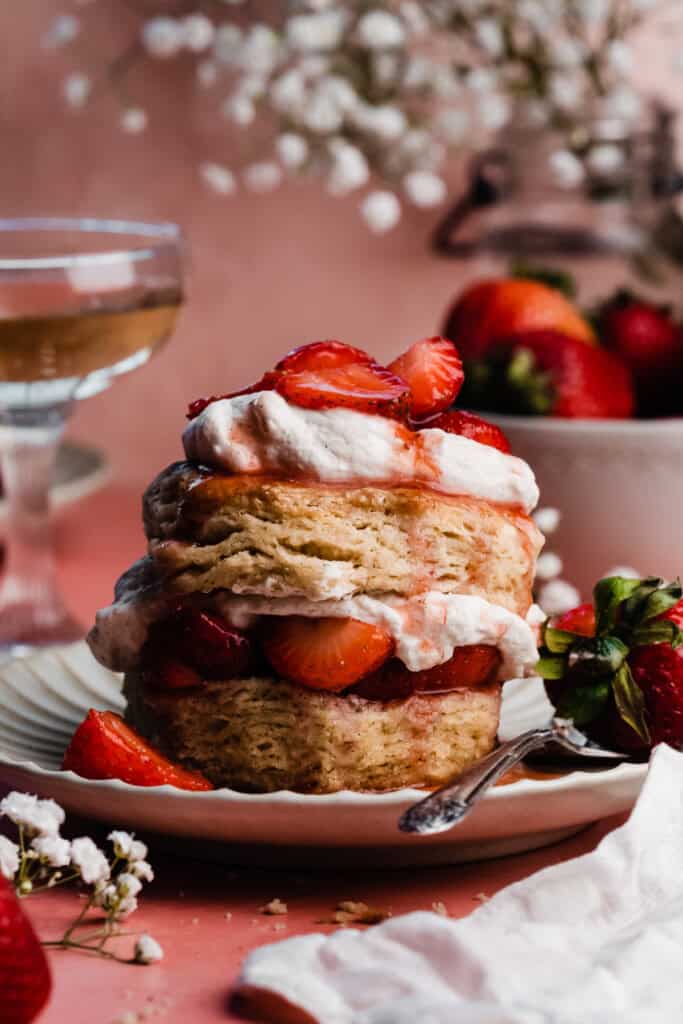
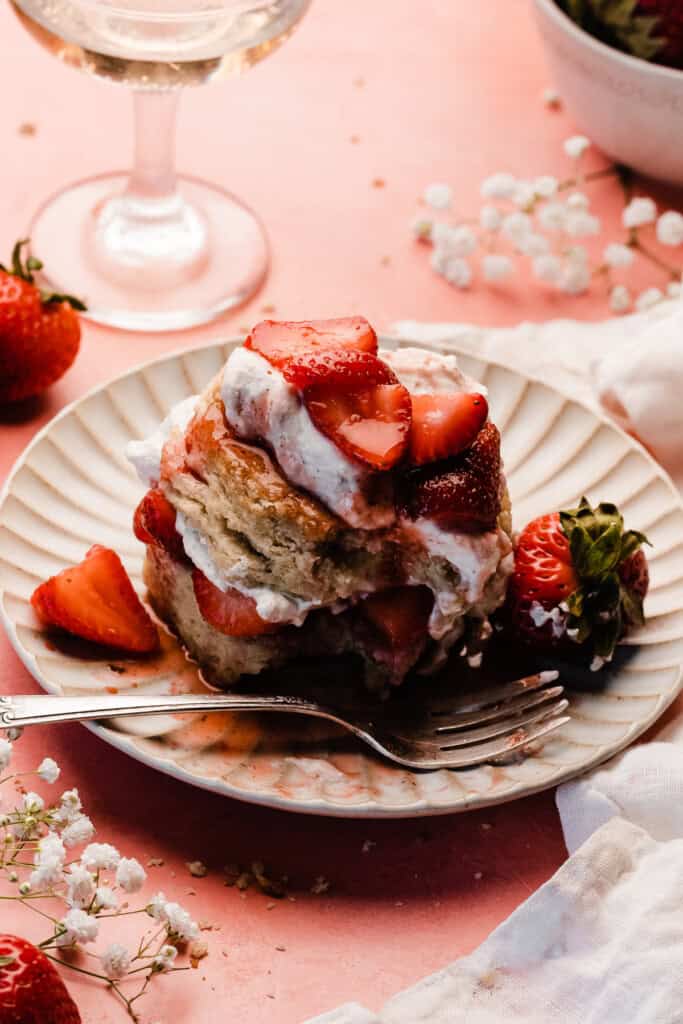
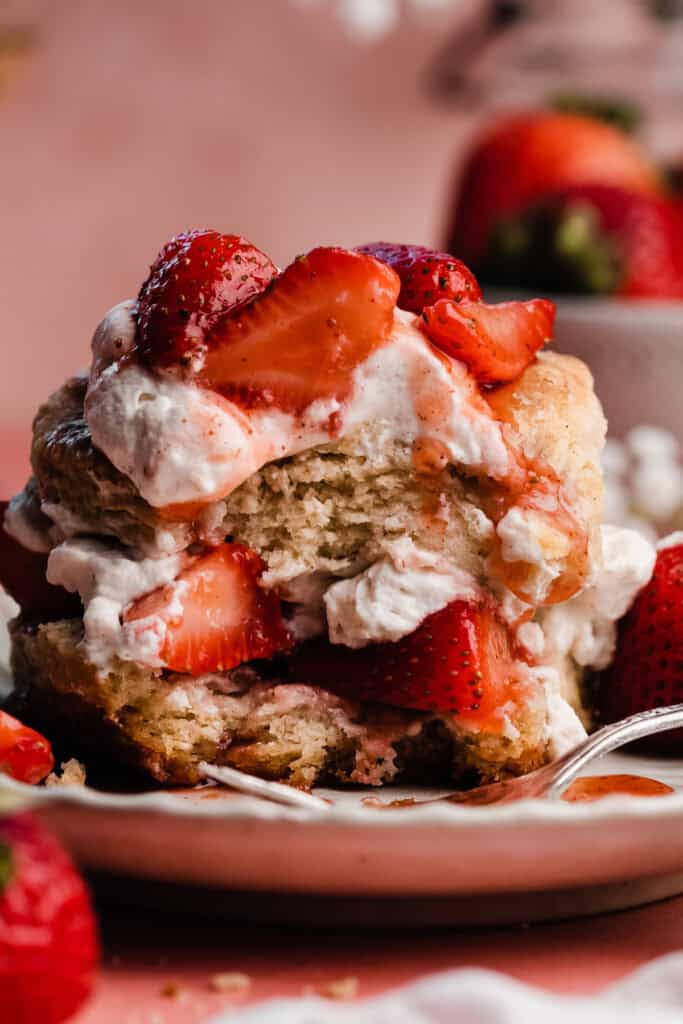
Once everything is ready, spoon the strawberries into your cooled and sliced biscuits, top with whipped cream and dive into strawberry heaven! You can even make this classic dessert into decadent double decker shortcakes (see photos) by adding an extra layer of strawberries & whipped cream to the biscuit lids.
Store the whipped cream and strawberries in individual containers in the fridge. The biscuits are absolutely at their best when fresh from the oven, on day 1. However, you can gently reheat biscuits in the oven on day 2. Store leftover biscuits in an airtight container at room temperature.
Expert Success Tips:
- Oven Thermometer – An oven thermometer will tell you if your oven is actually running at the temperature you set it to. Your oven may not be accurate. Accurate oven temperature is crucial for most bakes, so I leave an oven thermometer in at all times to keep an eye on my oven’s calibration.
- Kitchen Scale – A food scale is the best way to make sure your flour is at the proper weight, since amounts will vary SO widely based on how you measure it, as well as the measuring cup you use, as they are not standardized.
- Be Gentle – Handle the dough gently, and if it feels warm at any time, pop it in the fridge or freezer to keep the precious cold butter in tact! Cold butter going into a hot oven is what produces flaky layers.
- Whipped Cream – Remember that room temperature cream will not whip – your heavy cream must be cold, straight from the fridge.
- Don’t Over Mix – Stop mixing the whipped cream as soon as stiff peaks form. If you keep mixing past that point you might over whip the cream and ruin the smooth texture.
- Prevent Whipped Cream Splatters- Putting a kitchen towel over your mixer and your bowl while you beat the cream helps prevent splatters.
FAQs:
I do not recommend substituting for the buttermilk – nothing can replicate the rise and fluffy texture that buttermilk lends. However, if you are in an absolute pinch, you can add 1 tbsp of vinegar or lemon juice to a 1-cup measuring cup, then add milk until you reach the 1 cup line. Stir and let sit for 5 minutes before using. You will sacrifice some of the rise and fluffy texture, but your biscuits will still be delicious.
This is a classic strawberry shortcake recipe made with flaky biscuits. If you’d like to try a strawberry shortcake in layer cake form, check out my summery Berries & Cream Cake!
I haven’t tried refrigerating them overnight, and I don’t want to recommend that without trying it. However, I feel confident that you could freeze the cut out biscuits in an airtight container for up to 1 month or so before baking. Bake from frozen, adding 1-2 minutes as needed.
Special Tools:
- 10-Inch Cast Iron Skillet – I love my Staub cast iron skillet, but I also love this Lodge skillet (it’s a great budget friendly option!)
- Pastry Cutter – A pastry cutter makes cutting the butter into the dry ingredients a breeze!
Affiliate links above.
More Summer Dessert Recipes To Love:
- Strawberry Blueberry Pie
- Strawberry Rhubarb Crumble
- Classic Strawberry Cheesecake
- Strawberry Rhubarb Galette
- Summer Glory Skillet Crumble
- Strawberry Shortcake Icebox Cake
- Strawberry Bruschetta
Did you make this recipe? Leave a comment & star rating!
Click the little stars in the header of the recipe card below to leave a comment & star rating, letting me know how you liked the recipe. I take all feedback seriously, & leaving a rating helps my small business immensely!

Homemade Strawberry Shortcakes with Strawberries and Perfect Whipped Cream
Ingredients
Fresh Strawberries
- 5 cups fresh strawberries, hulled and quartered, 23 ounces or 652 grams
- 3 tbsp granulated sugar, 40 grams
- 1-2 tbsp strawberry jam, optional, Adds an extra juicy punch, but you can skip it if you don't have it on hand
For the Biscuits:
- 2 and 3/4 cups all-purpose flour, spooned & leveled or weighed out , 358 grams
- 1/4 cup + 2 tbsp granulated sugar, 79 grams
- 4 tsp baking powder
- 1/2 tsp baking soda
- 1/2 tsp salt
- 1/4 tsp cinnamon
- 3/4 cup salted butter, cubed & cold, 170 grams
- 1 cup cold buttermilk + 1-2 tsp extra, as needed, See note about substitutions, 240 mL, plus 1-2 tsp extra as needed
- 1-2 tbsp heavy cream, for brushing tops of biscuits, 15-30 grams
- coarse sugar, for sprinkling
Whipped Cream
- 1 and 1/4 cups cold heavy cream, 300 mL
- 3 tbsp powdered sugar, 24 grams
- 1 tbsp vanilla extract, or vanilla bean paste
Instructions
- Prep the Strawberries: Add the quartered strawberries, sugar, and jam (if using) to a medium bowl, and gently stir together with a rubber spatula so as not to mash the berries. Pop in the fridge while you prep everything else, so the strawberries have time to release their juices.5 cups fresh strawberries, hulled and quartered, 3 tbsp granulated sugar, 1-2 tbsp strawberry jam, optional
- Make the Biscuits: Whisk together the dry ingredients, including the sugar, in a large mixing bowl. Cut the cubed, cold butter into the flour with a pastry cutter, until you have flour-coated pieces of butter about the size of blueberries. Some will be a bit larger, and some a bit smaller. Add the buttermilk, and stir until a dough forms. Add 1-2 tsp extra buttermilk to moisten the dry crumbs that will inevitably be hiding in the bottom of the bowl. Your dough should be just hydrated – not dry, and not sticky. See photos in blog post above for reference. Dump the dough onto a floured counter and gently form into a ball that just holds together. With floured hands, gently flatten the dough into a rectangle about 3/4" thick. Fold the bottom 1/3 of the dough dough from the short side towards the center, then repeat with the top – like you're folding a letter into thirds. Rotate the dough so the short side is facing you again, and gently pat or roll back into a rectangle 3/4" thick. Flour the counter & dough lightly between turns as needed, to prevent sticking. Repeat this two more times, for a total of three rounds of folds and three turns. After the third fold and turn, pat or roll the dough out to 3/4" inch again. Cut biscuits from the dough using a 3" glass or a biscuit cutter – DO NOT twist the cutter when you cut them. This can prevent them from rising well in the oven. Gather the scraps and flatten again to cut a few more biscuits. Repeat until you have 7-8 biscuits. (The last biscuit will be a bit scraggly looking – it's pretty much just the scraps pushed together when I do it – not a true cut out biscuit, but it will taste just as good, and no reason to waste food!)Preheat your oven to 400℉. Pop the cut biscuits on a parchment lined baking sheet in the fridge to chill for at least 10 minutes (or up to overnight, in an airtight container) while the oven preheats. The butter in the dough must be cold going into the oven to create a good rise with beautiful flaky layers.2 and 3/4 cups all-purpose flour, spooned & leveled or weighed out , 1/4 cup + 2 tbsp granulated sugar, 4 tsp baking powder, 1/2 tsp baking soda, 1/2 tsp salt, 1/4 tsp cinnamon , 3/4 cup salted butter, cubed & cold, 1 cup cold buttermilk + 1-2 tsp extra, as needed
- Bake: Butter a 10-inch cast iron skillet generously. (If you have 8 biscuits, the 8th one will need to go on a separate baking sheet – 7 will fit perfectly into the skillet). Place your biscuits in the skillet. Brush the tops of the chilled biscuits with a little heavy cream and sprinkle a bit of coarse sugar on top. Bake for 20-24 minutes. The biscuits will be a light golden brown and will have risen nicely. You can carefully lift one open from the edge with a butter knife, to make sure it's baked through inside. Let the biscuits cool in the skillet on a wire rack for 10-15 minutes, then gently remove them to continue cooling on a rack.Note: You can also do this on a metal baking sheet if you don't have a cast iron pan. Just be sure the biscuits are all nestled together so the sides touch.coarse sugar, for sprinkling, 1-2 tbsp heavy cream, for brushing tops of biscuits
- Make the Whipped Cream: Make sure your heavy whipping cream has been thoroughly chilled before you start or the whipped cream will not turn out! Add the heavy cream, powdered sugar, and vanilla to a large mixing bowl and beat on high speed, stopping when stiff peaks form when you lift the beaters (turned off) out of the bowl. Don't keep mixing after that point or you may ruin the whipped cream. Tip: Cover your mixer and bowl with a kitchen towel to prevent heavy cream splatters.1 and 1/4 cups cold heavy cream, 3 tbsp powdered sugar, 1 tbsp vanilla extract
- Serve + Store: Slice the cooled biscuits in half, and fill with strawberries and whipped cream. Enjoy immediately! Store leftover biscuits, covered well, at room temp for a day or two, although this is something that's really best eaten the day of. Gently reheat biscuits in the oven (but really, please, just eat them while they're fresh from the oven!).Store leftover whipped cream and strawberries in containers in the fridge for 2-3 days.
Notes
Nutrition
Nutrition information is automatically calculated, so should only be used as an approximation.

That looks like a great dessert! I never roasted strawberries and wonder how they taste, I will have to try your recipe.