This post contains affiliate links. Please see our disclosure policy.
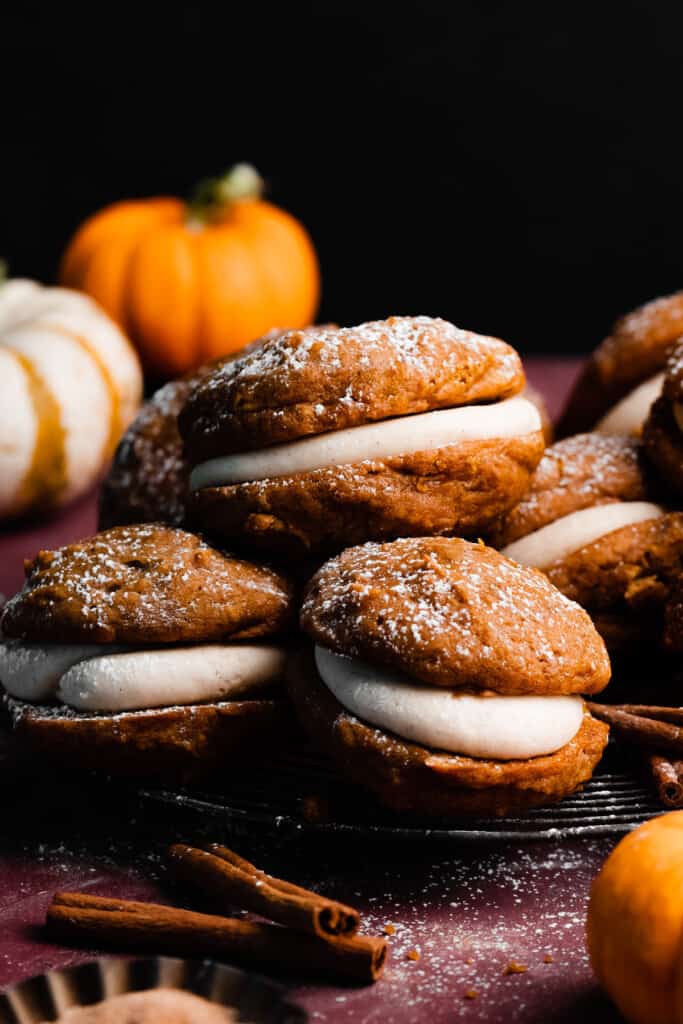
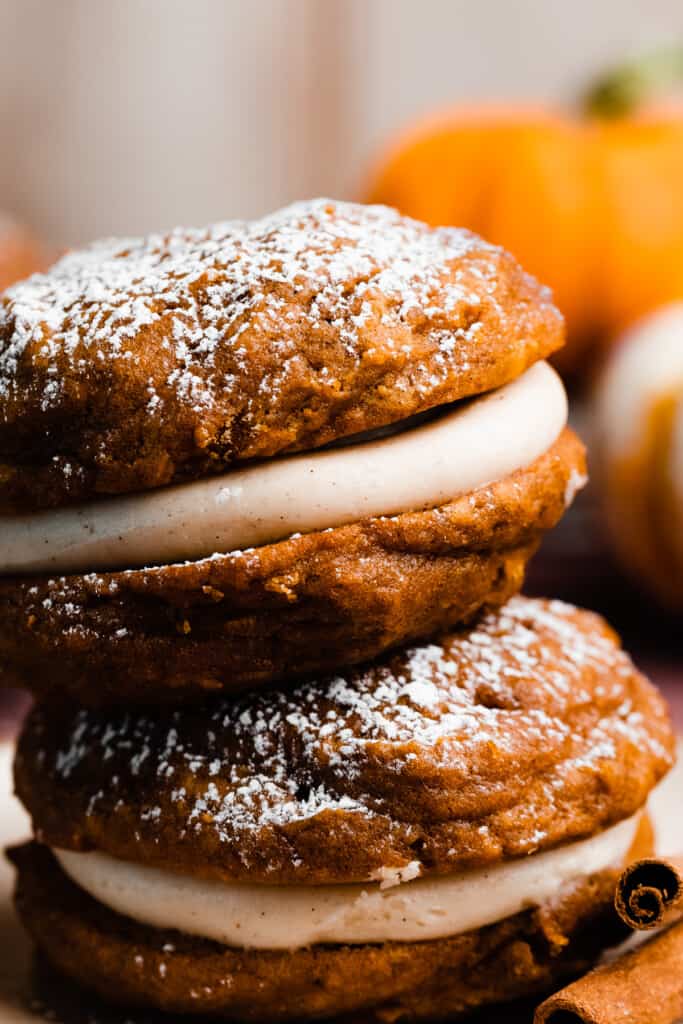
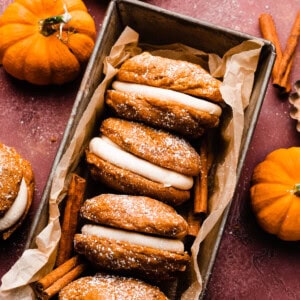
Pumpkin Whoopie Pies are pillowy soft and made with a whole can of pumpkin and plenty of cozy pumpkin spice. They’re sandwiched around a silky brown butter cream cheese frosting and topped with a flurry of powdered sugar. Serve these pumpkin treats at a Halloween party or Thanksgiving!

It’s the time of year for all things pumpkin, and I’m calling it now – these are sure to be one of your new favorite treats! They’re oh-so-easy to make, a huge crowd-pleaser, and they even use a whole can of pumpkin. Let’s dive in!
Why you’ll love Pumpkin Whoopie Pies:
- Pillowy Soft Cakes – Pillowy soft whoopie pies are ultra moist and fluffy, and stay that way for days!
- Packed with Pumpkin – This recipe uses a whole can of pumpkin, and plenty of pumpkin spice for tons of flavor!
- Brown Butter Cream Cheese Frosting – A luscious brown butter cream cheese frosting with a hint of cinnamon perfectly compliments these pillowy whoopie pies! Good luck not eating it by the spoonful, hehe.
Ingredient Overview:
As always, the full recipe with measurements & directions can be found at the bottom of this post.
- All-purpose flour – Spoon your flour into the measuring cup, then level it with a flat utensil for best results, or use a scale. Scooping the measuring cup directly into your flour will lead to too much flour, and a potentially dry bake.
- Butter – I always use salted buter for the best flavor, but feel free to use unsalted butter if you prefer.
- Eggs – Use large eggs, at room temperature.
- Pumpkin – Be sure to use pumpkin puree, not pumpkin pie filling. This also comes in a can but has other ingredients added.
- Cream Cheese – Use full fat cream cheese for best results.
- Cozy Spices – These are packed full of pumpkin pie spice – cinnamon, ginger, cloves, and nutmeg. The spices beautifully enhance the pumpkin flavor!
Recipe Variations:
- Dairy-free – Use your favorite, trusted dairy-free butter and cream cheese to make this recipe dairy-free.
- Brown Butter – You can skip the brown butter in a pinch, although it is incredibly delicious!
- Salted Caramel – These would be extra delicious with 1/4 cup of my salted caramel sauce recipe mixed into the frosting and/or with extra caramel sauce drizzled on top. It compliments the fall flavors so well!
- Chocolate Chips – If you want to add chocolate chips to these, I think the best way would be to plop a handful on top of each of the portioned out blobs of batter, rather than mixing them into the batter.
How to Make Pumpkin Whoopie Pies:
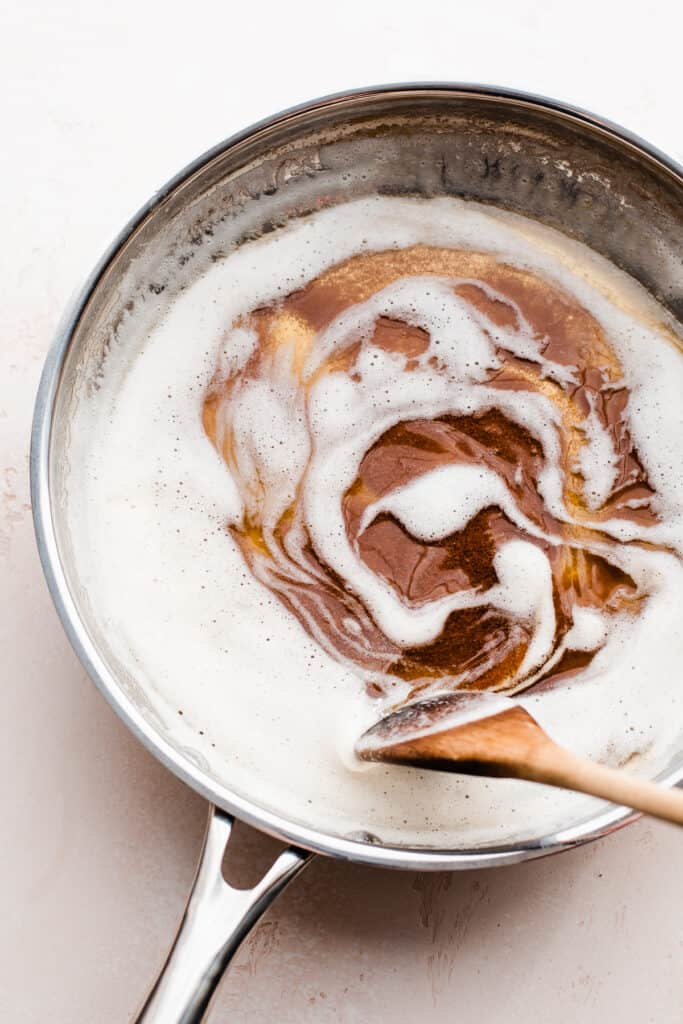
Step 1: Brown the Butter. Melt the butter in a medium saucepan over medium heat. Then, continue cooking it, stirring occasionally, until it’s deeply golden brown with a rich, nutty aroma. Pour into a separate bowl to to cool (this is for the frosting).
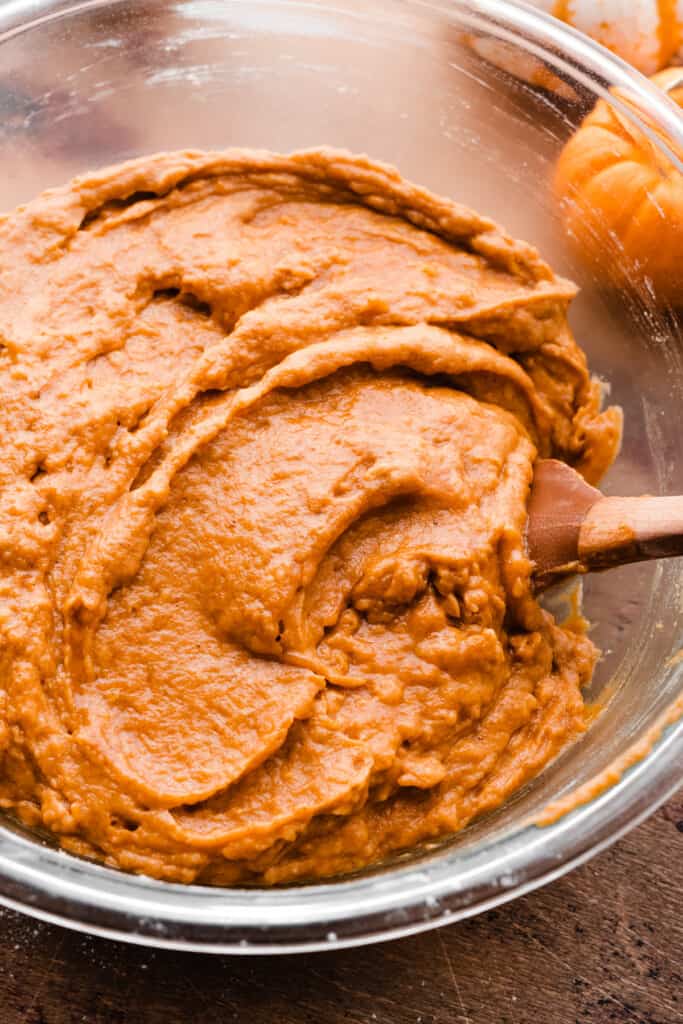
Step 2: Make the Whoopie Pie Batter. Whisk together melted butter, oil, eggs, pumpkin, and the sugars in a large bowl. Fold in the dry ingredients, scraping the bowl well. The batter will be slightly thick and a bit lumpy.
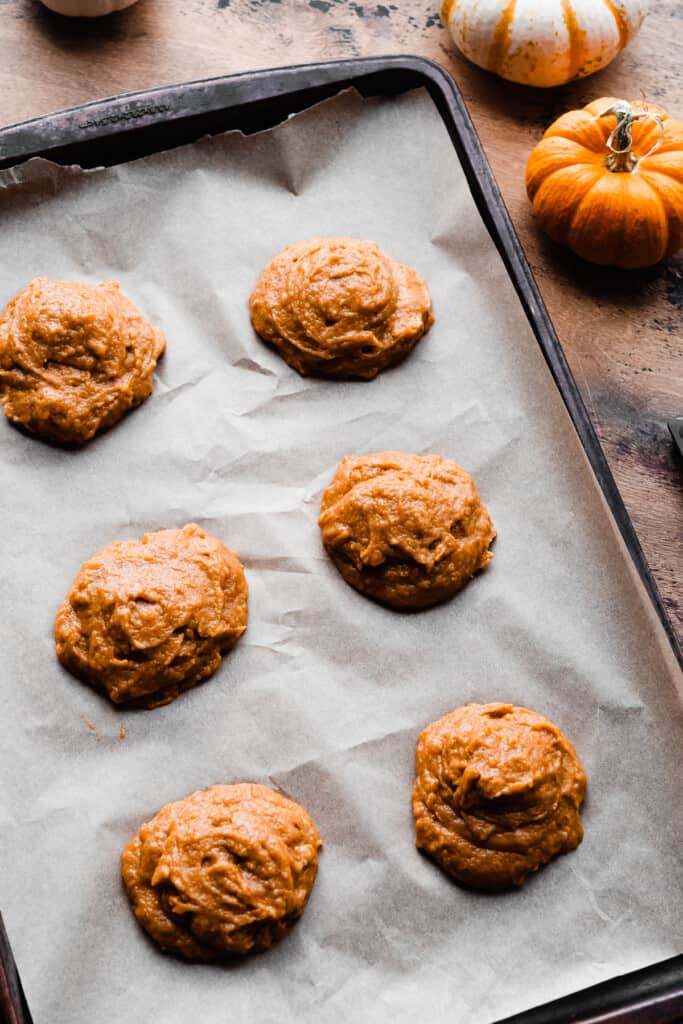
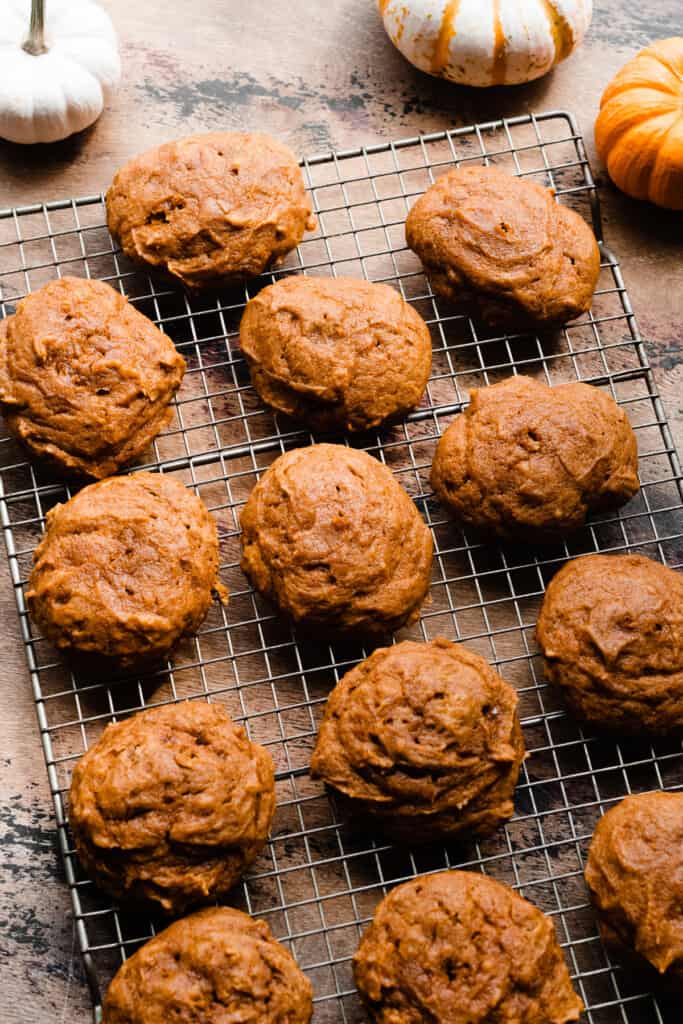
Step 3: Dollop Batter onto Baking Sheet. Drop two tablespoon size dollops of batter onto a cookie sheet lined with parchment paper.
Step 4: Bake. Bake as directed in the recipe card below for best results. A toothpick inserted into the center of the whoopie pies will pull out some moist crumbs, not wet batter.
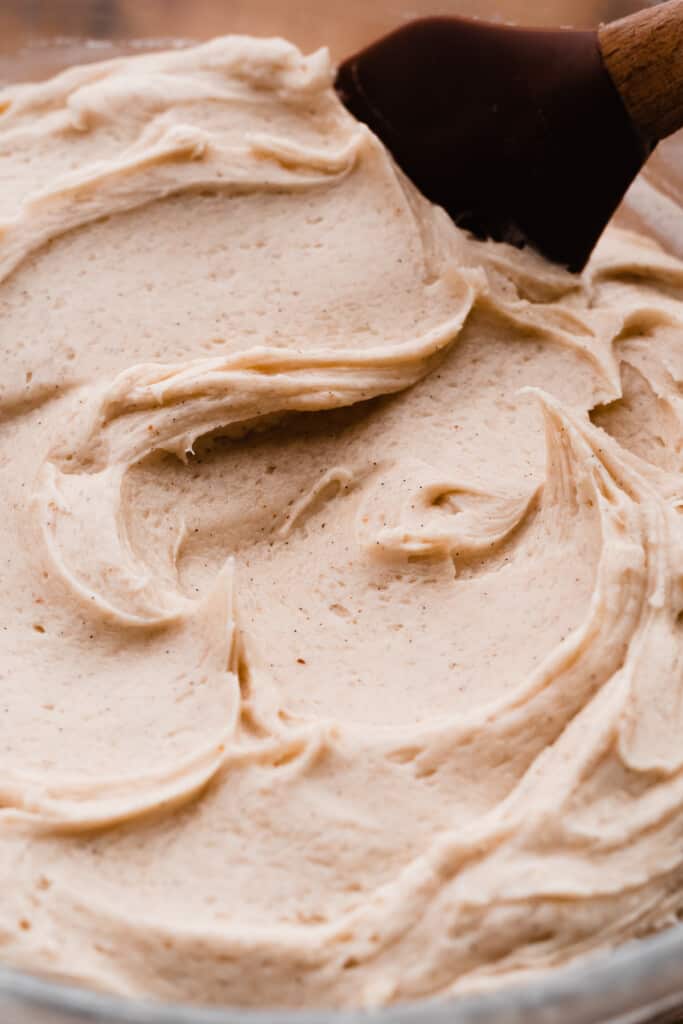
Step 5: Make the Brown Butter Cream Cheese Filling. In a medium bowl, beat together the brown butter and cream cheese. This will look curdled at first but it will smooth out after a few minutes. Mix in the powdered sugar, vanilla, salt, and cinnamon.
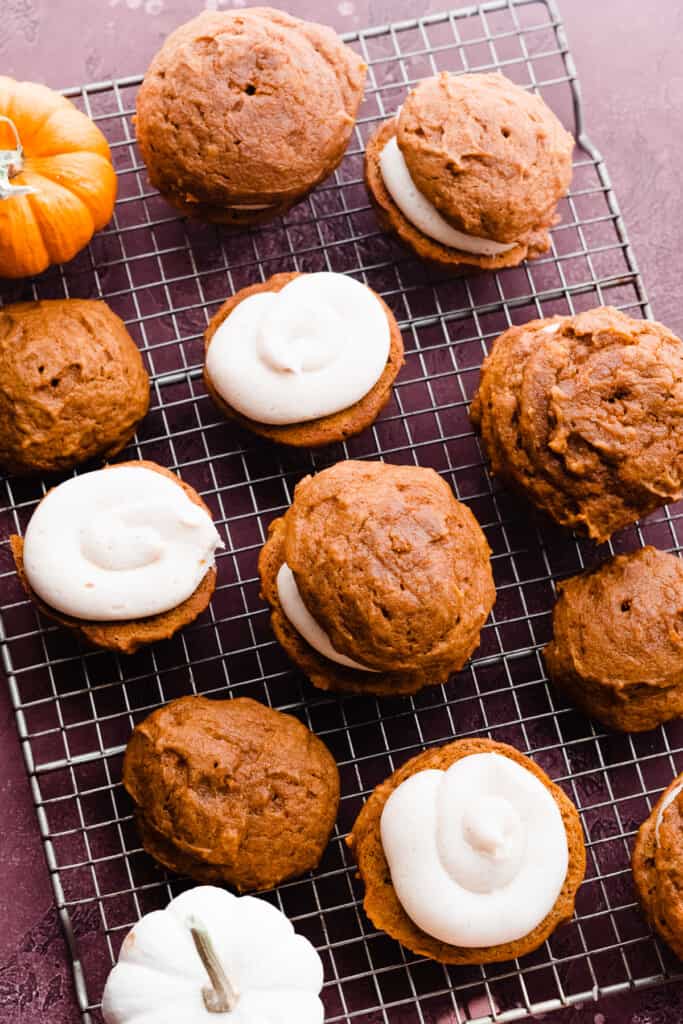
Step 6: Frost the Pies. Use a piping bag fitted with a round tip (I used a Wilton 1A piping tip) to pipe a swirl of frosting onto half the cakes, then pop the tops on. You can also use a ziploc bag with the tip snipped off.
Serving + Storing:
Enjoy once frosted! Store these whoopie pies in an airtight container in the fridge for 3-4 days. They do need to be refrigerated because of the cream cheese in the frosting.
Use up the rest of your canned pumpkin (you’ll have to use 1 and 1/2 cans roughly for this recipe) in my Pumpkin Snickerdoodles or my Gooey Pumpkin Cinnamon Rolls!

Expert Success Tips:
- Cooled Brown Butter – Be sure your brown butter is cooled to room temperature before making the frosting. If it’s warm, your frosting will be melty.
- Oven Thermometer – An oven thermometer will tell you if your oven is actually running at the temperature you set it to. Your oven may not be accurate. Accurate oven temperature is crucial for most bakes, so I leave an oven thermometer in at all times to keep an eye on my oven’s calibration.
- Kitchen Scale – A food scale is the best way to make sure your flour is at the proper weight, since amounts will vary SO widely based on how you measure it, as well as the measuring cup you use, as they are not standardized.
FAQs:
A whoopie pie is essentially a fluffy, moist piece of cake baked in the shape of a cookie. Two are sandwiched together with frosting as the filling to make a whoopie pie. They may have been invented in Maine (or at least, in New England). So, call them pumpkin cookies, pumpkin cakes, sandwich cookies, or pumpkin whoopie pies – up to you.
Yes you can! A double batch will be quite large, so make sure to use a very large mixing bowl.
Yes! Make the whoopie pies, and let them cool completely. Store in an airtight container at room temperature for up to 24 hours before frosting and serving. You can also make the frosting up to 24 hours ahead. Cover with plastic wrap and store in the fridge. Let come to room temperature for 10-15 minutes before using, and beat with your electric mixer to get it spreadable again.
Your butter was likely warm or you mixed the frosting for too long, or your house just runs warm. Pop the frosting in the fridge or freezer at any time to help firm it back up to a nice spreadable consistency. It can take anywhere from 10-60 minutes to firm up, depending on how melty it got. If it gets overly firm and you can’t spread it, just mix it with your mixer again and it will become creamy.

Special Tools:
- Cookie Scoop – Use a 1 tablespoon cookie scoop to dollop your batter. (This one says it technically holds 4 teaspoons, but it’s the one I always use.)
- Mixing Bowls – I love my set of glass mixing bowls for all things baking!
More Pumpkin Recipes to Love:
- Pumpkin Streusel Muffins with Maple Glaze
- Pumpkin Snickerdoodles with Rum Caramel
- Pumpkin Cupcakes with Brown Butter Cream Cheese Frosting
- Fluffy Pumpkin Pancakes
- Mom’s Best Ever Pumpkin Bread
- Pumpkin Pasties with Maple Glaze
Did you make this recipe? Leave a comment & star rating!
Click the little stars in the header of the recipe card below to leave a comment & star rating, letting me know how you liked the recipe. I take all feedback seriously, & leaving a rating helps my small business immensely!
Pumpkin Whoopie Pies with Brown Butter Cream Cheese Frosting
Ingredients
For the Whoopie Pies
- 1/4 cup salted butter, melted, 57 grams
- 3/4 cup vegetable oil, 166 mL
- 2 cups brown sugar, packed, 440 grams
- 3 tbsp granulated sugar, 39 grams
- 2 large eggs, at room temperature
- 2 and 3/4 cups canned pumpkin, Do not use canned pumpkin pie filling – 660 grams
- 2 tsp vanilla extract
- 3 cups all-purpose flour, spooned & leveled or weighed, 390 grams
- 1/2 tsp salt
- 1 tsp baking powder
- 1 tsp baking soda
- 2 and 1/4 tsp cinnamon
- 1 and 1/4 tsp ginger
- 1 tsp nutmeg
- 1/2 tsp ground cloves
Brown Butter Cream Cheese Frosting
- 1/2 cup + 1 tbsp salted butter, 127 grams
- 6 oz cream cheese, This only needs 5 mins or so at room temperature – 170 grams
- 3 cups powdered sugar, adjust to taste, 360 grams
- 1/4 tsp cinnamon
- 1 tbsp maple syrup
- 1 tsp vanilla extract
Instructions
- Brown the Butter for the Frosting. In a medium saucepan over medium heat, melt the butter. Turn the heat to medium-low and continue cooking the butter – stirring lazily. The butter will get foamy, then turn golden, then start to turn brown and develop a nutty/caramely sort of aroma. Once it reaches a deep golden color, pour into a heat safe container and pop into the fridge to cool down to room temperature. Make-Ahead Tip: This can be made up to 2 weeks ahead and stored in the fridge until ready to use.1/2 cup + 1 tbsp salted butter
- Prep: Preheat oven to 350℉. Line a few large baking sheets with parchment paper.
- Make the Whoopie Pies: Melt the butter in a large mixing bowl. Whisk in the oil, then the sugars. Add eggs, pumpkin, and vanilla and whisk until well combined and smooth. Add the dry ingredients and fold in with a silicone spatula until just incorporated. The batter will be a tad lumpy and slightly thick. Don't over mix!1/4 cup salted butter, melted, 3/4 cup vegetable oil, 2 cups brown sugar, packed, 3 tbsp granulated sugar, 2 large eggs, at room temperature , 2 and 3/4 cups canned pumpkin, 2 tsp vanilla extract, 3 cups all-purpose flour, spooned & leveled or weighed, 1/2 tsp salt, 1 tsp baking powder, 1 tsp baking soda, 2 and 1/4 tsp cinnamon, 1 and 1/4 tsp ginger, 1 tsp nutmeg, 1/2 tsp ground cloves
- Bake: Drop 2 tablespoons of batter onto the prepared baking sheet for each whoopie pie. Try to keep the batter in a little mound. Bake for 12-13 minutes. A toothpick inserted into the center will pull out some moist crumbs when done.Let them cool on the baking sheet placed on a wire rack for a few minutes, then transfer to a cooling rack to cool completely before frosting & assembling.
- Make the Frosting: Once the butter has cooled, beat it together with the softened cream cheese in a medium mixing bowl. It will seem lumpy at first but just keep mixing until it smooths out. Mix in the powdered sugar in two additions. Add the maple syrup, milk, and cinnamon and mix until well combined. Taste and adjust as desired.6 oz cream cheese, 3 cups powdered sugar, adjust to taste, 1/4 tsp cinnamon, 1 tbsp maple syrup, 1 tsp vanilla extract
- Assemble: Use an offset spatula or a piping bag fitted with a 1A round tip (or ziploc bag with the tip snipped off) to frost your pies. Frost one whoopie pie piece and add a second one on top to assemble your whoopie pies! Dust with a little powdered sugar before serving, if desired. Tip: Don't try to use a piping tip in a plastic bag – no matter what, the pressure of squeezing the bag will always make the tip shoot out.
- Serve & Store: Enjoy immediately once frosted! Store leftovers in an airtight container in the fridge for up to 4 days.
Nutrition
Nutrition information is automatically calculated, so should only be used as an approximation.


3 cups of flour is not 190 grams should be 360 grams.
Thanks for catching that typo, Scott! I’ve fixed that in the recipe card. Let me know how you like the recipe!
Loved this recipe. Turned out so well! Thank you
So glad to hear you enjoyed this recipe, Kim!
Making this recipe. Frosting instructions have milk listed but ingredients list doesn’t have milk included. Help please.
Hi Tami! Sorry about that – just add 1-2 tbsp of milk as needed to help the powdered sugar mix into the frosting. Let me know how you like the recipe!
Thank you for your response! I made them today and they were perfect and delicious without milk! Thank you so much for sharing the recipe!
Thanks so much for taking the time to leave a review, Tammie!
I want to make these, just a little confused about ingredient list. It gives 2 different flours w/ 2 different measurements for batter. Which do you use
Hi! The recipe calls for 2 different types of flour which is why flour is listed 2 times with different measurements. You can combine the amounts and use all all-purpose flour instead. Let me know how you like the recipe!
These look so good and I will be making them! Wondering how many cookies one batch makes? Thank you!
Hi Rebecca! It makes 16 whoopie pies. I just had my website re-designed and it looks like the recipe yield isn’t as obviously visible in the recipe card area anymore. I’ll try to get that adjusted so it’s more clearly visible again! Let me know how you like the recipe!
In ur recipe for your pumpkin whoopie pies u have flour listed twice , why is it listed twice , plz email me i want to make these like now , also i didn’t see any pumpkin spice even though u have the other spices i always add a little it just gives it r hat extra special taste
Plz let me know bout the 2 listings of flour
Thank You
Betty
Hi Betty! I originally used two different types of flour (white whole wheat and all-purpose) but have since changed the recipe to use only all-purpose flour since it was causing some confusion. Also, all the individual spices I used are what make up the pumpkin spice blends you see sold in stores. I prefer to measure each spice individually to have more control over the flavor. So, there’s no need to add pumpkin spice to this recipe as it’s already there with the quantities of each individual spice called for. Let me know how you like the recipe!
These were absurdly good. The cookies are unbelievably soft / moist, and the frosting is decadently rich and browned butter-y. Made these on a whim for a barbeque and legitimately every single person there came up to me at some point to comment on them. Next time around, I’ll add even more of the various spices to the cookies to help balance the sweetness of the frosting.
So glad you enjoyed these, Carmen! 😀
This was absolutely delicious and moist as a cake version!
So glad to hear you enjoyed this recipe, Trinity! Did you bake the batter in a 9×13 pan for the cake?
Hi! Can these be assembled and frozen ?
Hi Jessica! I think that would be fine, I just haven’t personally done it. I would wrap each one individually in plastic wrap and then seal them well in a ziploc bag(s). Thaw in the fridge overnight. Let me know how you like the recipe!
These are one of the best things I’ve ever eaten, and easy to prepare too. I tripled the recipe for a crowd and everyone loved them. Definitely a family favorite I will make again and again!
Thanks so much for the rave review, Gayle! Happy baking.