This post contains affiliate links. Please see our disclosure policy.
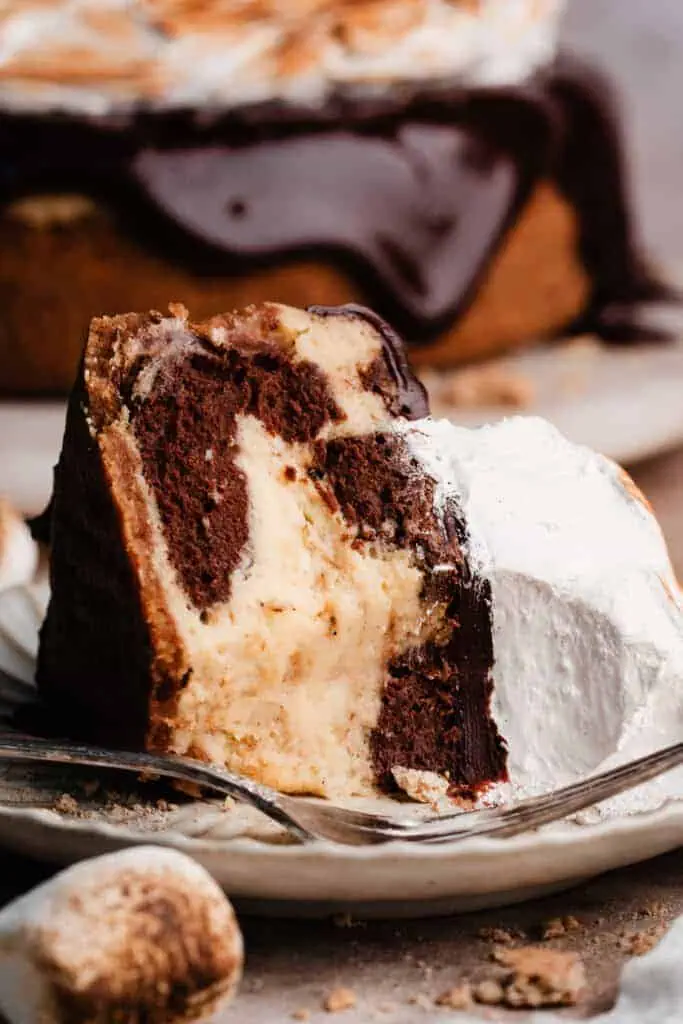
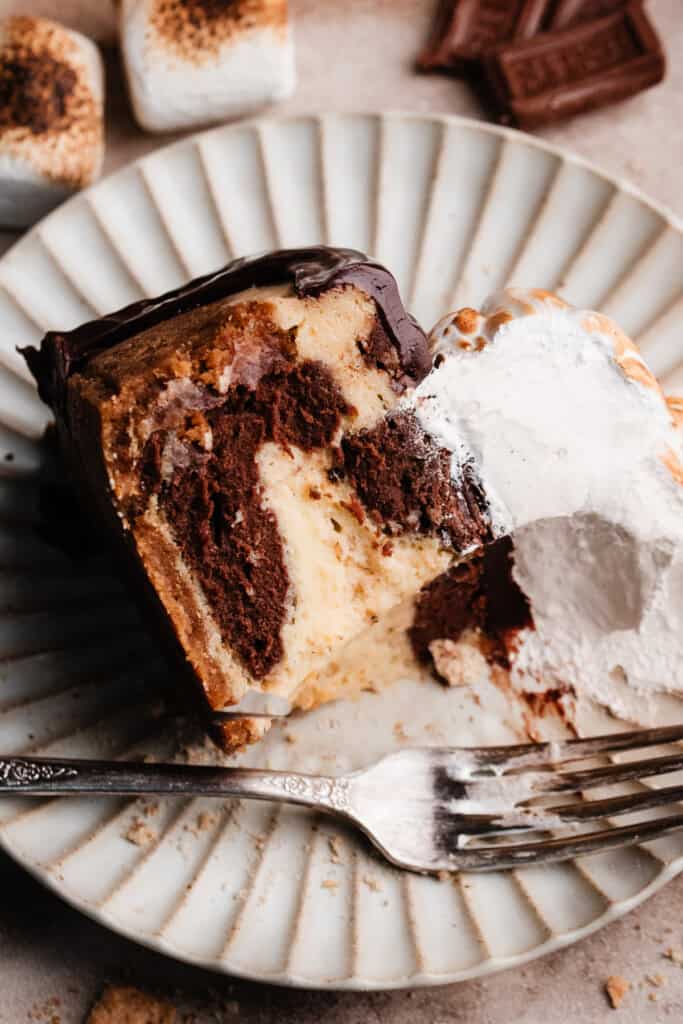
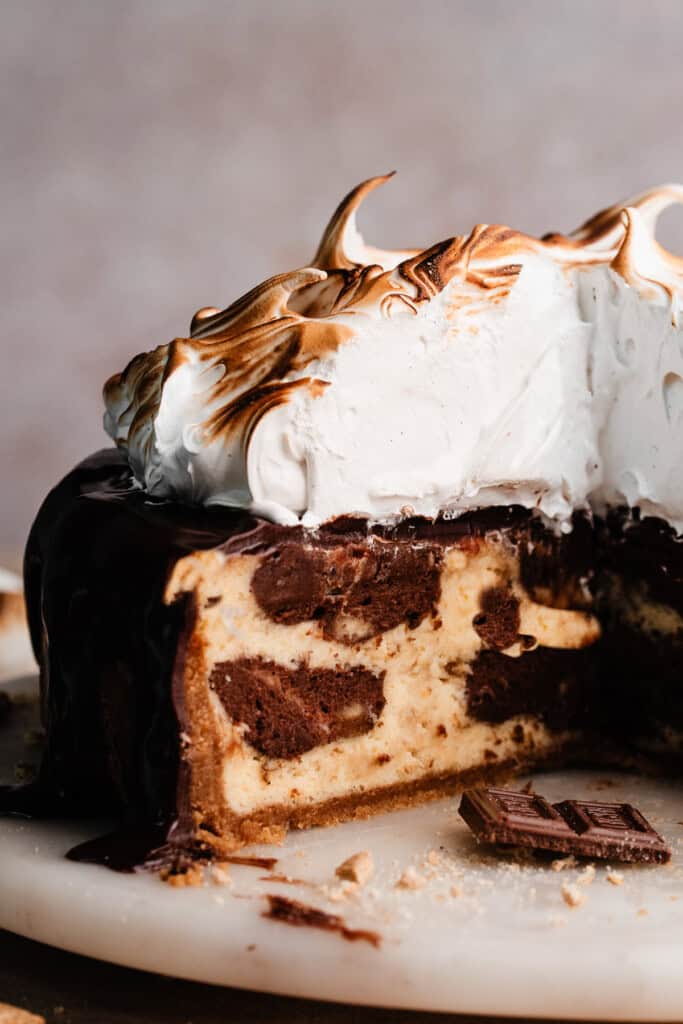
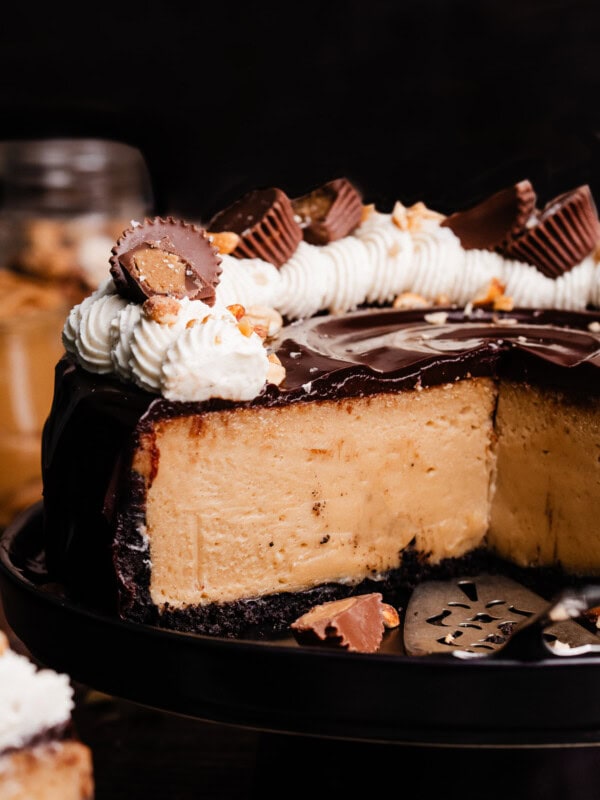
S’mores Cheesecake with Toasted Marshmallow Meringue tastes like summer in a dessert! Toasted marshmallow and silky chocolate cheesecake batters are swirled together atop a crisp graham cracker crust, and is topped off with a toasted marshmallow meringue. You’ll feel like you’re sitting around the campfire!


Fun fact: It took me two summers to test this recipe! I started it last summer, then finished perfecting it this summer.
Sometimes that happens with recipe testing – because I never want to publish a recipe that isn’t perfectly ready for you!
Baker’s Tip: Use up your leftover marshmallows in my S’mores Milkshake!
Table of Contents
Why you’ll love this S’mores Cheesecake:
- Toasted Marshmallow & Chocolate Cheesecake Batters – The batter gets divided and flavored partly with toasted marshmallows and partly with chocolate, for a complete s’mores experience!
- Graham Cracker Crust – The cheesecake is baked on a crisp graham crust.
- Toasted Marshmallow Topping – Homemade marshmallow topping is the final step – toasted, of course!
Ingredient Overview:
As always, the full recipe with measurements & directions can be found in the recipe card at the bottom of this post. Use the table of contents (back at the top, below the first image, to navigate).
- Cream Cheese – Use full fat cream cheese, in the block style. This needs to come to room temperature before you bake.
- Granulated Sugar – We’re using just enough sugar to sweeten the cheesecake, while still keeping the classic, slightly tangy, cream cheese flavor at the forefront.
- Eggs – Use large eggs, at room temperature.
- Sour Cream – Use full fat sour cream, at room temperature.
- Corn Starch – Just a hint of corn starch helps the cheesecake hold its shape, while staying super creamy.
- Vanilla Extract – Use real vanilla extract for best results.
- Salt – A tiny pinch of salt always balances the flavors in any baked good!
Recipe Substitutions & Variations:
- Gluten-free – Use gluten-free graham crackers to make this recipe gluten-free!
- Graham Crackers – I think digestive biscuits or something similar would be the comparable option to graham crackers if you don’t live in the U.S.
How to Make this S’mores Cheesecake Recipe:
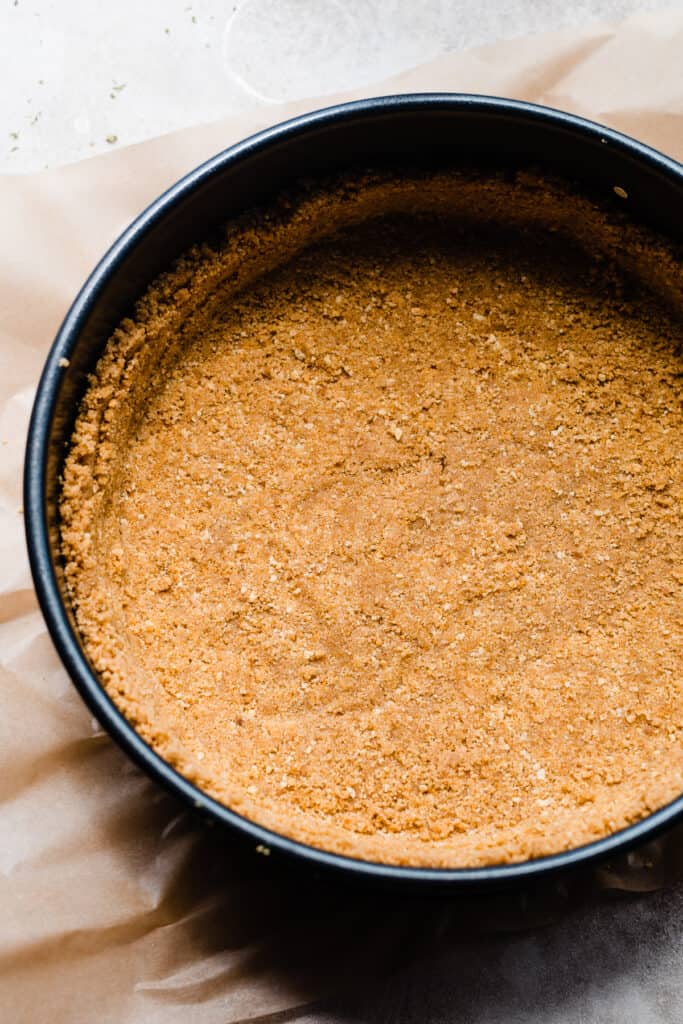
Step 1: Make & Bake the Crust. Stir together melted butter & graham cracker crumbs. Press into a 9-inch springform pan and bake at 350 for 10 minutes.
Step 2: Make the Cheesecake Batter. Beat the cream cheese until creamy. Add the granulated sugar and beat for 1-2 minutes, scraping the bowl to ensure no lumps. Beat in the eggs, one at a time, until just combined.
Mix in the sour cream, corn starch, vanilla, and salt. Divide the batter into two portions.

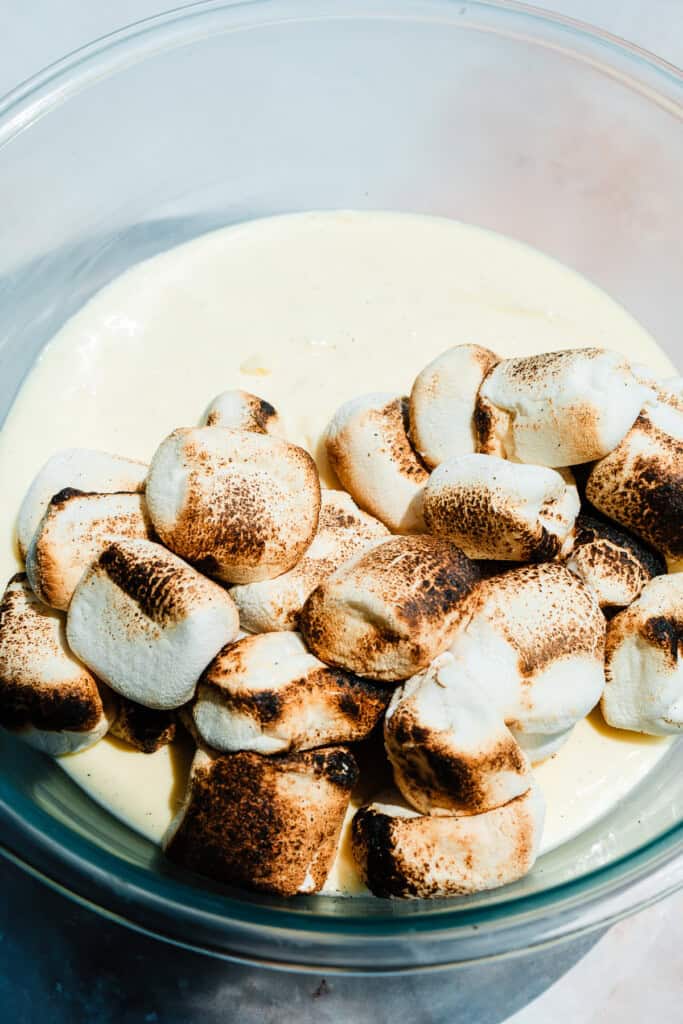
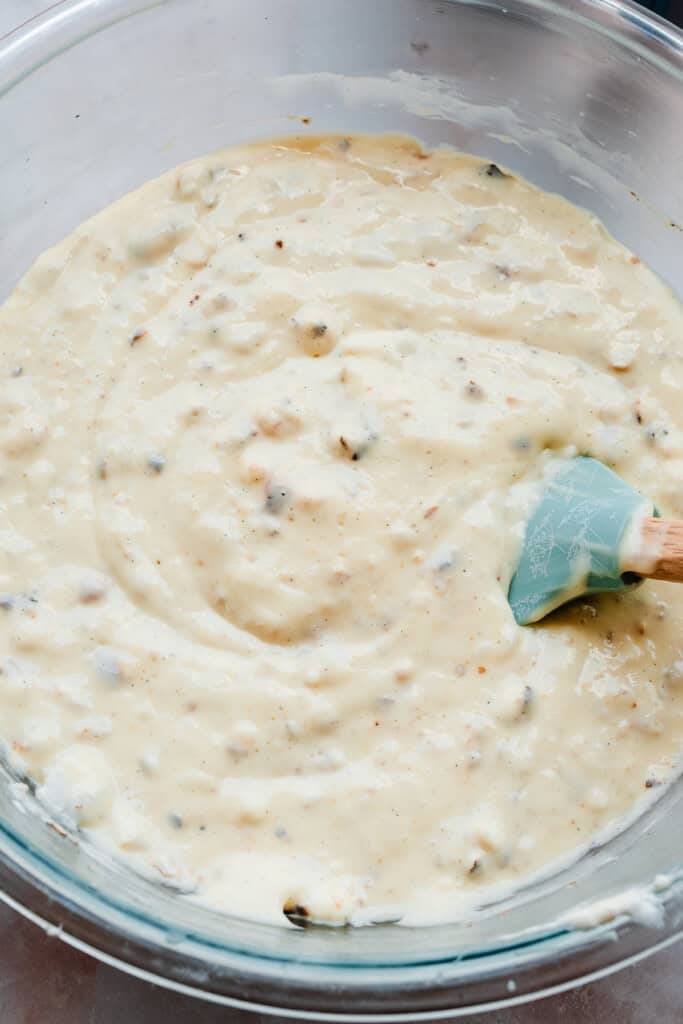
Step 3: Toast Marshmallows & Add to Batter. Toast marshmallows under the oven broiler or with a blow torch. Beat into one portion of the batter.
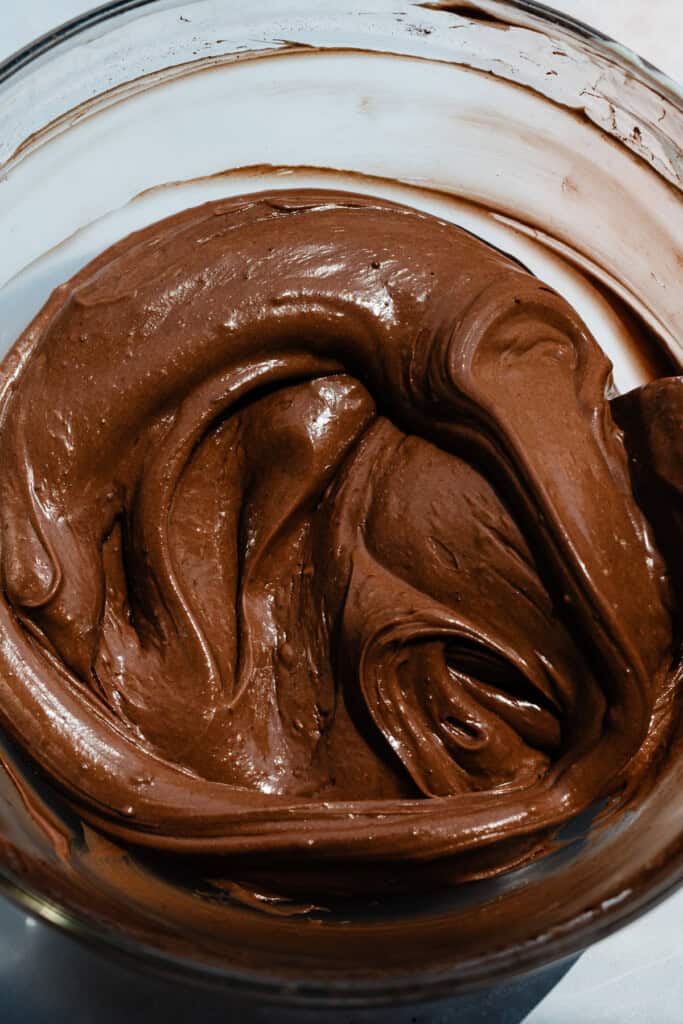
Step 4: Make the Chocolate Batter. Mix melted chocolate and cocoa powder into the other portion of batter.
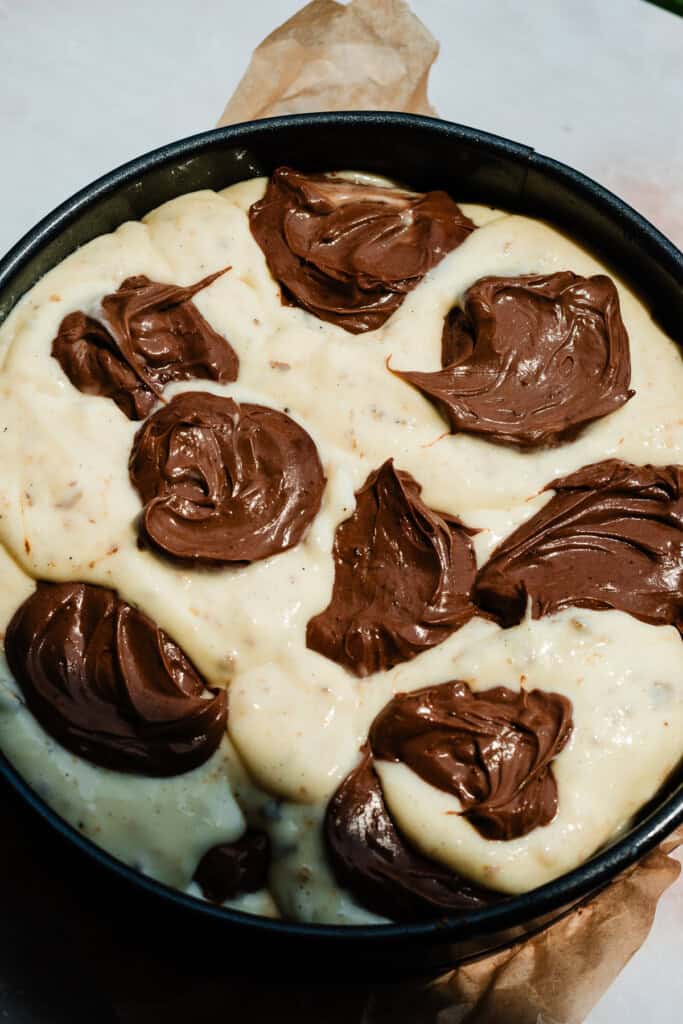
Step 5: Assemble & Bake. Alternate adding spoonfuls of each of the two batters into your crust. Swirl the batters with a butter knife (I forgot to get a photo of this, sorry!).
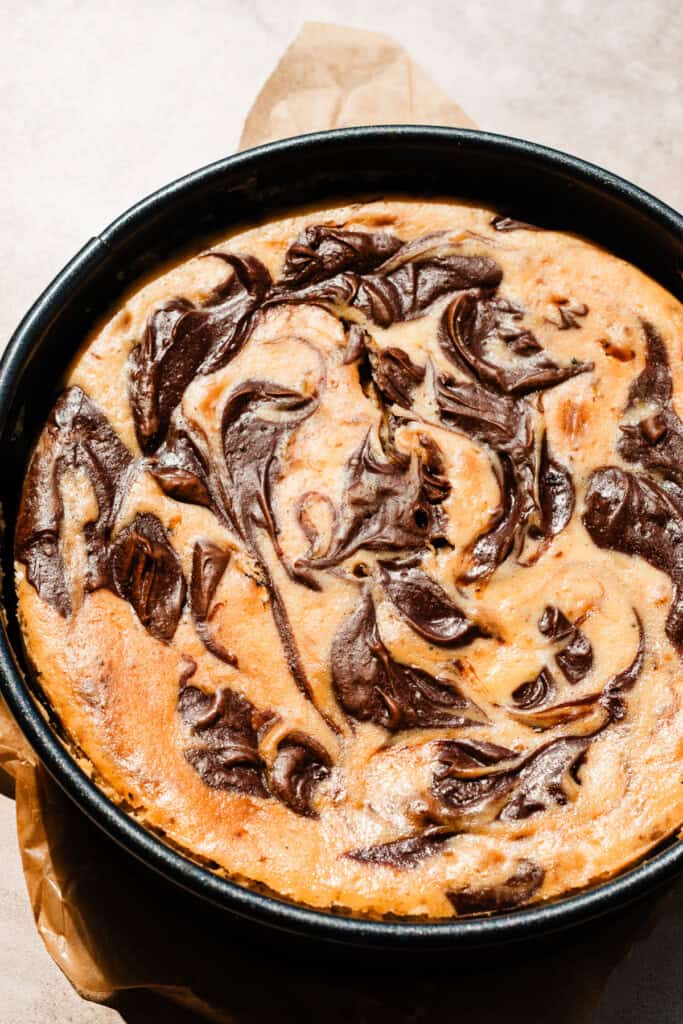
Bake as directed in the recipe card below.
Step 6: Cool & Chill Cheesecake. Once baked, turn the oven off and leave the cheesecake in with the door open for one hour. Then cool on a rack until the cheesecake is just warm. Refrigerate for at least 6 hours or ideally overnight.
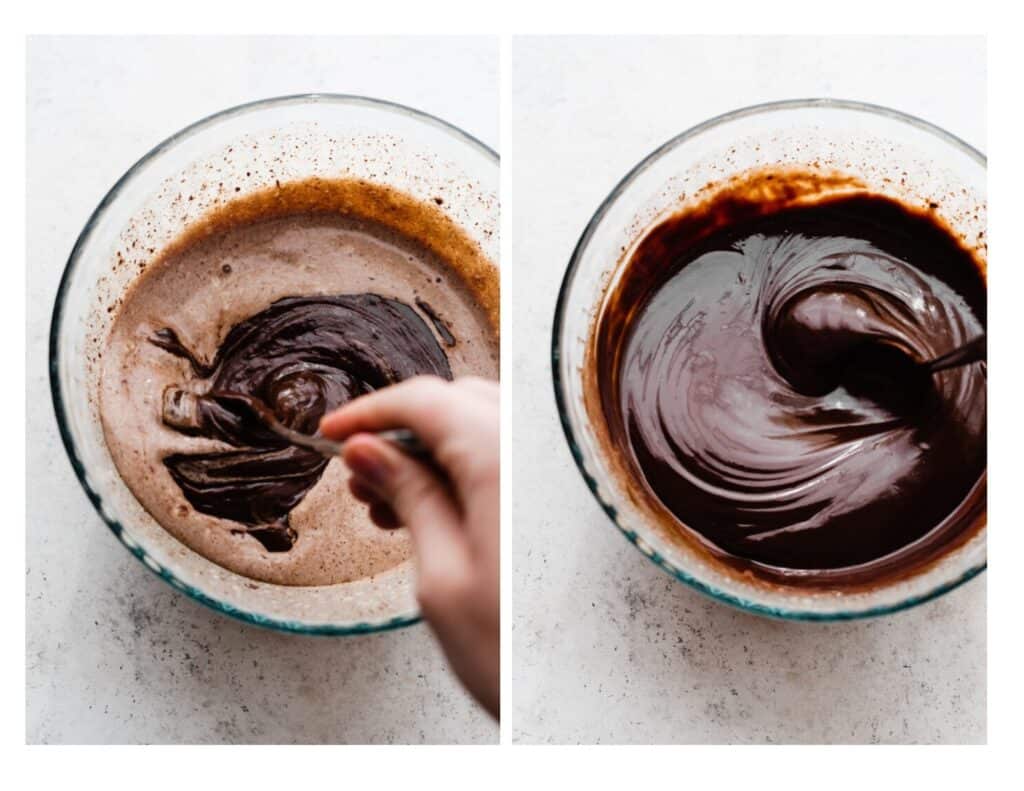
Step 7: Make the Ganache. Heat heavy cream to a simmer, then pour over a bowl of chopped semi-sweet and milk chocolate. Pour this over the chilled cheesecake.
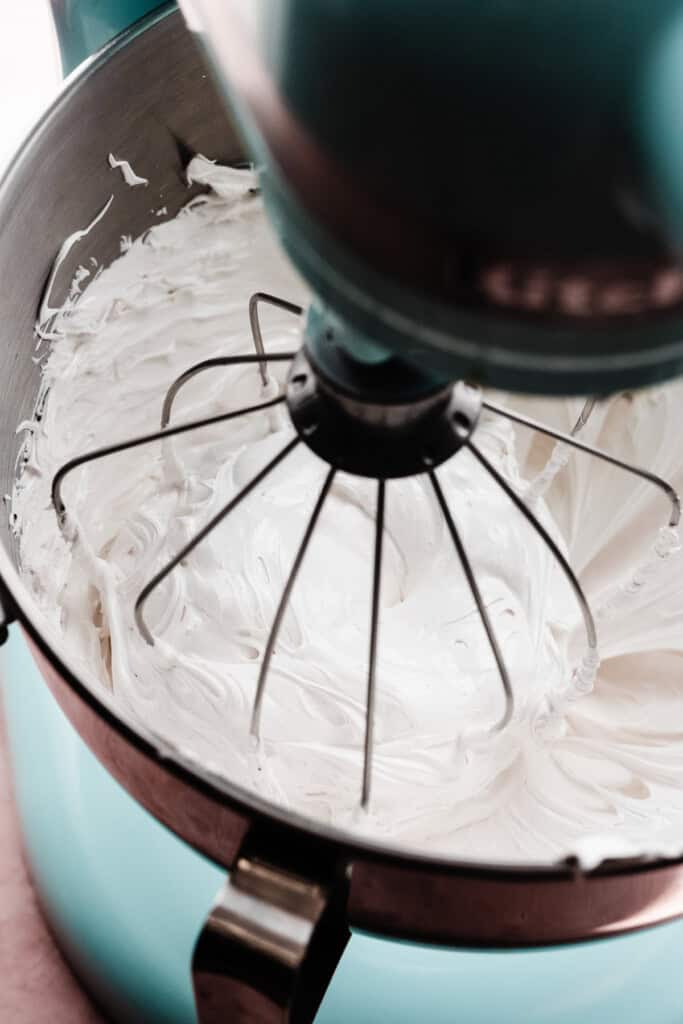
Step 8: Make the Marshmallow Meringue. Heat together egg whites, granulated sugar, cream of tartar, and salt to 175 degrees. Beat in a stand mixer fitted with the whisk attachment until you have a stiff, stable meringue.
Top the cooled cheesecake and toast the meringue! Learn all about how to make super stable swiss meringue in my dedicated blog post.
Serving + Storing:
Once the S’mores Cheesecake is chilled and topped with the ganache and meringue, slice and enjoy! Leftovers keep well in the fridge for 2-3 days, and as long as your meringue was made properly, it will hold up on the leftover dessert.
Expert Baking Tips:
- Oven Thermometer – An oven thermometer will tell you if your oven is actually running at the temperature you set it to. Your oven may not be accurate. Accurate oven temperature is crucial for most bakes, so I leave an oven thermometer in at all times to keep an eye on my oven’s calibration.
- oven thermometer in at all times to keep an eye on my oven’s calibration.
- Don’t Over Mix – Over mixing the cheesecake batter when you’re adding the eggs can cause the cheesecake to buckle when cooled, or, it might puff up like a soufflé in the oven which we definitely don’t want!
- Don’t Over Bake – Follow the doneness cues given in the recipe card below to avoid over baking the cheesecake. Don’t panic if it browns the slightest bit on top – that can happen without it being overbaked.
- Stand Mixer – This recipe works well with a hand mixer or in a stand mixer fitted with the paddle attachment!
FAQs:
Yes, bake a half batch of this recipe in an 8×8 or 9×9 square pan lined with parchment paper. I think half the batter may still be a bit much for a 6-inch springform pan.
Yes! That’s the nature of cheesecake. Allow the cheesecake to come to room temp after it’s baked, and then transfer to the fridge to chill at least 6 hours or up to 1 day before serving.
You have two options – place the roasting pan filled with water on the rack below your cheesecake, or place your cheesecake pan (still wrapped in aluminum foil) into a 10-inch cake pan inside of the roasting pan. Pour water into the roasting pan only. If you place the foil-wrapped cheesecake pan into the roasting pan and pour in water, it will almost always leak to some degree.
Yes, but freeze it without the ganache and meringue. Once the cheesecake has chilled in the fridge overnight, wrap it well in plastic wrap and foil. If you can fit it into a freezer bag or container, that’s ideal. Freeze for 4-6 weeks and thaw in the fridge overnight.
Special Tools:
- Springform Pan – This recipe uses a 9-inch springform pan.
- Roasting Pan – You’ll need a roasting pan (with the rack removed) for the water bath.
- 10-Inch Cake Pan – A 10-inch cake pan creates a no fail barrier between the cheesecake and water bath. If you don’t want to purchase this, you can wrap the cheesecake very well in aluminum foil, but it will take many layers – most people say 8 to 10 to ensure no water gets through. When I used to do 2 layers in the past, water always got in. You can also use any pan you already own that fits around the 9-inch springform, and fits inside the roasting pan.
More S’mores Recipes to Love:
- Gooey Caramel S’more Bars
- No Bake S’mores Pie
- Marshmallow Stuffed S’mores Cookies
- Gooey S’mores Brownies
- S’mores Stuffed Skillet Cookie
- Skillet S’mores Dip
- S’mores Pop Tarts
Did you make this recipe? Leave a comment & star rating!
Click the little stars in the header of the recipe card below to leave a comment & star rating, letting me know how you liked the recipe. I take all feedback seriously, & leaving a rating helps my small business immensely!

S’mores Cheesecake with Toasted Marshmallow Meringue
Ingredients
For the Crust
- 3 cups graham cracker crumbs, 276 grams
- 1/2 cup salted butter, melted, 113 grams
For the Cheesecake Filling
- 32 ounces cream cheese, at room temperature, 904 grams
- 1 and 1/4 cups granulated sugar , 263 grams
- 4 large eggs, at room temperature
- 3/4 cup full fat sour cream, at room temperature, 180 grams
- 1 and 1/2 tsp corn starch
- pinch of salt
- 1 tbsp vanilla extract, 15 grams
For the Marshmallow Batter
- 25 marshmallows
For the Chocolate Batter
- 5 ounces melted milk chocolate, 141 grams
- 2/3 cup cocoa powder, 60 grams
- 2 tbsp heavy cream, 30 grams
For the Chocolate Ganache
- 6 ounces heavy cream, 180 grams
- 6 ounces semi-sweet chocolate, chopped, You can use a mix of milk and semi-sweet if you want a slightly sweeter ganache, 170 grams
For the Marshmallow Meringue
- 1 cup granulated sugar, 210 grams
- 4 large egg whites, at room temperature
- 1/2 tsp cream of tartar
- 1/8 tsp salt
- 1 tbsp vanilla extract
Instructions
- Make the Crust: Preheat oven to 350° F. Spray a 9-inch springform pan with nonstick spray and make sure the bottom is securely fastened. Stir together crust ingredients and press into prepared pan and up the sides a bit (see photos above). Bake this for 10 minutes. Set aside. Keep the oven on at 350. Fill a large pot with water and set it on your stove, and get out a large roasting pan – you'll need this for your water bath later.Reduce the oven temperature to 325℉ for the cheesecake.3 cups graham cracker crumbs, 1/2 cup salted butter, melted
- Make the Cheesecake Batter: Remember that your cold ingredients need to come to room temp before you start or the filling won't turn out. In a large mixing bowl, beat the softened cream cheese with electric mixer until creamy, about 1-2 minutes. Add the sugar & mix until well incorporated, about 1 minute. Scrape the sides of the bowl with a rubber spatula as you go. Add the eggs one at a time, mixing on medium speed after each until just incorporated – if you over-mix, the cheesecake can inflate and overflow in the oven. Be sure to scrape the bottom of the bowl between each egg addition, as little lumps of cream cheese will hide down there. Add the vanilla, sour cream, corn starch, and salt and mix until just combined.32 ounces cream cheese, at room temperature, 1 and 1/4 cups granulated sugar , 4 large eggs, at room temperature, 3/4 cup full fat sour cream, at room temperature, 1 and 1/2 tsp corn starch, pinch of salt, 1 tbsp vanilla extract
- Divide & Flavor the Batters: Remove 2 and 1/2 cups of batter and add to a smaller bowl. The smaller bowl of batter gets the chocolate flavoring – mix in the melted chocolate, cocoa, and heavy cream. Toast the marshmallows on a cookie sheet under the oven broiler or with a blow torch. Scrape them into the larger bowl of vanilla batter, and mix in slowly with the electric mixer on low speed (or they can get sucked up the beaters very easily!). There will be some lumps left from the toasted mallows – this is fine!25 marshmallows, 5 ounces melted milk chocolate, 2/3 cup cocoa powder, 2 tbsp heavy cream
- Assemble & Bake: Starting with the marshmallow batter, use ice cream scoops or large spoons to alternate adding a few dollops of each type of batter at a time to the baked crust until it's all used up. Use a butter knife to swirl the batters. Bake at 325℉ (not 350!) for 1 hour and 30 minutes to 1 hour and 40 minutes. An instant read thermometer inserted into the center of the cheesecake should read 164℉ towards the very bottom (without actually touching the bottom of the pan – this will give a higher reading), and 155℉ halfway down. The cheesecake will appear just set, with slightly raised edges and a slight wobble in the center when you move the pan. Turn the oven off and crack the door open. Leave the cheesecake as is in the oven for 1 hour. This helps it cool gently to ensure a creamy texture and no cracks.
- Chill: After the hour is up, remove the cheesecake from the oven and remove the actual pan of cheesecake from the 10-inch barrier pan. Place the cheesecake on a wire rack to allow it to cool for about 1 and 1/2 hours at room temperature. Then, place it in the fridge and allow to chill for at least 6 hours but ideally overnight.
- Make the Ganache: Finely chop the chocolate and add to a small or medium bowl. Heat the heavy cream in a small saucepan over medium high heat for a few minutes, just until it's simmering around the edges. Pour the heavy cream over the chocolate and let stand 5 minutes before stirring. Stir until completely smooth. If you still have a few chocolate lumps left, microwave the ganache for 5 seconds at a time, stirring between each. Let the ganache sit in the fridge for a few minutes to thicken just a bit so it won't run all over when you pour it on. Once it's still pourable but not runny, pour the ganache over the cheesecake, nudging it over the sides with an offset spatula. Pop the cheesecake back in the fridge while you make the meringue.6 ounces heavy cream, 6 ounces semi-sweet chocolate, chopped
- Make the Marshmallow Meringue: Make the marshmallow topping according to my swiss meringue recipe. This post has everything you need to know (including step-by-step photos!) about making meringue and is far more than I can type into this small instruction box.1 cup granulated sugar, 4 large egg whites, at room temperature , 1/2 tsp cream of tartar, 1/8 tsp salt, 1 tbsp vanilla extract
- Serve + Store: Pile the meringue high in the center of the cheesecake, then spread it with the back of a spoon, making pretty swoops. Toast with a blow torch, then slice and enjoy! Store leftovers in an airtight container or cake carrier in the fridge for 3-4 days.
Nutrition
Nutrition information is automatically calculated, so should only be used as an approximation.


i made this for thanksgiving & it was a hit!! everyone absolutely loved it. thanks for a great recipe 🩷
Thanks so much for taking the time to leave a review, Erika!
This is the best dessert I have ever eaten! (Also the opinion of everyone in my family!) Cheesecake isn’t usually my first choice for dessert, but I love anything S’mores and this looked so good I had to try it. Oh my goodness! Not only is it beautiful, it tastes heavenly. I will l definitely be making this again.
So glad to hear you enjoyed this cheesecake, Debra! Thanks for your kind words!
These are amazing!!! I broiled some mini marshmallows on top instead of the meringue because I was short on time, but the cheesecakes themselves are just delicious. The tang from the sour cream is perfect. Definitely filing this recipe away to make again and again!
Glad you enjoyed these Natalie!
These turned out amazing! They are like an elevated s’more. And they’re beautiful! They won me a baking competition at my school, so thank you! 🙂
So glad to hear that Rachael – and thanks for taking the time to leave such a sweet comment – pun intended! 🙂