This post contains affiliate links. Please see our disclosure policy.
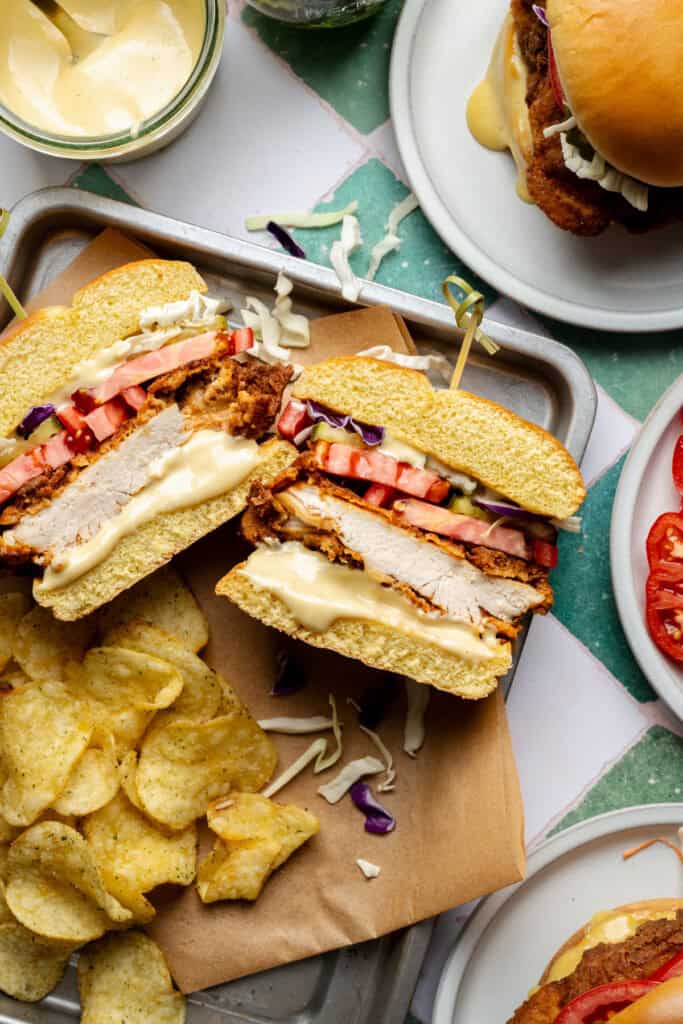
Fried Chicken Sandwiches are the ultimate summer food! These crispy chicken sandwiches are made with basic ingredients and a technique simple enough for anyone to pull off. Load up your sandwiches with plenty of toppings – pickles, slaw, tomatoes, and of course, honey mustard sauce! Serve on a toasted brioche bun for summertime perfection!

Why You’ll love Fried Chicken Sandwiches:
- Crowd-Pleaser – I think I’ve yet to meet a single person who doesn’t love a crispy, juicy fried chicken sandwich! This recipe is the ultimate crowd pleaser.
- Easy Recipe – Making fried chicken is easier than you might think! We’re simply taking marinated chicken and dredging it in a mix of flour and spices before frying it up. Using a meat thermometer takes out any guesswork!
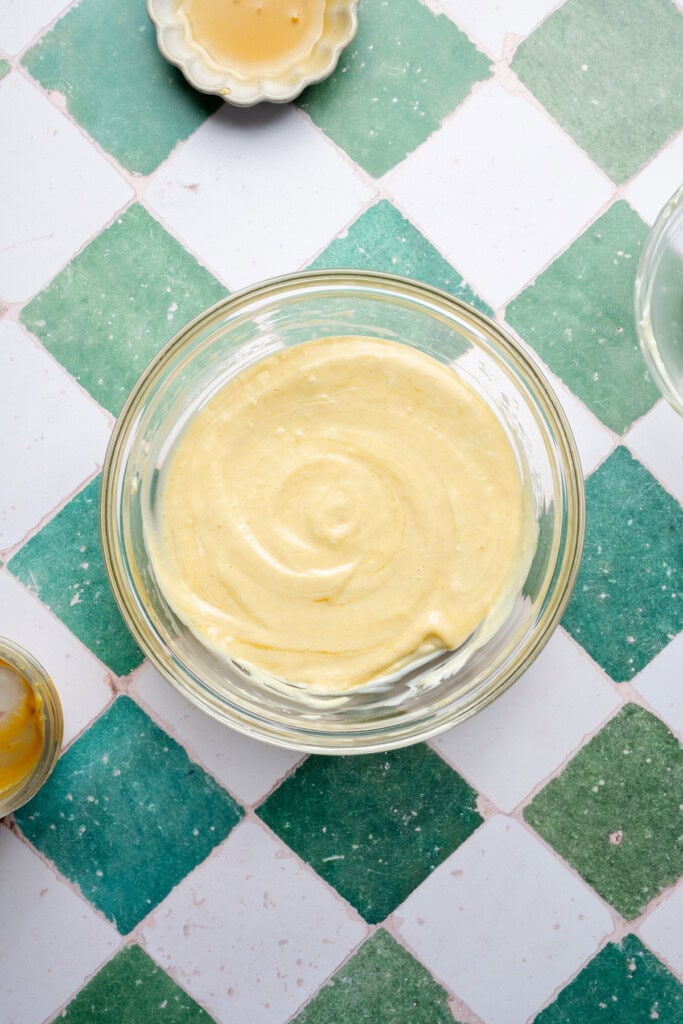
- Homemade Honey Mustard Sauce – This homemade honey mustard is practically drinkable, and easy to make! It’s the perfect deliciously tangy and sweet sauce.
Ingredient Overview:
As always, the full recipe with measurements & directions can be found in the recipe card at the bottom of this post. Use the table of contents (back at the top, below the first image, to navigate).
- Chicken Breasts — I love to use boneless, skinless chicken breasts for this recipe. But make sure to slice your chicken breasts in half so that they’re not too thick.
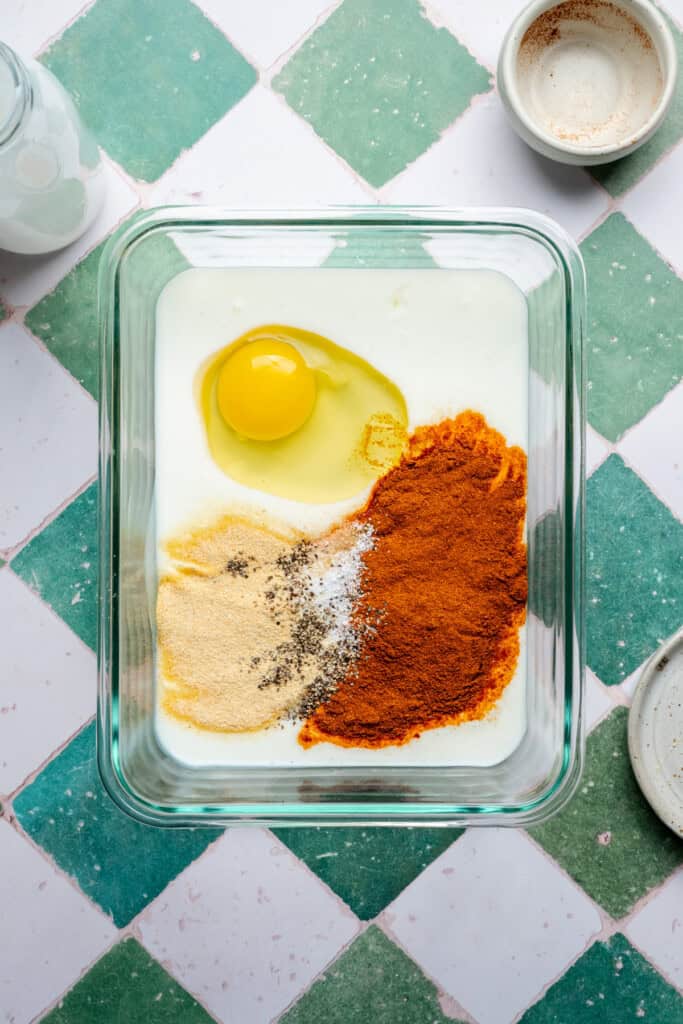
- Buttermilk — This buttermilk based marinade is what’s going to make the best chicken sandwich so incredibly juicy and tender.
- Spices — Just a simple combo of some paprika, garlic powder, salt and pepper packs a powerful punch and takes the tastiness of fried chicken to a whole other level!
- Flour — I use all-purpose flour because it’s easy to get and guarantees crispiness!
- Mayo — The secret to my homemade honey mustard sauce is real mayo!
How To Make This Easy Fried Chicken Sandwich Recipe:
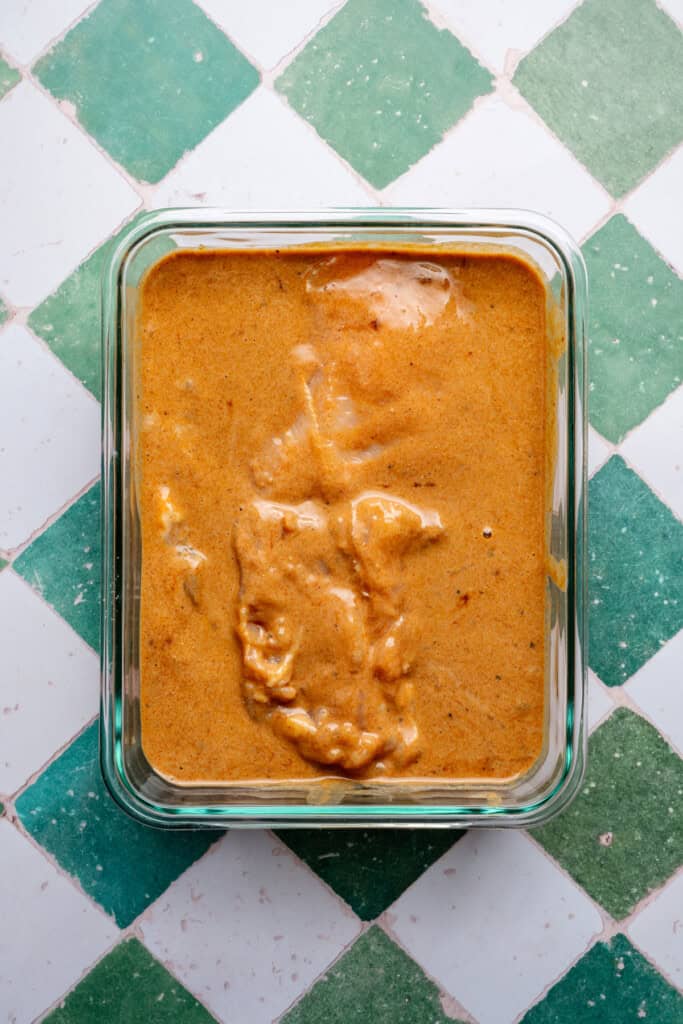
Step 1: Prepare The Chicken. First, slice your chicken breasts in half, lengthwise, and possibly in half the other way as well if they are super large. Let the chicken hang out in a mix of milk, egg, and spices for a couple of hours!
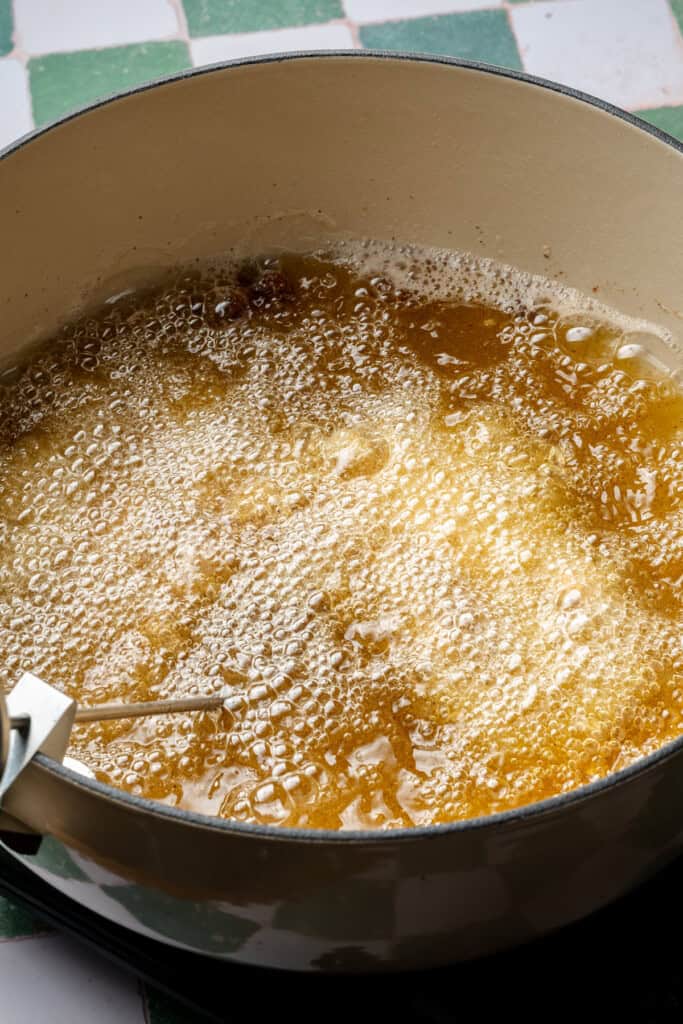
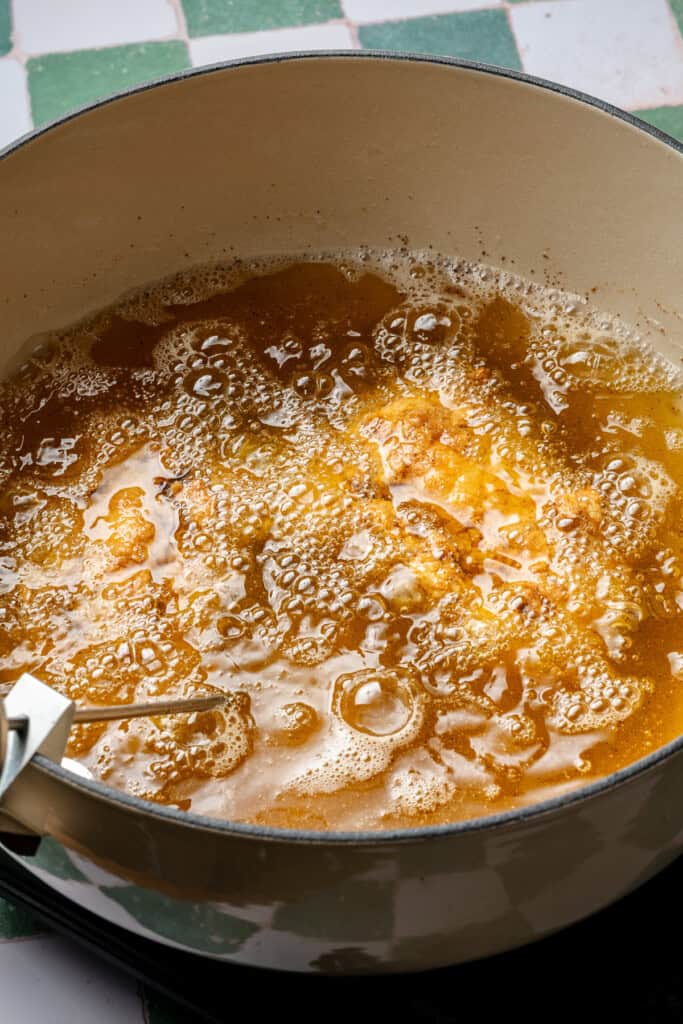
Step 2: Heat your Oil. Heat about an inch of vegetable oil in a large pot on the stovetop to 350 degree Fahrenheit. I usually start at medium heat so it doesn’t get too hot too fast – burnt fried chicken is no fun!
Step 3: Mix The Dry Ingredients. Whisk up your dry mix. It’s a simple blend of flour, corn starch, salt, pepper, baking powder, and paprika.
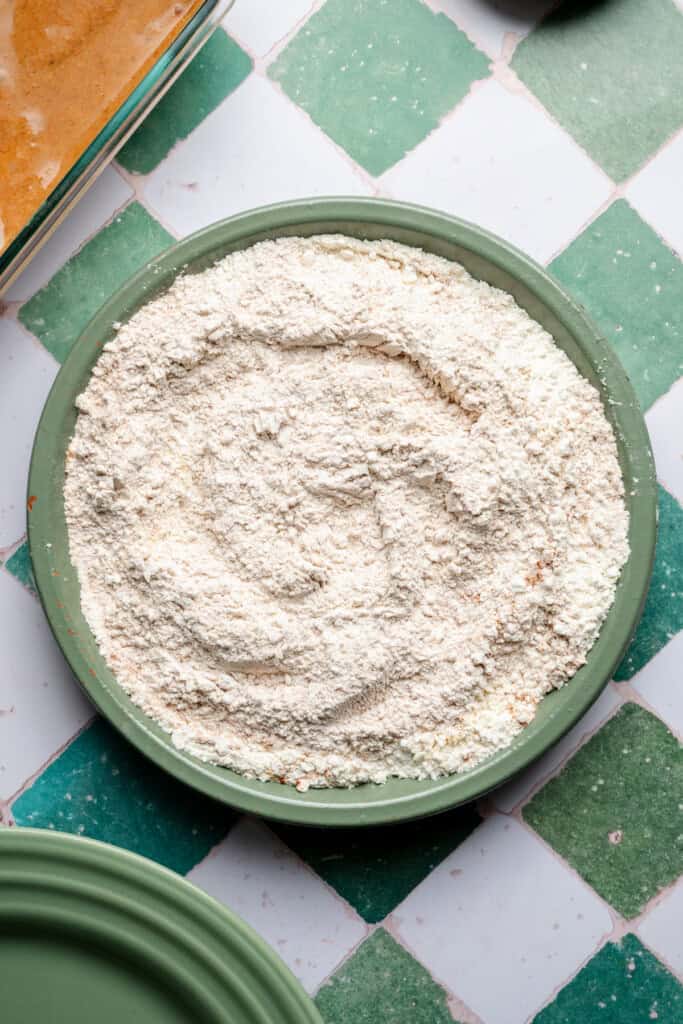
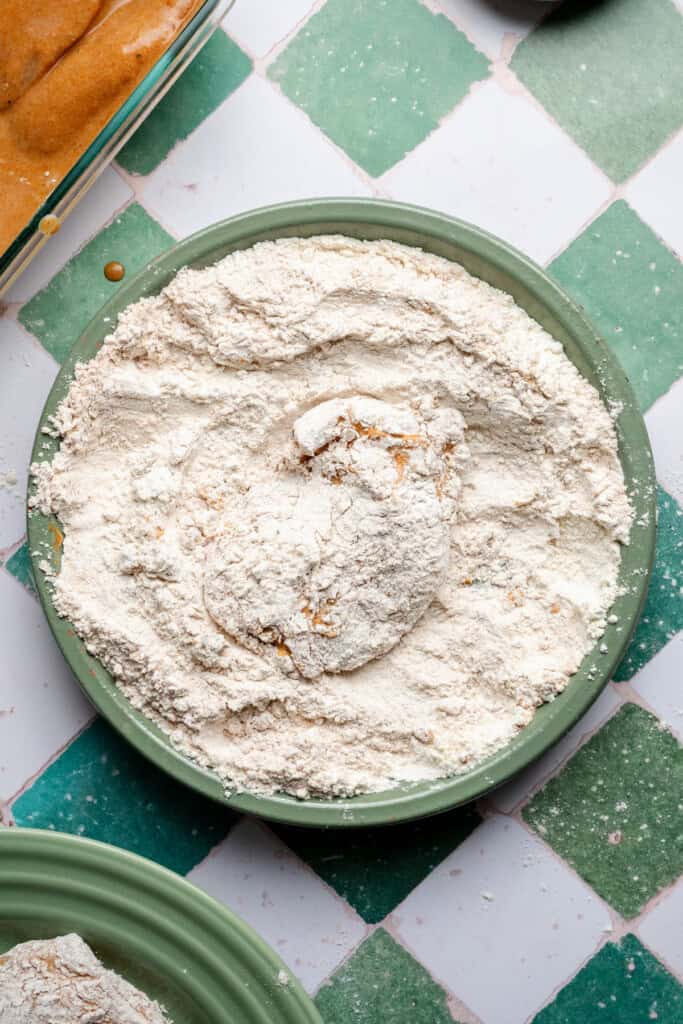
Step 4: Dredge the Chicken. Dredge chicken thoroughly in this mixture. Dredging simply means coating the chicken!

Step 5: Fry the Chicken. Once the oil is at 350 degrees, carefully place chicken, 2-3 pieces at a time, in the hot oil. Cook for 2-3 minutes on each side, checking doneness with a meat thermometer.

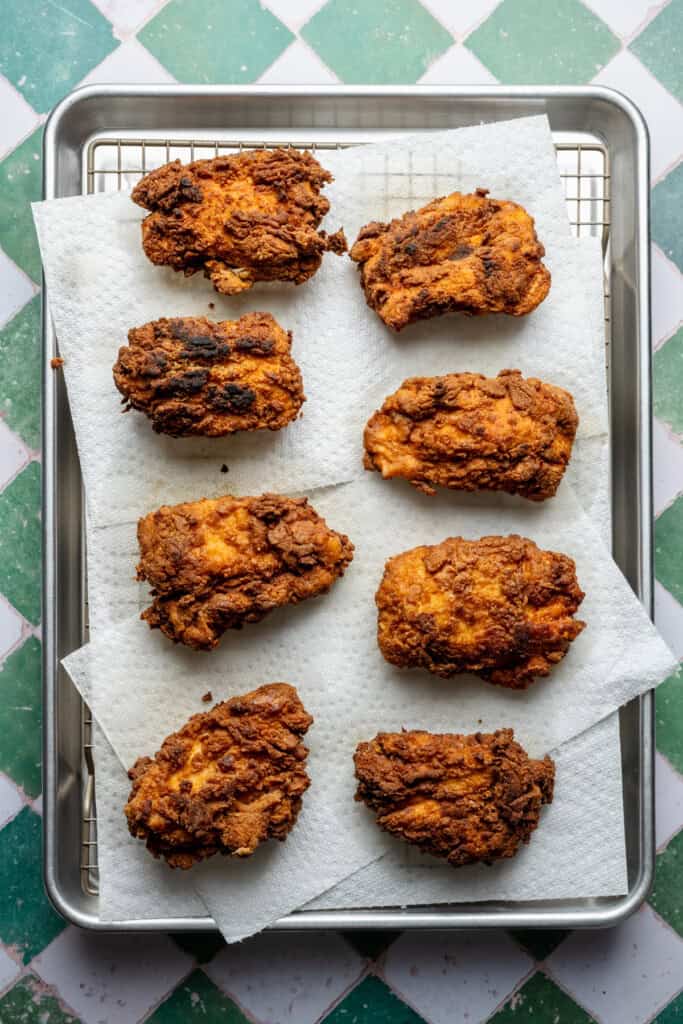
Step 6: Cool The Chicken. The chicken will be EXTREMELY hot when it comes out of the oil, so let it sit on a paper-towel lined cooling rack over a baking sheet – this also helps to remove the excess oil.
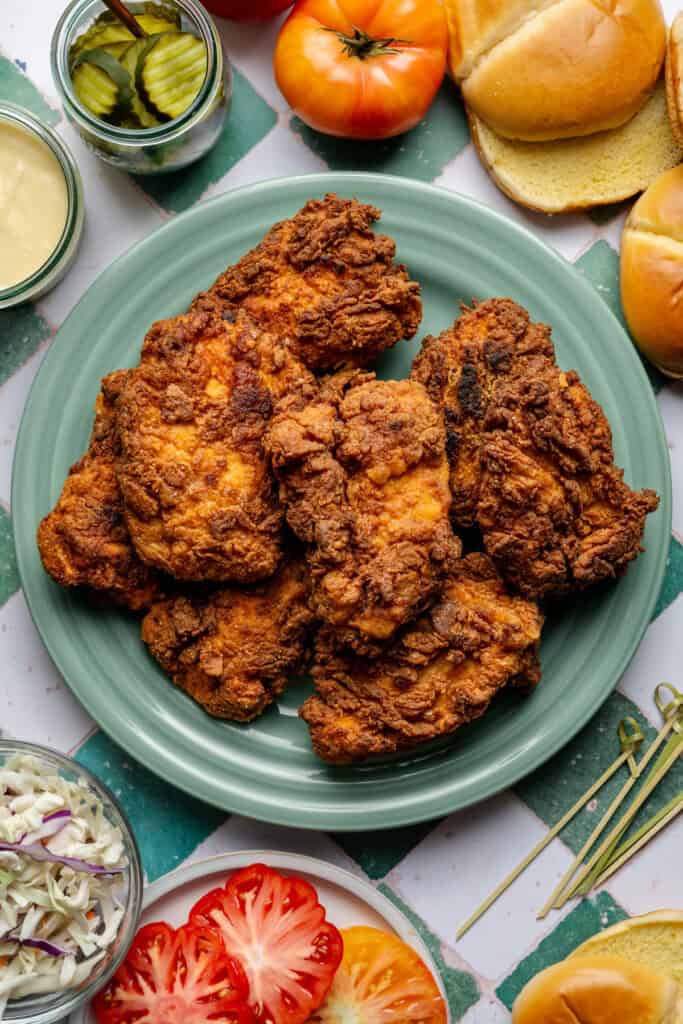
Here’s what the fried chicken should look like when you’re done! It’s nice and golden brown, and pretty even in color.
Step 7: Make The Honey Mustard Sauce. Oh – and for the Honey Mustard Sauce? It’s as simple as whisking together some mayonnaise, honey, and honey mustard! Sometimes i even add a splash of pickle brine to this sauce!
Serving + Storing:
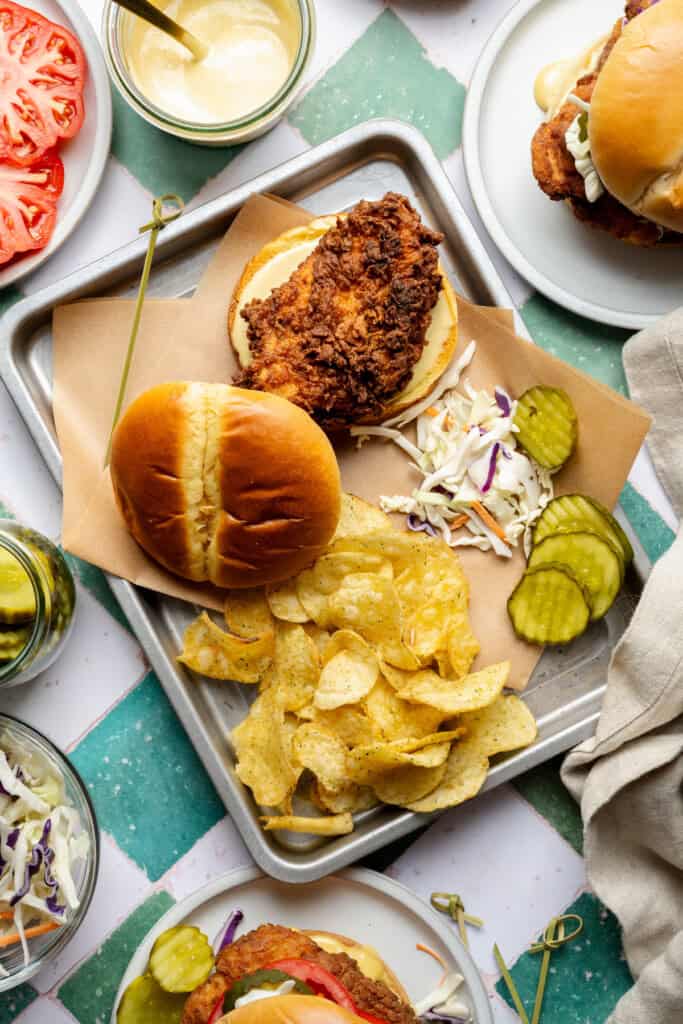
Don’t forget all the toppings! Toast your brioche buns, spread on our homemade sauce, add a slice of tomato, plenty of slaw, and a few dill pickles for the perfect summertime fried chicken sandwich!
These sandwiches pair perfectly with classic Americana sides like french fries or potato chips, potato salad, or a Strawberry Feta Salad or Peach Salad.
Store leftovers in an airtight container in the fridge for up to 4-5 days. It’s best fresh, of course, but the chicken reheats pretty well for a few days after, too.

Expert Cooking Tips:
- Don’t Crowd the Pan – Don’t add too many pieces of chicken at once to the frying oil – you’ll crowd the pan and they won’t cook as evenly. Work in batches if you need to, making sure the oil comes back up to 350 degrees before adding another round of pieces.
- Instant-Read Thermometer — An instant-read thermometer will tell you when the oil is ready for you to get frying. Make sure the temperature of the oil is at 350 degrees Fahrenheit otherwise you just won’t get that perfect crispiness! If the oil is too hot, you’ll be able to tell pretty quickly.
- Test First – I always fry a smaller piece of chicken first as a test piece. If the oil is too hot, the skin on the outside will burn and you’ll know to turn the heat down.
- Cool The Chicken — It’s essential that you cool your fried chicken on a wire rack before serving to drain any excess oil. Nobody likes an oily piece of fried chicken!
FAQs:
I generally advise marinating the chicken for 1-2 hours, but if you’re short on time, even 30 minutes will do the trick!
Use a meat thermometer to check that the chicken is cooked through. All poultry is considered cooked when it’s reached a minimum internal temperature of 165 degrees Fahrenheit.
The secret to making the best fried chicken sandwich is to dredge the chicken in the marinade, and coat it really well with the flour mixture.
Special Tools:
- Cooking Thermometer – Keep an eye on the temp with an instant read thermometer like this one (affiliate link) – that’s the one essential piece of equipment you’ll need to make this recipe! The good news is that you can grab one in most grocery stores or online for under $10.
More Main Dish Recipes to Love:
- Classic Cob Salad With Tangy Honey Mustard Dressing
- Lamb Sliders With Herb Yogurt Sauce And Roasted Peppers
- Our Favorite Barbecue Chicken Pizza
- One Pan Chicken Fajitas
Photography for this recipe is courtesy of Creating Kaitlin. All other photography on Blue Bowl Recipes is by myself, Stephanie Simmons, unless otherwise credited.
Did you make this recipe? Leave a comment & star rating!
Click the little stars in the header of the recipe card below to leave a comment & star rating, letting me know how you liked the recipe. I take all feedback seriously, & leaving a rating helps my small business immensely!

Fried Chicken Sandwiches with Honey Mustard Sauce
Ingredients
For the Chicken "Marinade"
- 4 large chicken breasts, about 2.5 to 3 lbs
- 1 cup buttermilk, see note for sub
- 2 tbsp paprika
- 1 tsp kosher salt
- 1/8 tsp pepper
- 1 and 1/2 tsp garlic powder
- 1 large egg
For the Honey Mustard Sauce
- 2/3 cup mayonnaise, Light or regular are both fine!
- 1/4 cup honey mustard, or more, to taste
- 2 tbsp honey
For the Dry Mix
- 1 and 1/2 cups all-purpose flour
- 1/3 cup + 1 tbsp corn starch
- 1 and 3/4 tsp salt
- 1 and 1/4 tsp baking powder
- 1 tbsp paprika
- 1 tbsp garlic powder
Instructions
- Marinate the Chicken: Mix all chicken marinade ingredients together in a large tupperware container. Slice chicken breasts in half so they're not so thick – it'll be very hard to fry them without burning them if you don't do this step. I ended up cutting some of the chicken breasts in half through the thick part, and then if one piece was twice as big as the other, I cut that in half across the width of it too. Toss chicken in the marinade mixture, pop the lid on, and let sit in the fridge for 1-2 hours.4 large chicken breasts, 1 cup buttermilk, 2 tbsp paprika, 1 tsp kosher salt, 1/8 tsp pepper, 1 and 1/2 tsp garlic powder, 1 large egg
- Mix up the Honey Mustard Sauce: Stir all sauce ingredients together, and adjust to taste (sometimes I add a splash of pickle juice, too!). Store in the fridge until ready to use.2/3 cup mayonnaise, 1/4 cup honey mustard, 2 tbsp honey
- Get Your Oil Heating + Prep: At this point, you want to get your oil heating up since it can take a bit. Add about 1 inch of vegetable oil to a sturdy pan or dutch oven and let it heat up over medium heat. Keep an eye on the temp – we're frying our chicken at 350℉. I don't recommend making this recipe without an instant read thermometer to check the oil temperature. Any hotter, it'll burn, and any colder, it won't fry up properly. Set a cooling rack over a baking sheet and line the cooling rack with a few paper towels. This is where you'll place the fried chicken pieces as they come out of the oil to cool a bit + to drain.
- Mix the Dry Ingredients: Whisk together the dry mix ingredients in a large shallow bowl.1 and 1/2 cups all-purpose flour, 1/3 cup + 1 tbsp corn starch , 1 and 3/4 tsp salt, 1 and 1/4 tsp baking powder, 1 tbsp paprika, 1 tbsp garlic powder
- Dredge + Fry the Chicken: Coat each piece of chicken in the dry mix, flipping each piece over and back a few times to make sure it's well coated. Set these on a clean plate while you check the oil temp – remember, 350 is the magic number! (It helps if the chicken pieces rest for a few minutes before you begin frying. You can do a few pieces at a time, and then while you're waiting for each batch of 2-3 pieces to fry, you can be dredging the next few pieces). I always fry a smaller piece (or I'll cut a small piece off a larger piece) first as a test piece. If the oil is too hot, the skin on the outside will burn and you'll know to turn the heat down. Once the heat is right, add 2-3 pieces of chicken. Note that each time you add something to hot oil, it will reduce the temperature, so keep an eye on it and adjust as needed. It sounds complicated and scary but I promise you'll get the hang of it! Fry the chicken for about 2 minutes on each side, or until golden brown, and then flip it over. Cook another 2 minutes or so on that side, or until golden brown. Check for doneness in the thickest part of each piece of chicken with an instant read thermometer – chicken is fully cooked at 165℉. Place your cooked chicken pieces on the prepared rack to let the oil drain and to let them cool a bit – they'll be SUPER hot when you take them out of the pan, so they'll need a little bit of time to cool. Remember to check your oil in between batches as the temperature will fluctuate.
- Serve + Store: Serve with toasted brioche buns, honey mustard sauce, slaw, tomato slices, pickles, and anything else you can dream up! Store leftovers in an airtight container in the fridge for up to 4-5 days. It's best fresh, of course, but the chicken reheats pretty well for a few days after, too.
Nutrition
Nutrition information is automatically calculated, so should only be used as an approximation.

Very good!
Thanks so much, Joann!
Had this for the 4th of July. It will be our new tradition!
Glad to hear that! 🙂