This post contains affiliate links. Please see our disclosure policy.
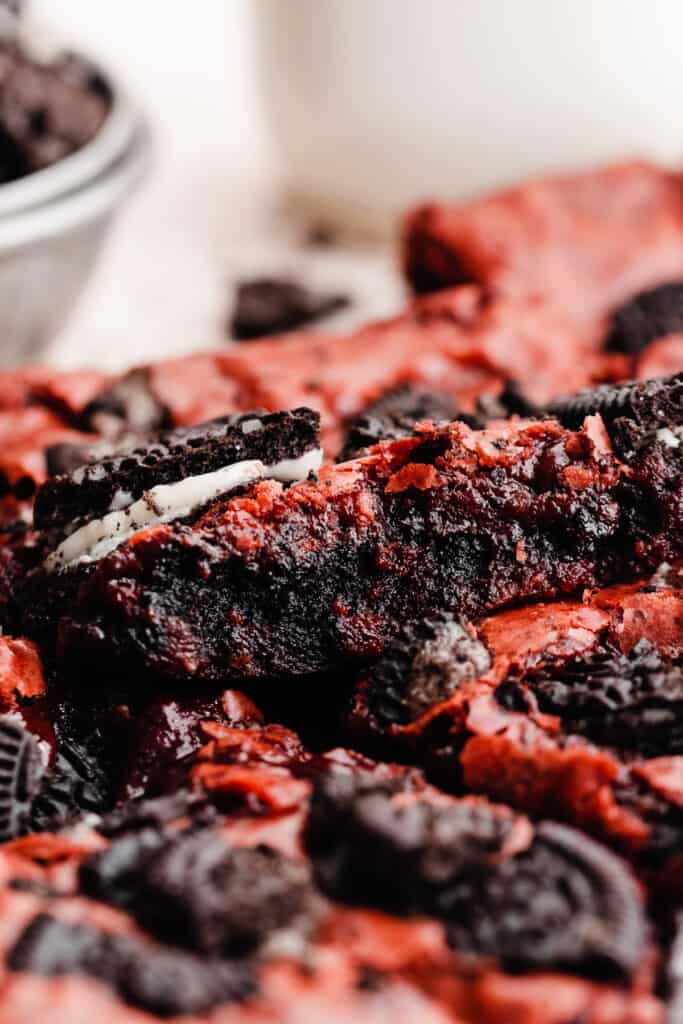
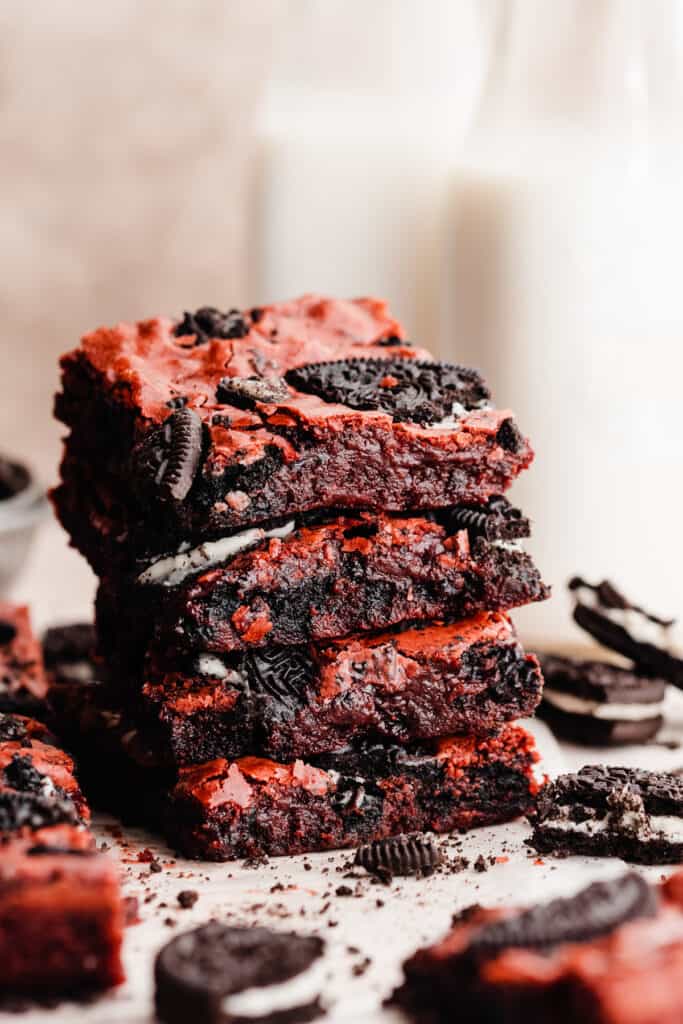
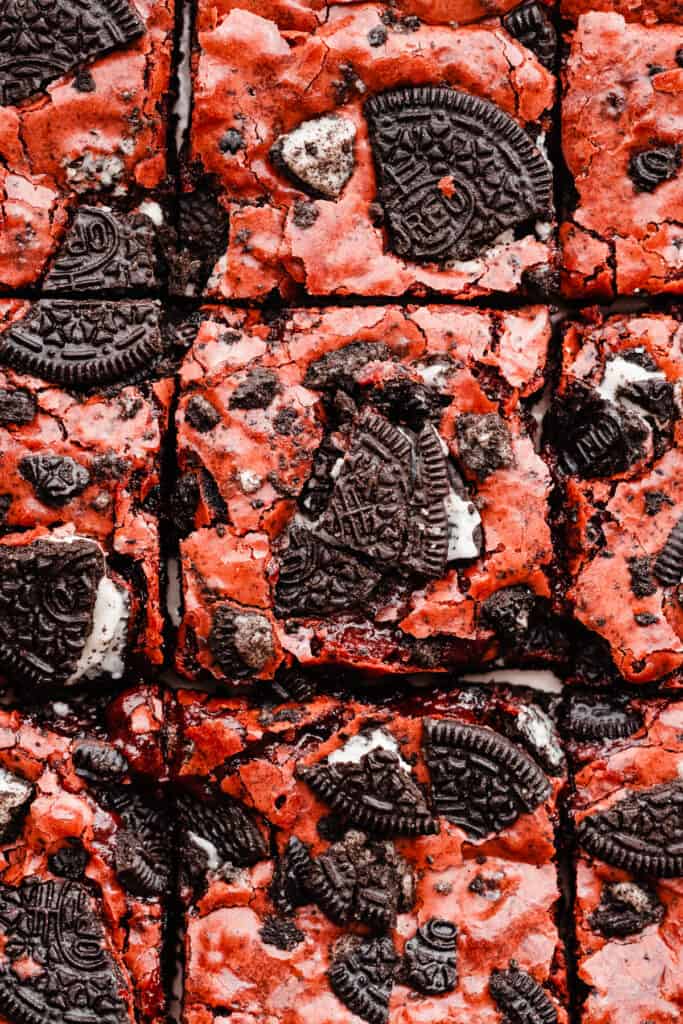
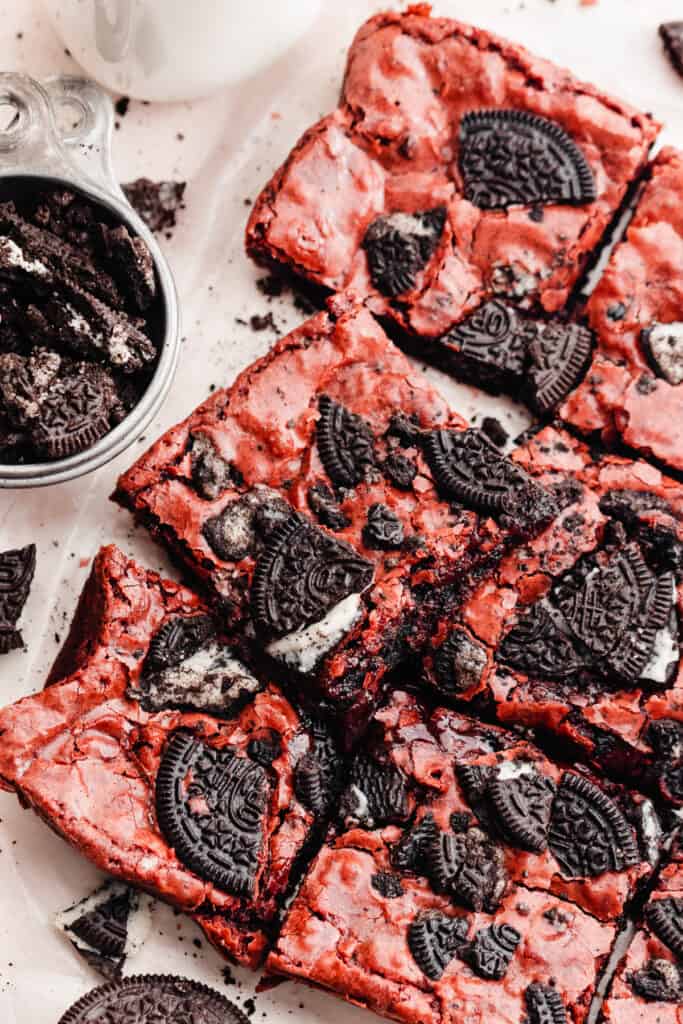
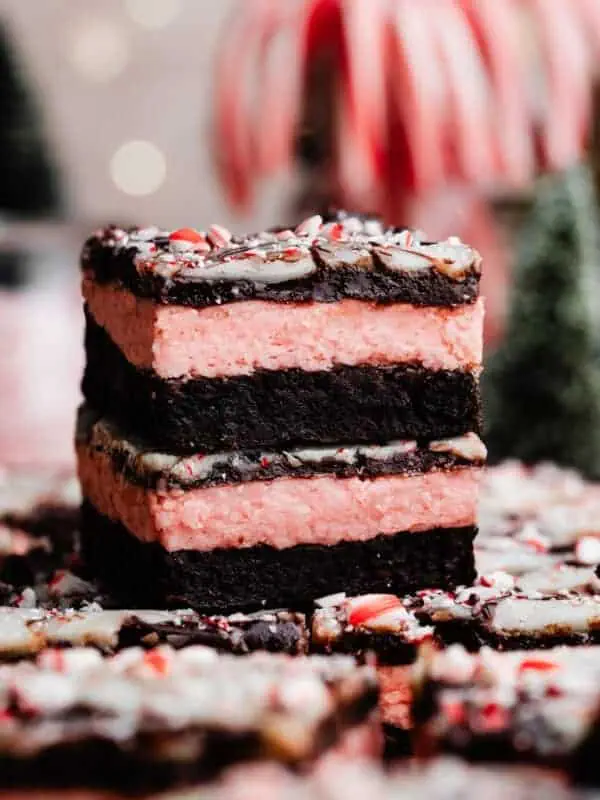
Red Velvet Brownies are ultra fudgy with crackly tops and oreo pieces folded in. These brownies come together in one bowl in just 10 minutes, and bake in under 30! They taste like a rich red velvet cake in brownie form – prepare to swoon!

Why you’ll love these Red Velvet Brownies:
- Red Velvet Flavor – These chewy red velvet brownies truly do taste like red velvet. They’re less chocolatey than a regular brownie, but still have a subtle chocolate flavor and the slight tang of a red velvet cake.
- Oreo Pieces – Was there ever a better match than oreo and red velvet? The subtle crunch from the oreo pieces contrasts perfectly with the fudgy brownies.
- Easy Dessert Recipe – These bars come together in 10 minutes in one bowl, and take under 30 minutes to bake. This truly is the best Red Velvet Brownies recipe – and they’re perfect for Valentine’s Day!
Ingredient Overview:
As always, the full recipe with measurements & directions can be found in the recipe card at the bottom of this post.
- Butter – I always use salted buter for the best flavor, but feel free to use unsalted butter if you prefer. Some people make brownies with vegetable oil, but I prefer butter for the flavor!
- Sugar – Sugar provides structure and sweetness. We’re using a mix of granulated sugar and brown sugar for depth of flavor.
- Flour – Flour adds structure. Use all-purpose flour. Spoon & level your flour for best results, or use a scale. Scooping the measuring cup directly in will lead to too much flour.
- Cocoa Powder – Using slightly less cocoa powder than usual in my brownie recipes is what helps give these the red velvet taste – a subtle chocolate flavor with a bit of tang.
- White Vinegar – This helps add that little bit of tang that you’d taste in a red velvet cake. I promise it won’t make these brownies taste like vinegar!
- Red Food Coloring – Use a red gel food coloring like Wilton for a bright red color without having to add a ton of extra liquid. If you prefer not to use food dyes, you can omit this. You can use the same color in my Red Velvet Cookies, next!
Recipe Substitutions:
- Dairy-free – Use your favorite dairy-free butter sticks to make this recipe dairy-free.
- Oreos – Feel free to leave out the oreos if you’re not a fan. Alternate mix-in ideas are listed in the recipe variations section at the bottom of this post.
- Alternate mix-ins – If you don’t want to use oreos, try using white chocolate chips, semi-sweet chocolate chips, or chocolate chunks. You can even top these with a cream cheese frosting to turn these into red velvet cheesecake brownies. Just be sure to let them cool first.
- Other Velvet Colors – This may sound odd, but I have known people who requested a blue velvet or a green velvet birthday cake. So, you could use any color in these bars if you would like a different color.
How to Make Red Velvet Brownies:
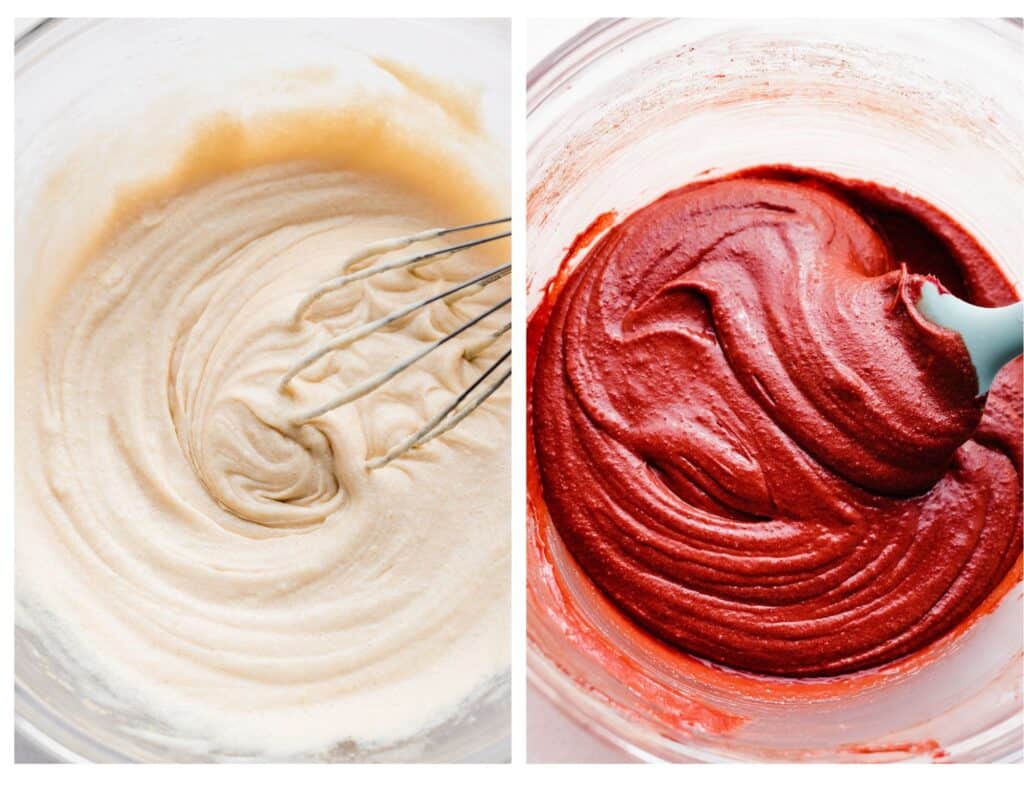
Step 1: Make the Brownie Batter. Melt the butter in a large bowl. Whisk in the sugar, eggs and vanilla extract, and whisk for 2 minutes – the mixture will lighten and become fluffy (pictured below).
Add red food coloring to desired amount, then stir in the dry ingredients. Add a bit more food coloring if desired. Fold in the crushed oreos.
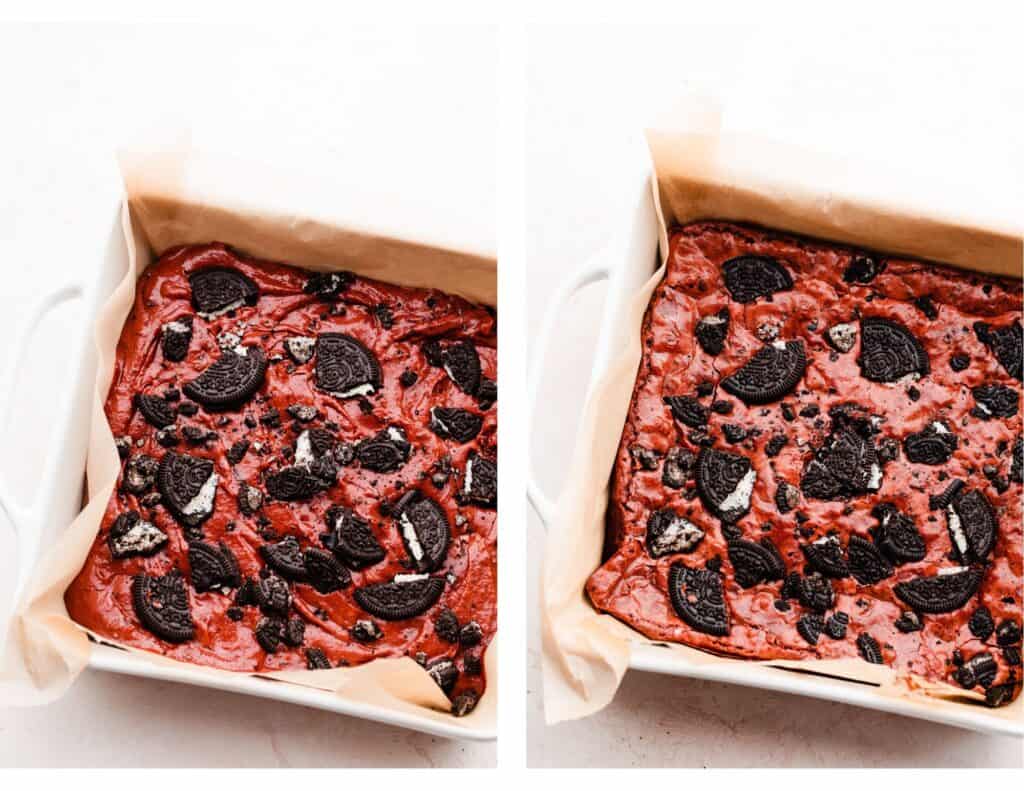
Step 2: Bake the Brownies. Spread the batter in a 9×9 pan lined with parchment paper and sprinkle a few more oreo pieces on top. Bake as directed in the recipe card below.
And, that’s it! This easy dessert comes together in almost no time, with just two basic steps – making the batter, and baking the red velvet brownies.
Expert Success Tips:
- Crinkly brownie tops – Don’t skip the step of whisking the eggs & sugar together for a good minute or so – this incorporates air into the batter which will provide that nice shiny, crinkly top to the brownies!
- Don’t over bake – Follow the doneness cues given in the recipe card below to ensure nice, fudgy, gooey brownies.
- Oven Thermometer – An oven thermometer will tell you if your oven is actually running at the temperature you set it to. Your oven may not be accurate. Accurate oven temperature is crucial for most bakes, so I leave an oven thermometer in at all times to keep an eye on my oven’s calibration.
- Kitchen Scale – A food scale is the best way to make sure your flour is at the proper weight, since amounts will vary SO widely based on how you measure it, as well as the measuring cup you use, as they are not standardized.
FAQs:
Yes, you can double and bake in a 9×13 pan. Start with a similar bake time as in the recipe card below, adding a few minutes more at a time as needed. If halving, bake in a standard size loaf pan or a 6-inch round pan. Start with 14 minutes and add time as needed.
Whisking the eggs & sugar together for a few minutes dissolves the sugar, which creates that crinkly effect on top. My Brown Butter Brownies use this same method!
Yes! These are fudgy and chewy – not cakey brownies.
Yes. You can also use an 8 or 9 inch oven safe skillet or a 8 or 9 inch round cake pan in a pinch.
I suppose you can, but you won’t be able to get a deep red color without adding enough liquid that it could alter the recipe. So, if you do this limit it to 1 tsp at most and you’ll just have a more subtle color.
Serving + Storing:
Let these brownies cool at least 30 minutes before digging in. The longer you let them cool, the neater slices they’ll hold, but they really are amazing while they’re still a little warm and gooey.
Leftovers will keep in an airtight container at room temperature for 3-4 days and 5-7 days in the fridge. Then, make my Red Velvet Cake if you can’t get enough of this flavor!
More Homemade Brownies to Love:
- Gooey S’mores Brownies
- Fudgy Gluten-Free Brownies
- Black Forest Brownies
- Layered Mint Chocolate Brownies
- Fudgy Triple Chocolate Skillet Brownie
- Salted Caramel Pretzel Brownies
- 5-Ingredient Brownies
Did you make this recipe? Leave a comment & star rating!
Click the little stars in the header of the recipe card below to leave a comment & star rating, letting me know how you liked the recipe. I take all feedback seriously, & leaving a rating helps my small business immensely!

Red Velvet Oreo Brownies
Ingredients
- 1/2 cup salted butter, 113 grams
- 3/4 cup granulated sugar
- 1/4 cup brown sugar, packed, 60 grams
- 2 large eggs
- 1/2 tsp vanilla extract
- 3/4 tsp white vinegar
- red gel food coloring, Use a gel to get rich color without adding tons of extra liquid – try Wilton gel food colors
- 1/2 cup + 1 tbsp all-purpose flour, spooned & leveled, 73 grams
- 3 and 1/2 tbsp cocoa powder
- 1/4 tsp salt
- 8 oreos, broken up
Instructions
- Prep: Preheat your oven to 350°F. Spray a 9×9 ceramic or metal pan with nonstick spray and line with parchment paper (so the paper stays in place).
- Make the Brownies: Melt the butter in a large or medium bowl. Whisk in the sugars. Whisk in the eggs and vanilla extract. Then, whisk for 2 additional minutes – this will create the crackly top. Whisk in the vinegar. Add the gel food coloring to your desired effect. Fold in the flour, cocoa powder, and salt. Fold in about 2/3 of the oreos, then spread the batter in your prepared pan. Sprinkle remaining oreos on top.
- Bake: 24 to 29 minutes. A toothpick inserted into the edges will come out clean or mostly clean, and one inserted into the center will pull out some thick batter that may look a *tad* underdone – but the center shouldn't be super jiggly anymore.
- Serve + Store: Let brownies cool at least 30 minutes before diving in. (The longer they cool, the neater your slices will be, but these are a joy to eat warm!)Store cooled brownies in an airtight container at room temperature for 4-5 days or in the fridge for 5-7 days, letting come back to room temperature before enjoying (or try them cold if you like!)
Nutrition
Nutrition information is automatically calculated, so should only be used as an approximation.

can i halve the recipe and bake it in an 8×8 pan? i dont have a loaf pan. what would the time be
This red velvet brownie recipe is baked in an 8×8 (or 9×9) pan, not a loaf pan. Did you mean to comment on a different recipe by chance? ☺️
3 and 1/2 tbsp cocoa powder
Is that 3cups plus 1/2 tbsp or is it 3 whole tbsp plus the 1/2tbsp
Hi Samantha! Its just 3 and 1/2 tablespoons of cocoa – no cups. Just 3.5 tablespoons in total. Hope you enjoy these! ☺️ please let me know how you like them.
Hi, what’s the measurement for the red food coloring? Thanks
Hi! I recommend using gel food coloring since you can get a vibrant color with just a few dots. I just stick a toothpick into the jar and use whatever comes out on it in the batter. You can do this a couple times to deepen color if you like. If you’re using the regular grocery store type of non-gel food coloring, I recommend using just 1 tsp so that you don’t add too much liquid to the batter. Gel is definitely the best option but you can work with what you have. Please let me know how you like the recipe!
Vinegar? Does vinegar need to be used? It is mentioned in the top portion but there is no measurement of how much needs to be used.
Thank you
Hi Jasmine – thanks for alerting me to this! I checked back on my recipe testing notes and I used 3/4 teaspoon. I will get that added into the recipe. Please let me know how you enjoy these brownies!
how much vinegar do we add? its mentioned in the article above but not in the recipe. Thanks!
It should be 3/4 teaspoon – thanks for alerting me to that missing ingredient, Carmen! I hope you enjoy the brownies. Please be sure to report back 🙂
I’m not a big brownie person, but i LOVE red velvet cake, so i decided to give this recipe a shot…i devoured half the pan to the point i felt sick…my bf devoured the other half, now im making a double batch. That’s how delicious these brownies are. This will be the only brownie recipe i use from now on.
Thanks so much for the rave review, Hannah! 🙂
Incredible brownies!!!
Thanks Jennie!
These were absolutely delicious! 10/10!
Glad to hear it!
I made this this weekend for my daughter to take to her Girls Club. Got them out of the oven and cut the pieces really small so I could keep some. (Sorry, not sorry!) So glad I did! Chewy, fudgy, absolutely Delicious!! Will be making these from now on when a brownie craving hits.
Thanks so much for taking the time to leave a review, Chels! ☺️ Glad you enjoyed these.
Blue Bowl knocks it out of the park once again! These brownies were a huge hit. I made them and a couple other favorite cookies and gave them to my adult kids for a Valentine’s Day treat. They were super easy to put together and they are so fudgy and delicious! BB is my go-to for great recipes and this is staying in my tried-and-true pile for sure!
Thank you so much Kristin! ☺️