This post contains affiliate links. Please see our disclosure policy.
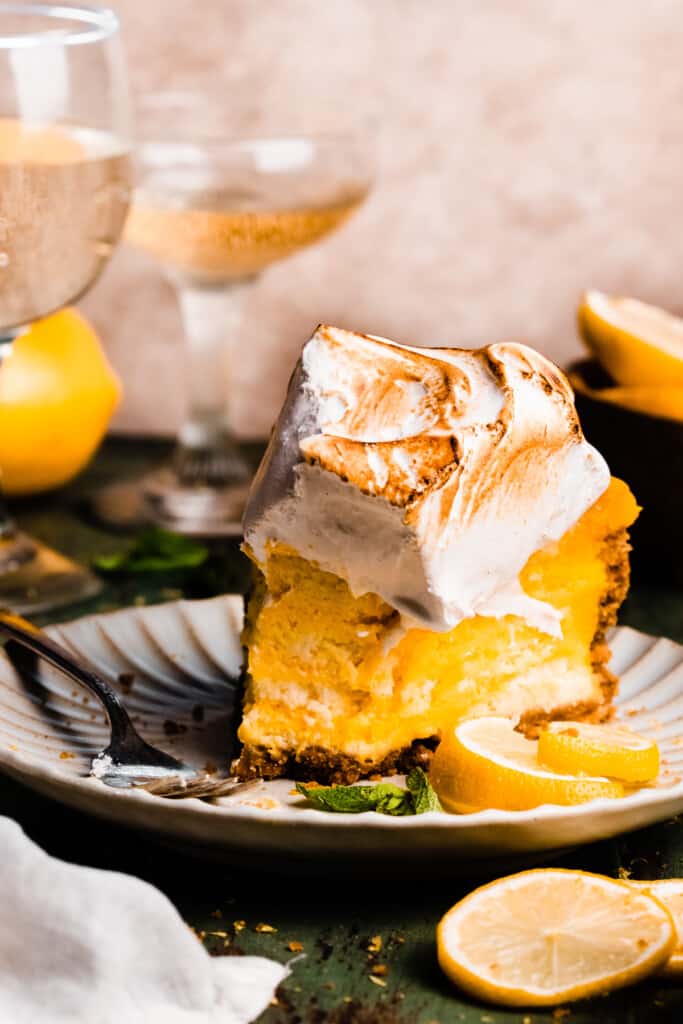
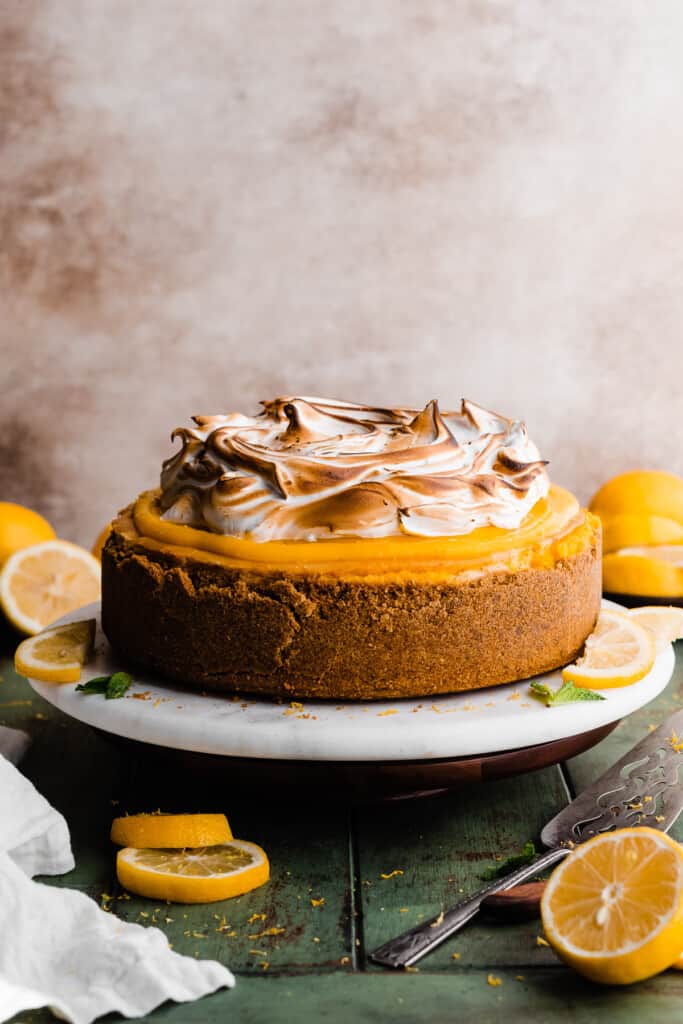
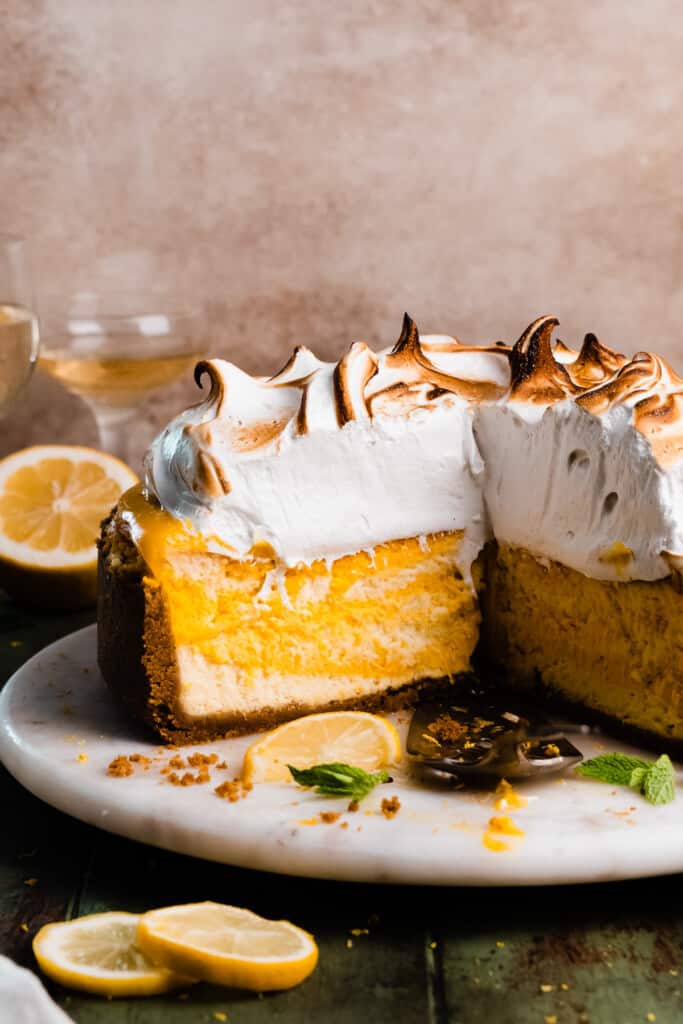
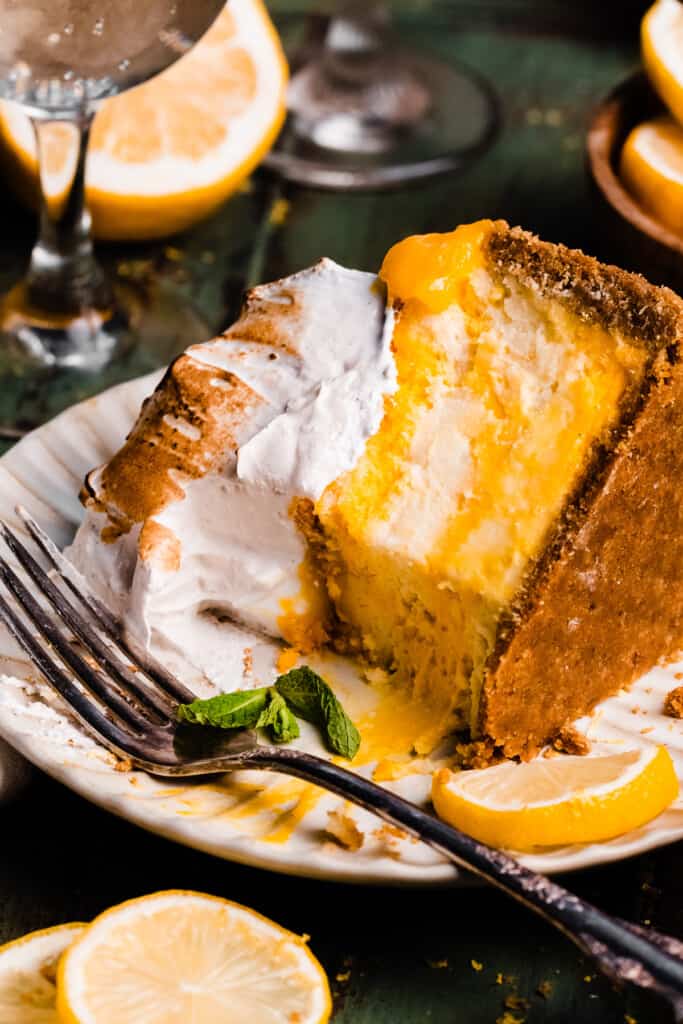
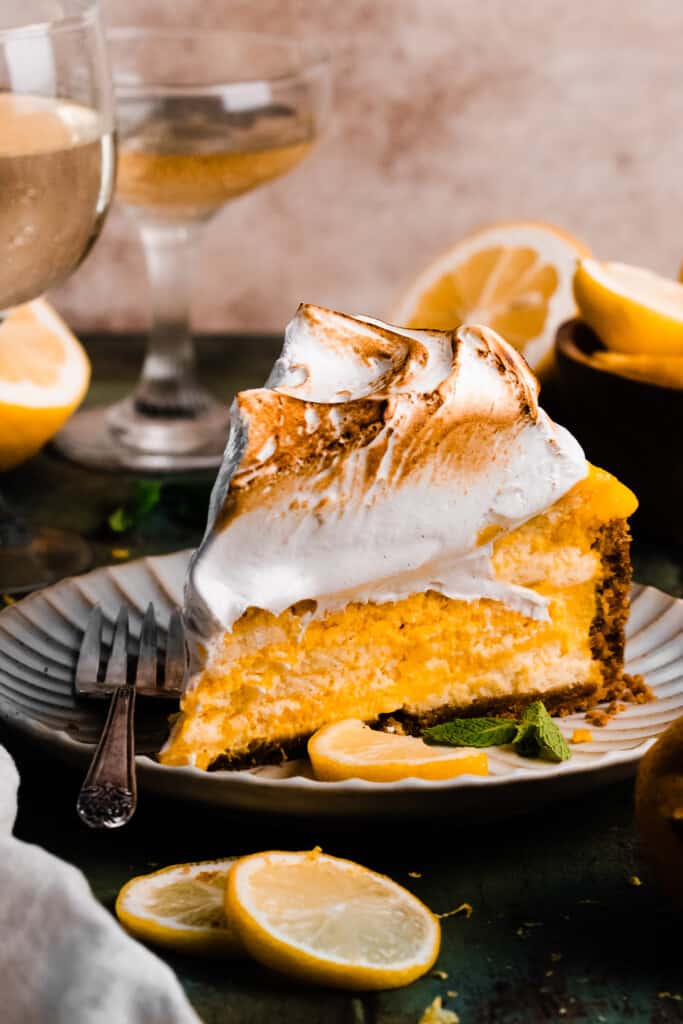
Lemon Meringue Cheesecake tastes just like a Lemon Meringue Pie, but in luscious cheesecake form! Silky lemon and lemon curd cheesecake batters are swirled atop a crisp graham cracker crust, topped with tart lemon curd, and finished with a mile high pile of toasted meringue!

Table of Contents
- Why you’ll love Lemon Meringue Cheesecake:
- Ingredient Overview:
- Recipe Variations:
- How to Make Lemon Meringue Cheesecake:
- Serving + Storing:
- Expert Tips for Swiss Meringue:
- Why didn’t my meringue reach stiff peaks or why did it become weepy?
- Is it possible to over mix Swiss Meringue?
- Expert Success Tips:
- FAQs:
- Recipe Variations:
- Special Tools for Lemon Curd:
- Special Tools for Lemon Cheesecake:
- More Cheesecake Recipes to Love:
- Lemon Meringue Pie Cheesecake Recipe
Why you’ll love Lemon Meringue Cheesecake:
- Ultra Creamy Lemon Cheesecake – Creamy vanilla lemon and lemon curd cheesecake batters are swirled atop a crisp graham crust, and baked to creamy perfection in this impressive dessert.
- Luscious Lemon Curd – Homemade lemon curd is full of fresh, tart lemon flavor and is incredibly silky!
- Mile-High Meringue Topping – Meringue is easier to make than you’d think – I’ll cover all the steps you need to ensure your meringue will never fall!
Ingredient Overview:
As always, the full recipe with measurements & directions can be found in the recipe card at the bottom of this post. Use the table of contents (back at the top, below the first image, to navigate).
- Butter – I always use salted buter because in my experience, it lends the best flavor, but feel free to use unsalted butter if that’s what you prefer.
- Graham Cracker Crumbs – You can pulse whole graham crackers in a food processor, or buy ready made graham cracker crumbs.
- Cream Cheese – Use full fat blocks of cream cheese, at room temperature.
- Eggs – Use large eggs, at room temperature.
- Sour Cream – Use full fat sour cream, at room temperature.
- Lemons – Be sure to zest & juice them fresh, for the best flavor!
Recipe Variations:
- Gluten-free – Use gluten-free graham crackers in the crust to make this recipe completely gluten-free!
- Quicker Version – Short on time? Try my Lemon Meringue Cookies instead!
How to Make Lemon Meringue Cheesecake:
Step 1: Make the Lemon Curd. Rub lemon zest into granulated sugar. Whisk in eggs, lemon juice, and salt. Cook gently until thickened, then strain & stir in vanilla and butter.

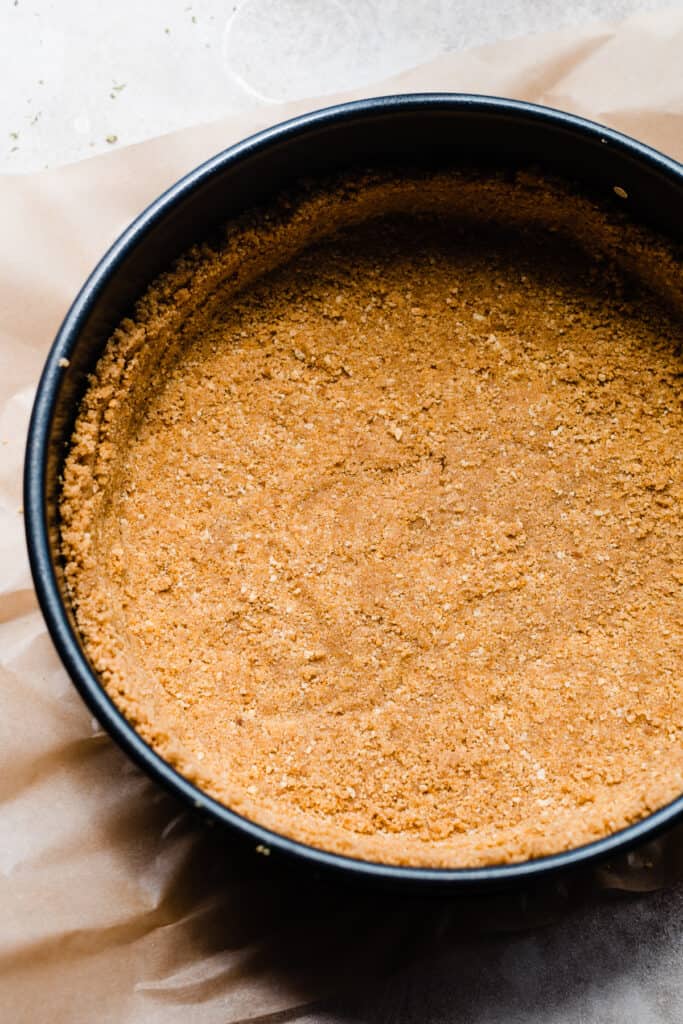
Step 2: Make & Bake the Crust. Stir together graham cracker crumbs, melted butter, and a pinch of sugar. Press this into a 9-inch springform pan and bake.
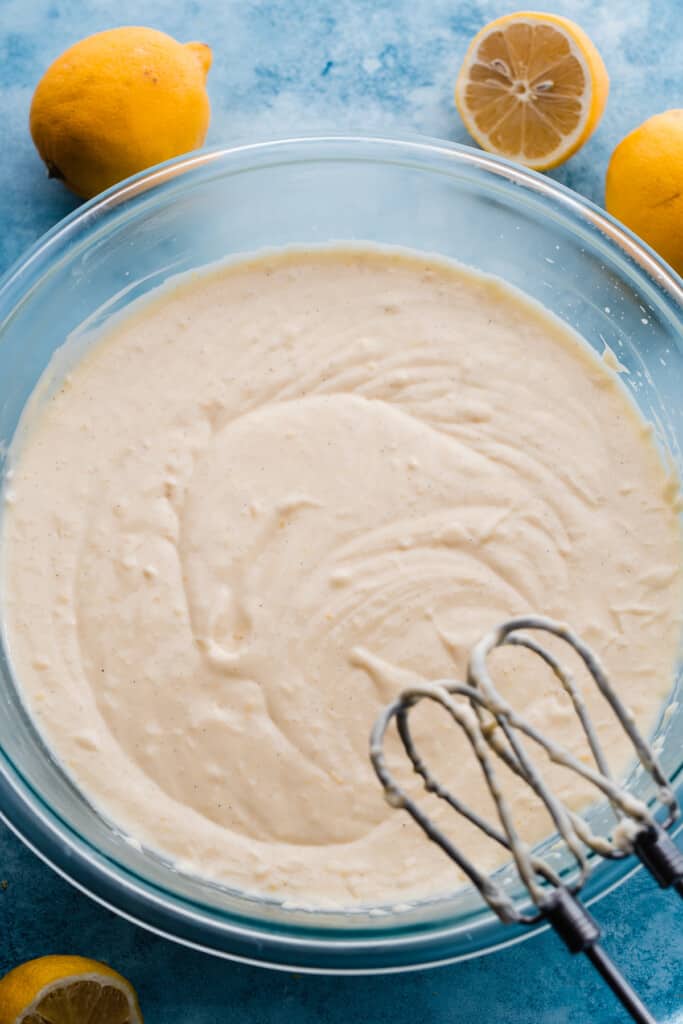
Step 3: Make the Lemon Cheesecake Batter. In a large mixing bowl, beat your cream cheese until creamy. Then, mix in the lemon sugar, eggs, vanilla, and sour cream. Mix in the lemon juice. You’ll have a silky batter (a few small lumps is fine!)
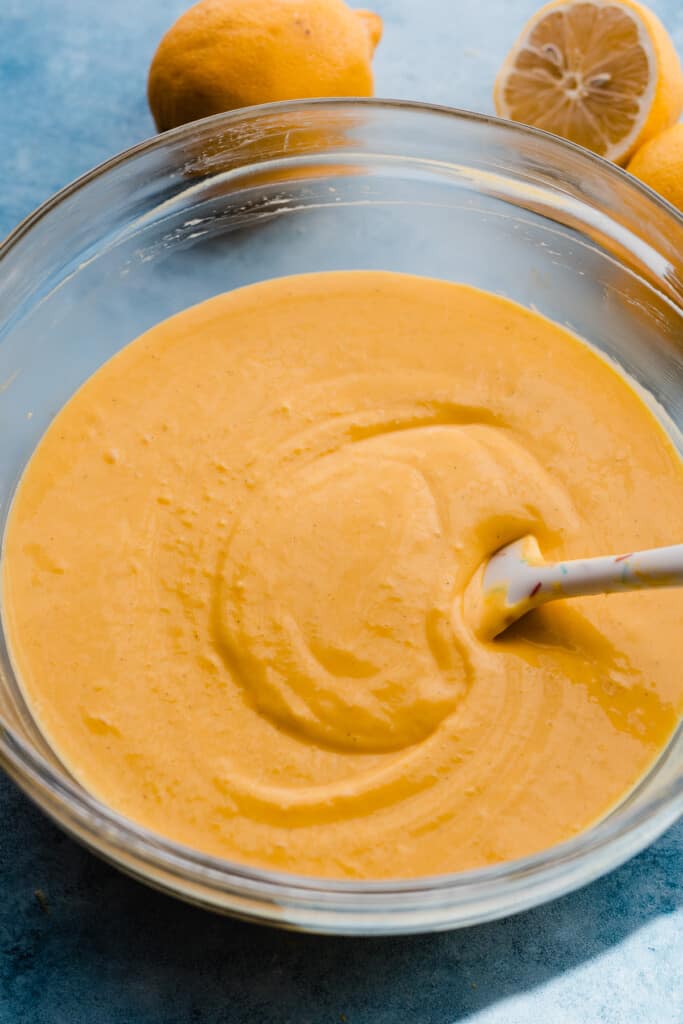
Step 4: Divide & Flavor the Batter. Remove 2 and 1/2 cups of the cheesecake batter and fold in 1 cup of lemon curd.
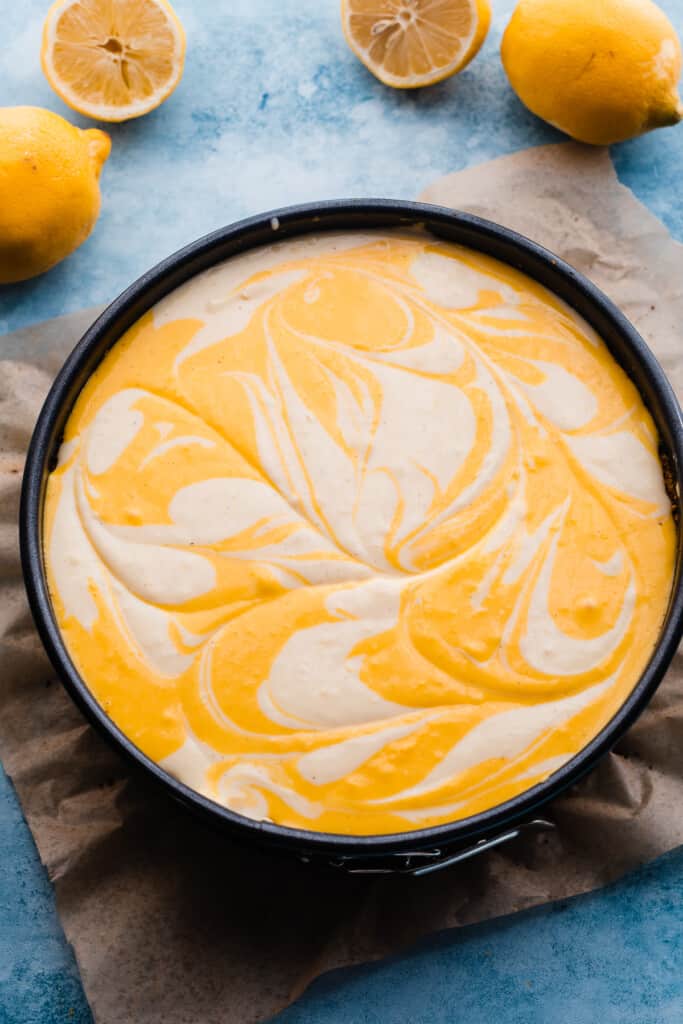
Step 4: Swirl Batters & Bake Cheesecake. Layer the two batters into your pan, adding random dollops of each, until all the batter is used up. Use a butter knife to swirl the batters together.
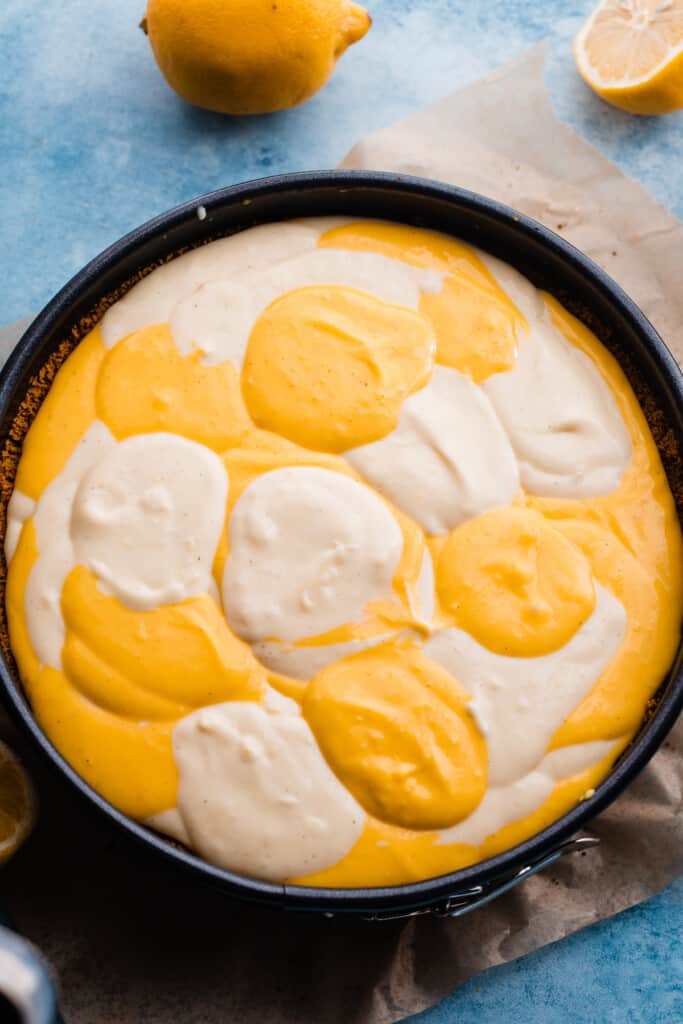
Step 5: Prepare Water Bath & Bake Cheesecake. Wrap the sides of a 9-inch springform pan with foil, then place the springform pan inside a 10-inch cake pan, and place that into a roasting pan. The 10-inch cake pan is your barrier against leaks.
Foil is not enough. Place the roasting pan with the other nested pans onto your oven rack and pour boiling water into the roasting pan only. Bake as directed in the recipe card below for best results.
Step 6: Cool & Chill: The cheesecake will need to cool to room temperature for 1-2 hours, then chill in the fridge overnight before serving.

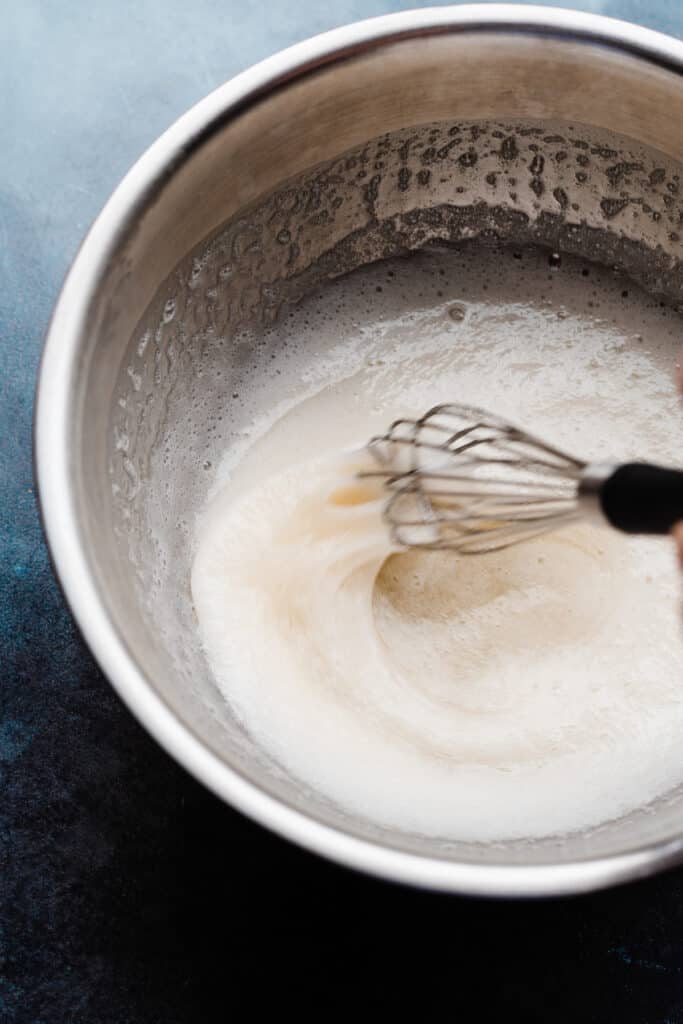
Step 7: Make the Meringue. In a metal bowl over a pot of simmering water, whisk together egg whites, granulated sugar, and cream of tartar. Cook to 175 degrees F. Transfer to the bowl of a stand mixer and beat on high until very stiff peaks form.
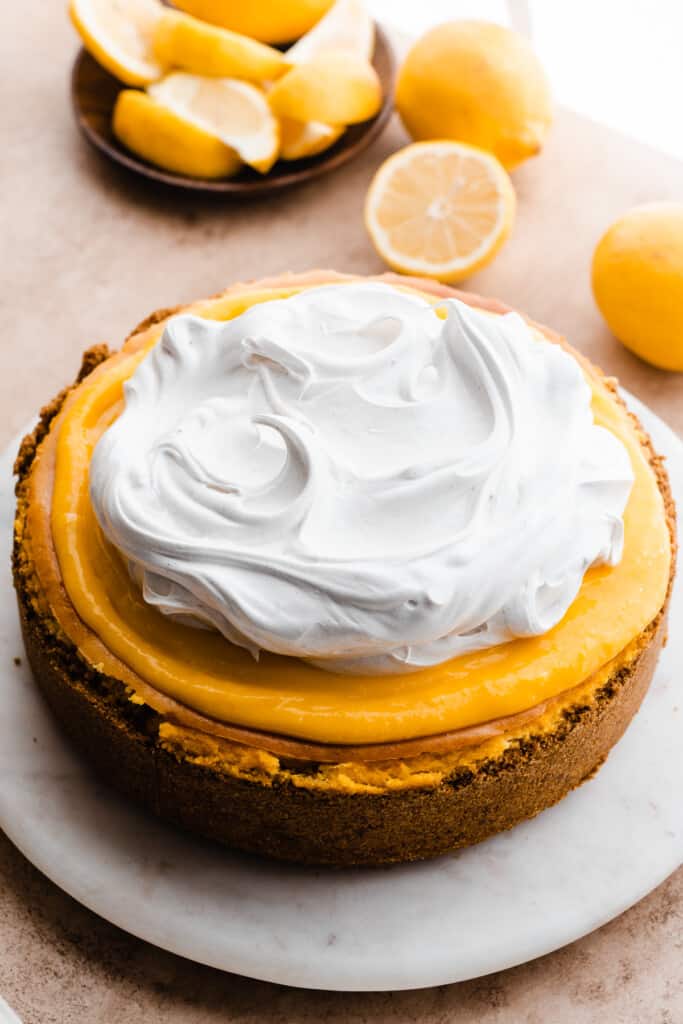
Step 8: Finish the Cheesecake. Spread lemon curd over your chilled cheesecake, then top with the meringue. Use a blow torch to toast it. Slice and enjoy!
Serving + Storing:
Serve the cheesecake as soon as you’ve added & toasted the meringue! Store leftover cheesecake inside of a cake carrier in the fridge for 3-4 days. The meringue should hold without weeping off the leftover cheesecake for 3-4 days.
Expert Tips for Swiss Meringue:
If you’ve never made meringue before, it can seem intimidating. I give very specific directions in the recipe as well.
Why didn’t my meringue reach stiff peaks or why did it become weepy?
Meringue will become weepy on a humid day. Or, if you got any bits of egg yolk in your whites, it can prevent the eggs from stabilizing. If you didn’t properly clean your bowl & utensils with vinegar & hot water, there could be fat residue (butter, etc.) from previous bakes, which interferes with the meringue’s stability (even after going through the dishwasher).
Use metal instead of silicone or ceramic – fat clings to these much more stubbornly than metal. (This is especially true of silicone! If you have silicone baking mats, you know this – they feel greasy no matter how many times you wash them!)
Is it possible to over mix Swiss Meringue?
Yes, this is possible. If it won’t reach the proper consistency no matter how long you mix, you likely need to revisit the tip above. At some point, you can over mix and the meringue will deflate. Follow my tips here and in the recipe card and you’ll be all set!
Expert Success Tips:
- Oven Thermometer – An oven thermometer will tell you if your oven is actually running at the temperature you set it to. Your oven may not be accurate. Accurate oven temperature is crucial for most bakes, so I leave an oven thermometer in at all times to keep an eye on my oven’s calibration.
- Room Temperature Ingredients – It is imperative that you let your cold ingredients come to room temperature. Cold ingredients will create a lumpy batter.
- Don’t Over Mix – Over mixing the cheesecake batter when you’re adding the eggs can cause the cheesecake to buckle a little bit in the oven. It will still taste great, but won’t look as pretty (it may have a bit of a waist in the middle).
- Don’t Over Bake – Follow the doneness cues given in the recipe card below to avoid over baking the cheesecake. Don’t panic if it browns the slightest bit on top – that can happen without it being over baked.
FAQs:
Yes you can! Bake a half batch of this recipe in a 9×9 square pan. I think half the batter may still be a bit much for a 6-inch springform pan.
Don’t panic! This is very normal with my cheesecake recipes because of the sheer volume of batter in the pan – since the top of the cheesecake is at the top of the pan, it’s just closer to the heat of the oven and will brown a bit more. Don’t try to cover the cheesecake with foil if you notice the top catching some brown. It will stick and rip part of the top off – learned that the hard way! The cheesecake will still be creamy & delicious inside even if it browns a bit on top. Using the water bath can help mitigate this!
Yes! That’s the nature of cheesecake. Allow the cheesecake to come to room temp after it’s baked, and then transfer to the fridge to chill overnight (some people say at least 6 hours, but I’ve always let mine go overnight) before serving.
Sure thing. Add the lemon curd to the whole bowl of batter, instead of diving the batter, then bake as directed. Separating the batter out makes for a very pretty finished look, but it certainly isn’t required.
The hot water produces steam that fills the oven, which helps the cheesecake cook evenly at a constant temperature, and remain nice and creamy, without cracking. It also helps prevent the edges from cooking at a faster rate than the center. Think of it as a protective shield for the delicate cheesecake, from the heat of the oven!
You have two options – place the roasting pan filled with water on the rack below your cheesecake, or place your cheesecake pan (still wrapped in aluminum foil) into a 10-inch cake pan, then place this into the roasting pan. Pour water into the roasting pan only. If you place the foil-wrapped cheesecake pan into the roasting pan and pour in water, it will almost always leak to some degree. The ideal option is to have your cheesecake inside of this extra pan for protection, and to have that inside of the water bath. The water bath is not as effective when the cheesecake is on a separate rack, but it will taste fabulous either way!
Recipe Variations:
- Lemon Curd – This is easy to make, but if you’re pinched for time, you can use store-bought!
- Whipped Cream – If you don’t want to make meringue, you can make vanilla bean whipped cream instead. Make my Homemade Whipped Cream and pipe it on as the directions specify, or serve it on the side for people to add onto their own slices.
- Other Citrus Options – Swap in my orange curd for the lemon curd, and orange zest and juice for the lemon zest & juice to make an orange cheesecake. If you want a lime cheesecake, make my fabulous Key Lime Cheesecake.

Special Tools for Lemon Curd:
- Silicone Whisk – Use a silicone whisk to reduce the chance of the lemon reacting with metal, leaving a metallic taste in your lemon curd.
- Ceramic Saucepan – For the same reason as mentioned above, a ceramic pan is preferable for this recipe!
- Fine Mesh Sieve – You’ll need a fine sieve to push the lemon curd through, ensuring that any tiny bits of cooked egg don’t end up in your dessert.
- Instant Read Thermometer – An instant read thermometer tells you when your curd is cooked to the proper temperature!
Special Tools for Lemon Cheesecake:
- Springform Pan – This lemon meringue cheesecake recipe uses a 9-inch springform pan.
- 10-Inch Cake Pan – Use a 10-inch cake pan as your barrier between the cheesecake pan and the water bath in the roasting pan.
- Roasting Pan – A roasting pan is essential for a water bath when making cheesecake.
- Kitchen Torch – You know those cute little hand held kitchen torches? They crap out after a couple uses – don’t waste your money on those cheap things. Buy this Bernzomatic Trigger Start Torch and a few Propane Tanks to go with it – it’s a much higher-quality torch and has lasted me for years!
More Cheesecake Recipes to Love:
- Mini S’mores Cheesecakes
- Key Lime Pie Cheesecake
- Strawberry Cheesecake
- Pecan Pie Cheesecake
- Biscoff Cheesecake
- Triple Nutella Cheesecake
- Lemon Blueberry Cheesecake
Did you make this recipe? Leave a comment & star rating!
Click the little stars in the header of the recipe card below to leave a comment & star rating, letting me know how you liked the recipe. I take all feedback seriously, & leaving a rating helps my small business immensely!

Lemon Meringue Pie Cheesecake
Ingredients
For the Lemon Curd
- zest of 2 large lemons
- 3/4 cup + 2 tbsp granulated sugar , 184 grams
- 3/4 cup + 1 tbsp lemon juice, About 4-5 medium lemons – 198 grams
- 4 large eggs, at room temperature
- pinch of salt
- 1/2 tsp vanilla extract
- 6 tbsp salted butter, cubed, 85 grams
For the Crust:
- 3 cups graham cracker crumbs, 280 grams
- 1/2 cup + 2 tbsp salted butter, melted, 141 grams
For the Cheesecake Batter:
- 32 ounces full fat cream cheese, softened at room temperature , 904 grams
- zest of 2 large lemons
- 1 and 1/2 cups granulated sugar, 315 grams
- 4 large eggs, at room temperature
- 3/4 cup full fat sour cream, at room temperature , 180 grams
- 2 tsp vanilla extract
- 1/3 cup + 1 tbsp lemon juice, 96 grams
- 1 cup lemon curd , 290 grams
For the Meringue
- 4 large egg whites, at room temperature , See tip below before starting!
- 1 cup granulated sugar , 210 grams
- 1/2 tsp cream of tartar
- 1/8 tsp salt
- 2 tsp vanilla bean paste, or vanilla extract
Instructions
- Make the Lemon Curd: Use a non-metal pan, if at all possible. It can react with the lemon and leave a metallic taste. Use a ceramic pan and even a silicone whisk if you've had issues with this in the past. I haven't, but have heard of it happening to others. Beat the eggs in a small bowl and set aside. Place a strainer over a medium bowl. Add lemon zest and sugar to a medium saucepan, rubbing the lemon zest into the sugar well with clean fingers. Add the lemon juice, beaten eggs, and salt to the same pot. Whisk until well combined. Cook, whisking constantly, over low heat, for 10-14 minutes or until the temperature on a candy thermometer reaches 175° F. The mixture should coat the back of a spoon, and hold a trail when you drag your finger through the curd. Remove the saucepan from the heat immediately once it hits 175℉, and strain it into the medium bowl to remove any lumps. Whisk the vanilla & butter into the hot curd mixture until fully combined. Press plastic wrap onto the surface of the curd and chill in the fridge at least 3 hours or up to 4 days week before using. Curd will thicken a bit as it cools.Tip: Use a bit of golden yellow food coloring to make this look more lemony – it is naturally less saturated than mine looks. Note: This yields about 2 cups, or 555 grams of lemon curd.zest of 2 large lemons, 3/4 cup + 2 tbsp granulated sugar , 3/4 cup + 1 tbsp lemon juice, 4 large eggs, at room temperature , pinch of salt, 1/2 tsp vanilla extract , 6 tbsp salted butter, cubed
- Make the Crust: Preheat oven to 350° F. Spray a 9-inch springform pan with nonstick spray and make sure the bottom is securely fastened. Stir together crust ingredients and press into prepared pan and up the sides a bit (see photos above). Bake this for 10 minutes. Set aside to cool, then wrap the bottom with foil. Tip: If your crust seems like it needs a bit more moisture, add 1-2 additional tbsp melted butter. I have to do this often lately!Keep the oven on at 350. Make sure your oven rack is positioned in the center. Fill a large pot with water and set it on your stove, and get out a large roasting pan – you'll need this for your water bath later.3 cups graham cracker crumbs, 1/2 cup + 2 tbsp salted butter, melted
- Make the Cheesecake Filling: Remember that your cold ingredients need to come to room temp before you start or the filling may have issues. In a small bowl, rub the lemon zest into the granulated sugar with clean hands, until it resembles a sandy mixture. In a large mixing bowl, beat the softened cream cheese with electric mixer until creamy, about 1-2 minutes. Add the sugar & mix until well incorporated, about 1-2 minutes. Scrape the sides and bottom of the bowl with a rubber spatula as you go – little lumps of cream cheese love to hide down there. Add the eggs one at a time, mixing on medium speed after each until just incorporated – don't over mix here – we aren't trying to make a soufflé. Scrape down to the bottom of the bowl in between each egg. Add the vanilla, sour cream, and lemon juice and mix until just incorporated.Remove 2 and 1/2 cups (560 grams) of batter and add to a medium bowl. Fold in 1 cup of the chilled lemon curd. Add a little more golden yellow food coloring if desired. Alternate adding dollops of the two batters to the baked & cooled crust, using up all the batter. Use a butter knife to swirl the batters together for a pretty design.32 ounces full fat cream cheese, softened at room temperature , zest of 2 large lemons, 1 and 1/2 cups granulated sugar, 4 large eggs, at room temperature , 3/4 cup full fat sour cream, at room temperature , 2 tsp vanilla extract , 1/3 cup + 1 tbsp lemon juice, 1 cup lemon curd
- Prepare the Water Bath + Bake: Bring the large pot of water to a boil. Set your springform pan with the cheesecake batter inside of a 10-inch cake pan, then place that stack into your roasting pan. Place the roasting pan in the oven, then pour the boiling water into the roasting pan only. Tips: The 10-inch cake pan is the only way to ensure your water bath doesn't leak into the cheesecake. Foil alone is not enough, I've learned from countless attempts. If you don't have a metal pan to use as a barrier between the springform cheesecake pan and the water, place the roasting pan of boiling water on the rack below your cheesecake pan. This method doesn't work as well than placing it in the water, but it's better than no water bath! The cheesecake will still taste delicious – this helps prevent cracks and helps it cook evenly.
- Bake: Bake the cheesecake for 1 hour and 40 minutes to 2 hours and 12 minutes. When done, the cheesecake will have only a slight wobble in the center, and a knife inserted into the edge will come out clean, and will have just a bit of thick batter when inserted into the center.Turn off the oven and crack the door open. Let the cheesecake cool in the oven for 1 hour before removing it.
- Cheesecake Cooling: Once the hour is up, remove the pan from the oven. It should be cool enough to handle. Remove the foil and set the springform pan on a wire rack. Let cool completely at room temp, then cover with foil and refrigerate at least overnight or up to 2 days before removing from the pan and decorating/serving.
- Meringue Prep: Make sure you read the note below on cleaning your utensils with vinegar before beginning. Get out everything you need before starting, including your cheesecake. Place your cheesecake on a serving plate, and spread a thin layer of lemon curd on top. I have had better success making meringue in a stand mixer, but if you're confident with your hand mixer, you can use it as well. Try to avoid making this on a humid day as that can wreak havoc on the meringue's stability.4 large egg whites, at room temperature , 1 cup granulated sugar , 1/2 tsp cream of tartar, 1/8 tsp salt, 2 tsp vanilla bean paste
- Make the Meringue: Add an inch or so of water to a small/medium saucepan. Make sure your bowl doesn't sit in the water. Test it by setting the bowl on the pot, over the water, lifting off and seeing if the bottom is wet. If you have a stand mixer, you can use it's metal bowl. In your selected bowl, whisk together room temperature egg whites, granulated sugar, cream of tartar, and salt. Set the bowl over the pot of water. Turn the heat to low, then cook, whisking constantly until an instant thermometer holds steady at 175℉. (Mine was registering between 175℉ and 180℉ depending on where I stuck the thermometer without hitting the bottom of the bowl. Keep going until you don't see any reading below 175 ℉.) This will take about 8 minutes, but go by temp, not by time. Remove from the heat immediately, and add the vanilla. Hand Mixer: Beat with a hand mixer on high speed for 4-5 minutes. We're looking for a thick mixture with stiff peaks. Stand Mixer: Mix with the whisk attachment on high speed (I like to keep it between 8-9, not at 10) for 4-5 minutes. The mixture will grow up the sides of the bowl, and is ready when it seems to have stopped growing, and is balling up inside the whisk attachment (it will almost look a tad clumpy, as opposed to smooth & silky). When you lift the whisk attachment out and flip it so the bottom is pointing up, the meringue should stand stiffly up, with only the slightest bit of the tip top strand of meringue flipping over. Immediately pile the meringue on your cheesecake, then gently make swirls with the back of a spoon. Toast the meringue with a blow torch.
- Serve & Store: After toasting, immediately slice and enjoy! Store leftovers in an airtight container (a cake carrier works well here for the height of the meringue!) in the fridge for 3-4 days.
Notes
Nutrition
Nutrition information is automatically calculated, so should only be used as an approximation.


Hi,
Could I leave out the lemon juice and zest in the base cheesecake? Would I need to replace the moisture with something else? Thanks!
Hi! You can leave it out, though I’m not sure what the purpose of that would be? You do not need to replace it with anything else. Let me know how you like the recipe!
Question about baking time – 1 hour 40 minutes to 2 hours 12 minutes is a wide range and also seems very long compared to most cheesecake recipes. Can you confirm the baking time?
Hi Sheila! That is the correct bake time. The addition of the lemon curd in the batter means more liquid, which means it will take longer to bake. And every oven is a bit different, so start with about 85 minutes first, then check for doneness from there adding time as needed. The edges should be set and the center will have a slight wobble. The top may brown a bit but that’s normal. Let me know how you like the recipe!
Haven’t made it yet but am wondering if I could just put the finished cheese cake under the broiler to brown the top. I don’t want another piece of equipement I raarely use cluttering up the kitchen.
Hi Marie! I think that would work, but i have to give the disclaimer that I haven’t tried it myself. I would keep a very close eye on it! Let me know how you like the recipe!
I’ve made multiple of her cheesecakes and they always turn out fabulous! It’s become a Thanksgiving tradition in my family!
Thanks so much Helen! If you have a moment, please leave a star rating on the other cheesecake recipes you’ve made as well, it’s super helpful to have reader reviews! Happy baking.
Fabulous!
Thanks so much, Natalie!
32 ounces how much is this in grams?
Hi Linda! 32 ounces of cream cheese is 904 grams. Let me know how you like the recipe!
Hi Stephanie,
thanks for your response. I come from the Netherlands and there we work with grams instead of ounces. Sometimes it is difficult to find how to calculate this on the internet. Thank you very much for your response.
Hi Linda! Happy to help. I’m slowly working on adding gram measurements to my 400+ recipes. I wish the U.S. used metric, it would be so much easier 😄. Happy baking!
I was super impressed with this recipe, It was so delicious! I haven’t made a cheesecake in a very long time, so it took more effort than i thought it would, but I enjoyed every bit of making it. The process definitely goes quicker if you prep beforehand. The only alteration I had to make was to the crust. I only had half the graham crackers that I needed and ended up using frosted flakes for the other half. That was a terrible mistake, tastewise, but it was the only things I had in my pantry and I didn’t feel like going to the grocery store, but now I know better lol. Also, the recipe for the meringue was extremely simple & absolutely perfect. I didn’t have a kitchen thermometer, so I just did a little finger test and that worked just fine. I’m curious if this recipe will make pavlovas because it just held up so well & was very delicious.
Thanks so much for the rave review, Aria! I truly appreciate it. Also, I had to laugh about the frosted flakes mistake, haha! Happens to all of us at some point or another. I think you could definitely pipe the meringue onto parchment paper and bake low and slow for pavlovas! I actually loosely tried it once and it was pretty good!
Could I fully blend the filling and have it turn out creamy?
Or is the lemon filling softer/less set?
Personally I just prefer a non swirl.
Hi Amber! Yes, if you want to skip the swirl you certainly can. Instead of separating the batter into two bowls, leave it all in the large bowl and stir the lemon curd into the whole bowl of batter. Please let me know how you like the recipe!
Hi! I’m looking forward to making this is my dream come true with cheesecake and lemon!
Could I know if I can use something else instead of a torch? I don’t own one yet and I would like to make this during this weekend, thank you!
Hi Laura! I believe you can place the cheesecake topped with meringue under your oven broiler to toast it. Keep a careful eye on it and only let it go for 1-2 minutes or so. Don’t let it burn! Please let me know how you like the recipe!