This post contains affiliate links. Please see our disclosure policy.
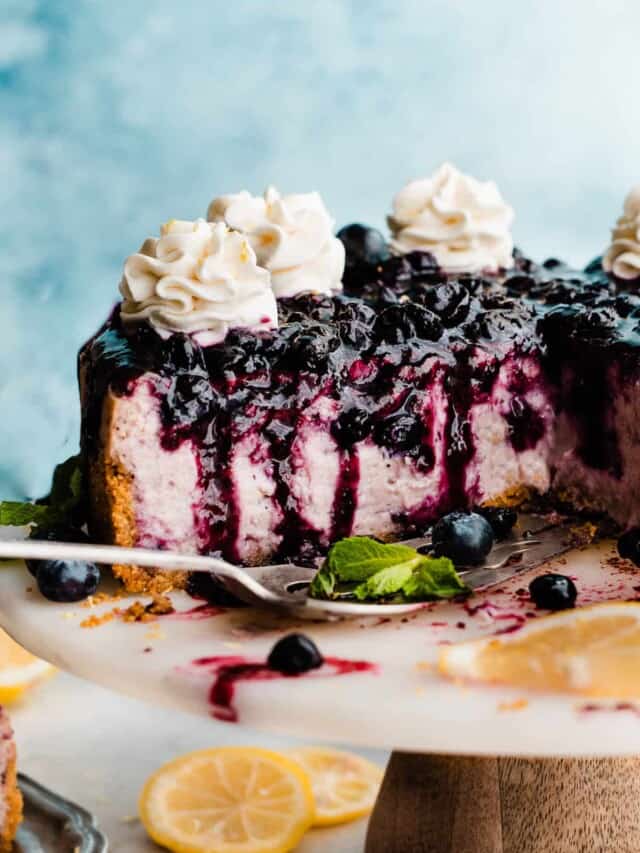
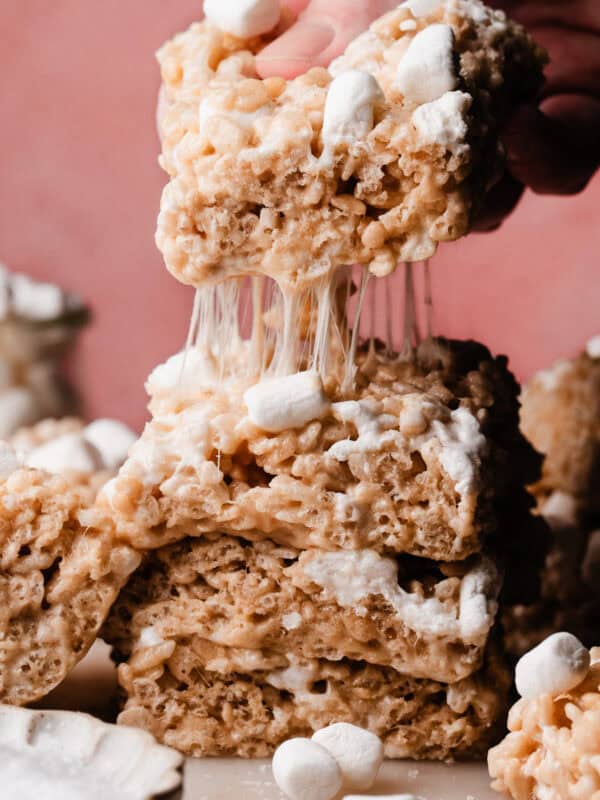
Homemade Whipped Cream is easy to make at home with simple ingredients! I’ll walk you through everything you need to know to make, stabilize, pipe, and even flavor whipped cream in this in-depth post! It’s the perfect, refreshing topping for cheesecakes, pies, cakes, and more.

Table of Contents
- Why you’ll love Homemade Whipped Cream:
- Ingredient Overview:
- Recipe Substitutions & Variations:
- How to Make the Best Whipped Cream:
- How to Stabilize Whipped Cream:
- How to Pipe Whipped Cream:
- How to Beautifully Dollop Whipped Cream:
- Alternate Mixing Methods for Whipped Cream:
- How to Flavor Whipped Cream:
- Serving + Storing:
- Expert Baking Tips:
- FAQs:
- Special Tools:
- Recipes to Pair Whipped Cream with:
- Homemade Whipped Cream Recipe
Why you’ll love Homemade Whipped Cream:
- Easy to Make – This refreshing treat is made in minutes with just 3 basic ingredients.
- Delicious, Fresh Flavor – Homemade whipped cream has a delicious fresh taste that the store-bought stuff just can’t compete with.
- Customizable – Once you’ve mastered whipped cream, you can have fun with piping it, or adding different flavors!
Ingredient Overview:
As always, the full recipe with measurements & directions can be found in the recipe card at the bottom of this post. Use the table of contents (back at the top, below the first image, to navigate).
- Heavy Cream – Use cold heavy whipping cream (the same thing as heavy cream). Note that heavy cream doubles in volume as it’s whipped, so if you start with 1/2 cup of cream, you’ll have about 1 cup of whipped cream. This makes it easy to decide how much you’ll need without necessarily following a recipe every time!
- Vanilla – You can use vanilla extract or vanilla bean paste. I love using vanilla bean paste because it leaves those beautiful little flecks of vanilla in the white whipped cream.
- Powdered Sugar – Powdered sugar is the best option for whipped cream so you don’t end up with a grainy texture.
- Gelatin – You can find plain gelatin in the baking aisle near the jello. This is what I use to stabilize my whipped cream. You can read more about that a few sections below.
Recipe Substitutions & Variations:
- Gluten-free – This recipe is naturally gluten-free!
- Dairy-free – I’ve had good success using dairy-free heavy cream to make whipped cream. Be sure to use a brand you already trust.
- Flavored Whipped Cream – You can sometimes add flavor to your whipped cream through cocoa powder, freeze dried fruit powder, or lemon/orange juice.
- Light Whipping Cream – I do not recommend using light whipping cream, it has a much lower fat content and will not whip up the same way as heavy cream.
- Almond Extract – You can flavor your whipped cream with a little almond extract (1/4 to 1/2 tsp, add from there) in addition to the vanilla!
How to Make the Best Whipped Cream:
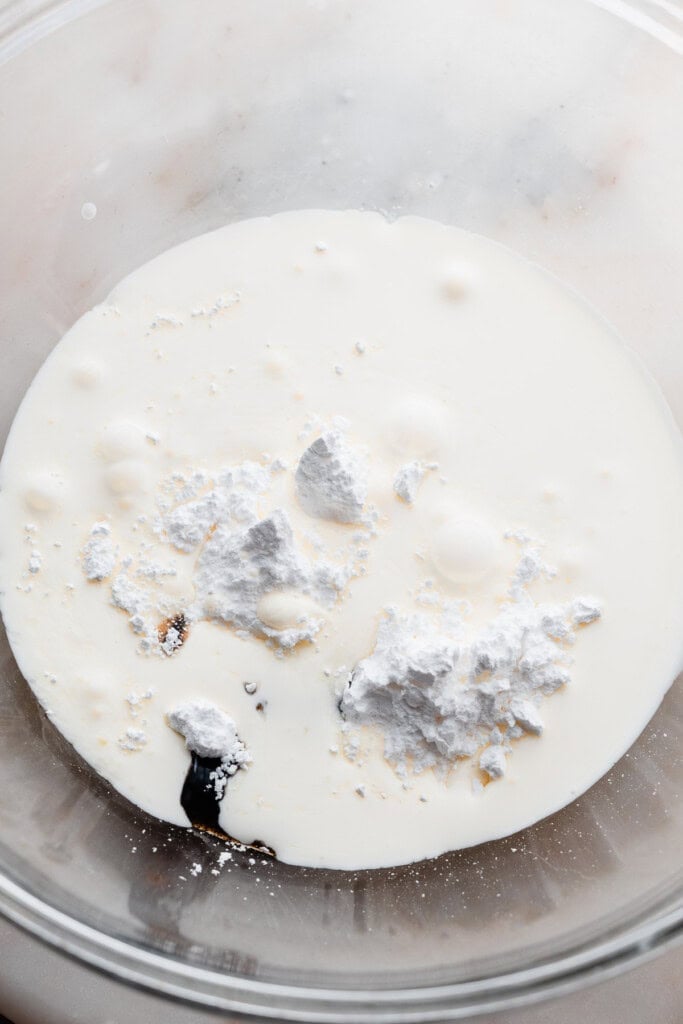
Step 1: Prep. Add all your ingredients to a bowl. Your heavy cream must be very cold, straight from the fridge. Warm cream will not whip up.
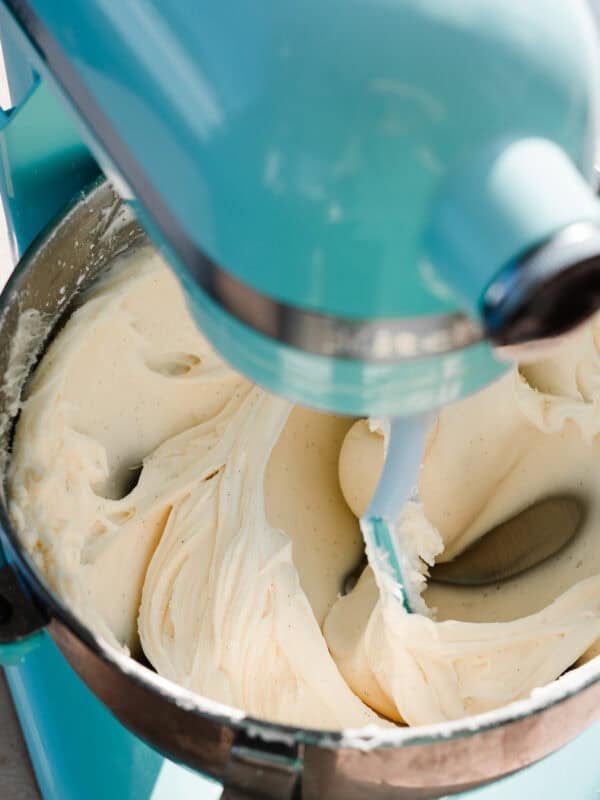
Step 2: Mix. Mix on medium high to high speed. The mixture will splatter at first, before it begins to thicken, so use a towel over the bowl and mixer to contain the mess.
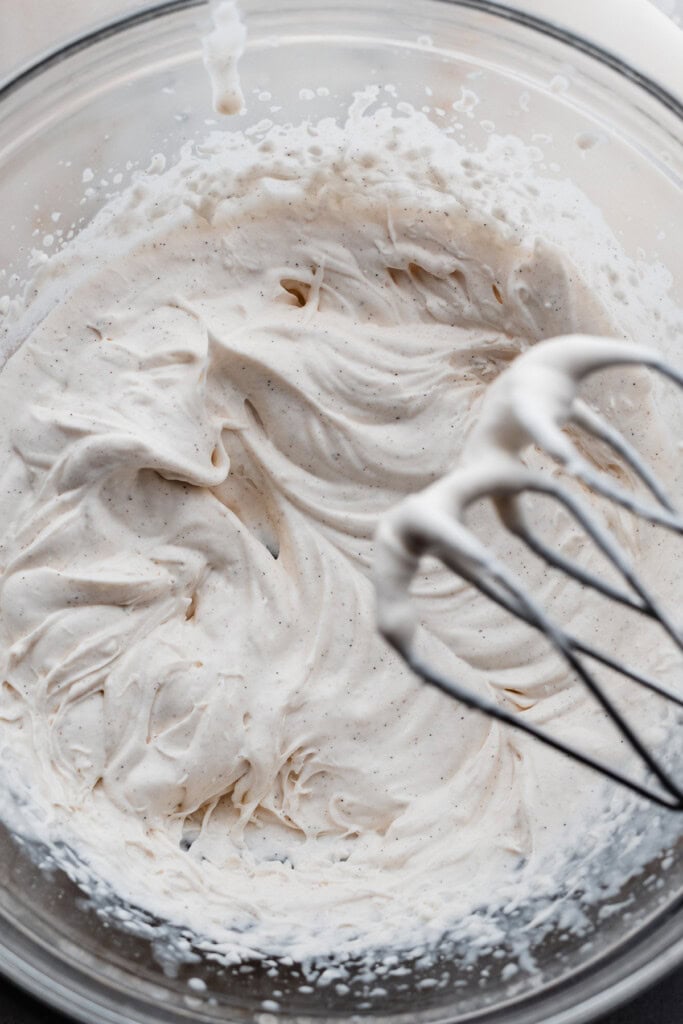
The mixture will begin to thicken, then reach soft peaks, then reach stiff peaks. Don’t keep mixing once stiff peaks are reached, or you’ll end up with a sort of curdled texture.
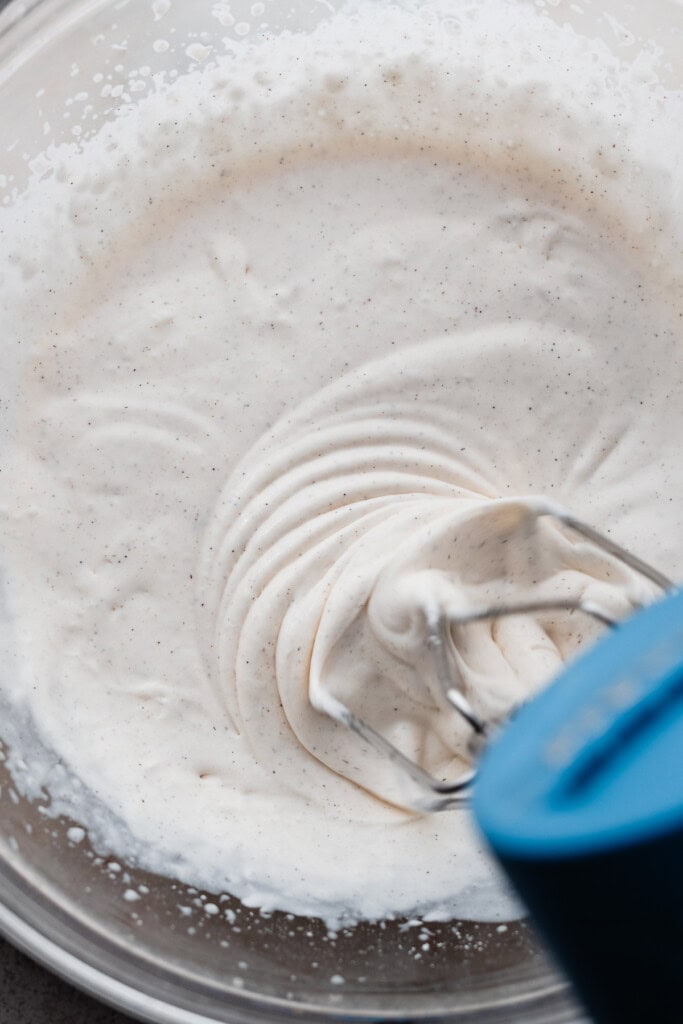
Step 3: Finish. You can mix until soft peaks (below left photo) or stiff peaks (below right photo). Soft peaks are good for dolloping onto individual slices of cake or using in individual Strawberry Shortcakes.
Stiff peaks is best if you want the whipped cream to be more stable, for piling on top of a pie (like my Black Forest Pie) or piping on. If piping, you’ll also want to stabilize the cream (see section on Stabilizing Cream, below).

How to Stabilize Whipped Cream:
Stabilizing whipped cream is ideal when you want the whipped cream to stay put on a dessert for a period of time before you serve it. For example, you may want to pipe whipped cream on top of a cheesecake or a pie a few hours before serving.
A mixture of gelatin and water gives structure to the cream, making it sturdy enough to pipe AND stay in place without weeping, while still allowing the cream to stay soft and delicious. And, no, you can’t taste the gelatin one bit!
If you don’t want to go the gelatin route, adding a little cream cheese or mascarpone will also stabilize your whipped cream.
Step 1: Add Gelatin and Water to a Bowl. Add plain powdered gelatin to a small bowl with water. You’ll need 1 part gelatin to 4 parts water. Let stand for 3 minutes – the mixture will look thick and gummy.
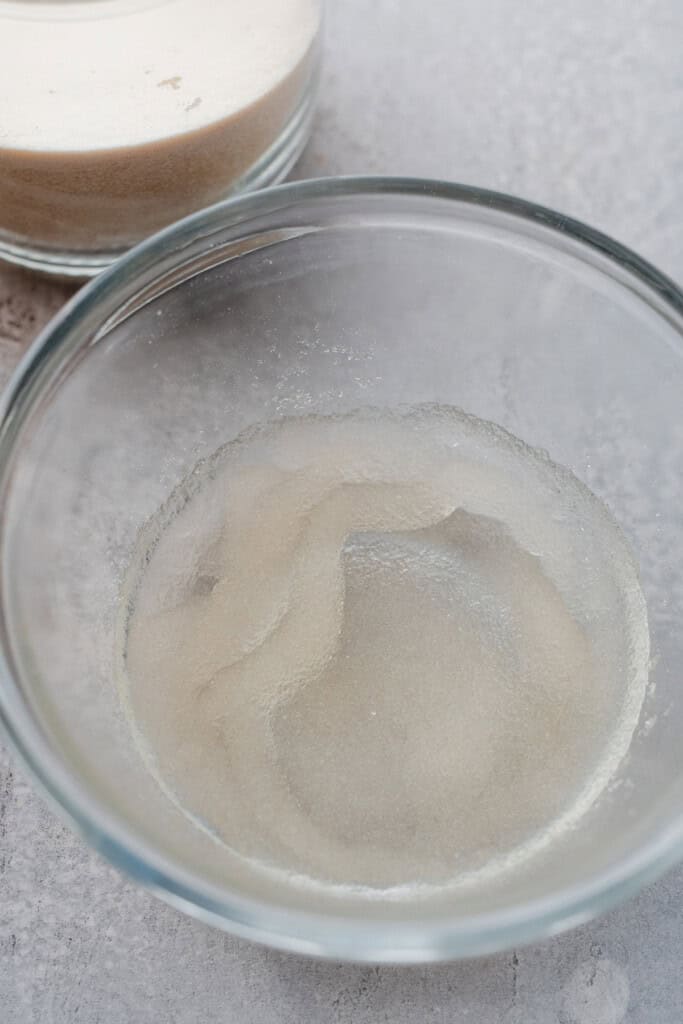
Step 2: Microwave. Microwave the gelatin mixture just for a few seconds, to liquify it. Set aside.
Step 3: Stabilize. Start making our whipped cream. Then, slowly stream in the liquid gelatin mixture on low speed, once the cream has just started to thicken. Then, keep beating the cream until stiff peaks form. That’s it! Easy peasy.
How to Pipe Whipped Cream:
Step 1: Stabilize Cream. Make your whipped cream and stablize it as directed above.
Step 2: Pipe. Add your cream to a piping bag fitted with your desired piping tip. Pipe onto your chilled cheesecake or pie just before serving. Or, pipe onto individual slices as you serve them!
How to Beautifully Dollop Whipped Cream:
Step 1: Make your whipped cream. Use the back of a spoon to gently make waves across the top of the cream. Then, use your spoon as a shovel and push it vertically through the horizontal waves.


This makes a beautiful dollop of whipped cream which you can gently nudge off the spoon onto a slice of cake, cheesecake, or pie.

Alternate Mixing Methods for Whipped Cream:
- Stand Mixer – Use a stand mixer fitted with the whisk attachment. Mix on medium-high speed until stiff peaks form. You can stabilize with this method (see section below for all about stabilizing!).
- Whisk & Elbow Grease – Use a bowl, a whisk, and your arm! This takes a bit longer but produces beautiful results. Try trading the bowl off between multiple people in the kitchen to give your arm a break – trust me on that, haha! You can stabilize with this method.
- Blender – I’ve only tried this a few times, but it worked beautifully on my Peanut Butter Pie and didn’t need to be stabilized. Add ingredients to a blender and pulse on medium or medium high for 1-2 minutes, giving it a stir about halfway through to check the consistency, until thickened and stiff.
- Food Processor – I’ve had mixed results with this one, but I think the times it failed was due to me over mixing and the cream deflating. If you want to try it, be warned that it may not be the most reliable method but it does self-stabilize, like in the blender. Add ingredients and pulse about 8-10 times, then run on low until whipped cream is thickened and stiff.
- Immersion Blender – I tried this once out of desperation when my food processor was dirty and I didn’t want to get out a giant blender. It produced delicious whipped cream that was a bit runnier – I couldn’t get to stiff peaks. So, beware that this method may not be the best, but still tastes delicious!
- Mason Jar – Add your ingredients to a mason jar and shake, shake, shake! This method isn’t the best if you want to stabilize, but is great if you want a light workout, hehe.
How to Flavor Whipped Cream:
Classic whipped cream can be flavored in a variety of fun ways!
- Lemon/Lime/Orange – Add 1-2 tablespoons per cup of heavy cream used. Add at the beginning of mixing with all the ingredients.
- Freeze-Dried Fruit – Add 1/4 cup of freeze dried fruit, pulsed to a powder in the food processor, per 1 cup of heavy cream to make a fruity whipped cream.
- Nutella Whipped Cream – Follow the step 7 of my Nutella Cheesecake to make this one. This one was hard to get to a true firm peaks stage, so it’s probably not the best for piping, I would dollop it onto individual servings instead.
- Mascarpone Whipped Cream – Make the mascarpone cream from my Tiramisu Cheesecake (with or without the cocoa powder) for a deliciously creamy, thick, and stable whipped cream!
- Chocolate Whipped Cream – Add 2 tbsp cocoa powder per 1 cup of heavy cream, with the rest of the ingredients at the beginning of mixing.

Serving + Storing:
Once your whipped cream is made, whether stabilized or not, it’s best to use it right away! If it’s not stabilized, it can begin to lose structure or “weep” as it sits. If it is stabilized, it may firm up too much after sitting, for you to nicely add it to a dessert.
The good news is that once stabilized whipped cream is piped on or added to a dessert, it will stay in place for a few days in the fridge! So never fear, you won’t open the fridge the next day to find a a puddle of weeping whipped cream on your dessert.
Expert Baking Tips:
- Cold, Cold, Cold – If your cream didn’t whip up, it may be because it wasn’t cold enough. Make sure you’re taking it from the fridge right when you’re about to use it and begin whipping. If you struggle with whipped cream, pop your bowl and beaters into the fridge for 20 minutes (or longer!) before you start, to add extra coldness.
- Make and Serve Immediately – I wasn’t kidding when I said this should be made right when you intend to use it. It is one thing that is not make-ahead friendly.
- Taste & Adjust – I like my whipped cream a tad sweeter, but you might like it less sweet. Taste yours when it’s at soft peaks, and add more powdered sugar at this point, if desired. Adding it now vs. at firm peaks helps avoid overmixing.

FAQs:
If you continued mixing past the stiff peak stage, your cream likely looks a bit lumpy or curdled. Add a few extra tablespoons of heavy cream and mix on medium until the mixture smooths back out (you may need to do this 1-2 times). You may not always be able to fix it, but this often works for me when I’ve accidentally mixed too far.
If your cream was thick with stiff peaks, and you kept mixing, this could be the cause. Or if it reached stiff peaks, and you didn’t use it right away, this could be the cause (I mean, you have a little wiggle room, it’s not going to deflate in minutes, but don’t let it sit out or in the fridge for an hour or more before using). If it never thickened/stiffened in the first place, your cream was likely warm or expired.
Yes! You can use a stand mixer fitted with the whisk attachment, or good old fashioned elbow grease and a hand whisk (this will take a bit longer but produces beautiful results! I recommend handing this off between a few people in the kitchen so you can give your arm a break!).
This has happened to me a few times, and a little internet research told me that this is a sign your heavy cream is bad or going bad. Unfortunately in that case, it’s best to throw it out and try again with a fresh bottle.

Special Tools:
- Mixing Tool of Choice – As listed above, you’ll need either a stand or hand mixer, a bowl and whisk, or even a food processor, blender, or mason jar to make this.
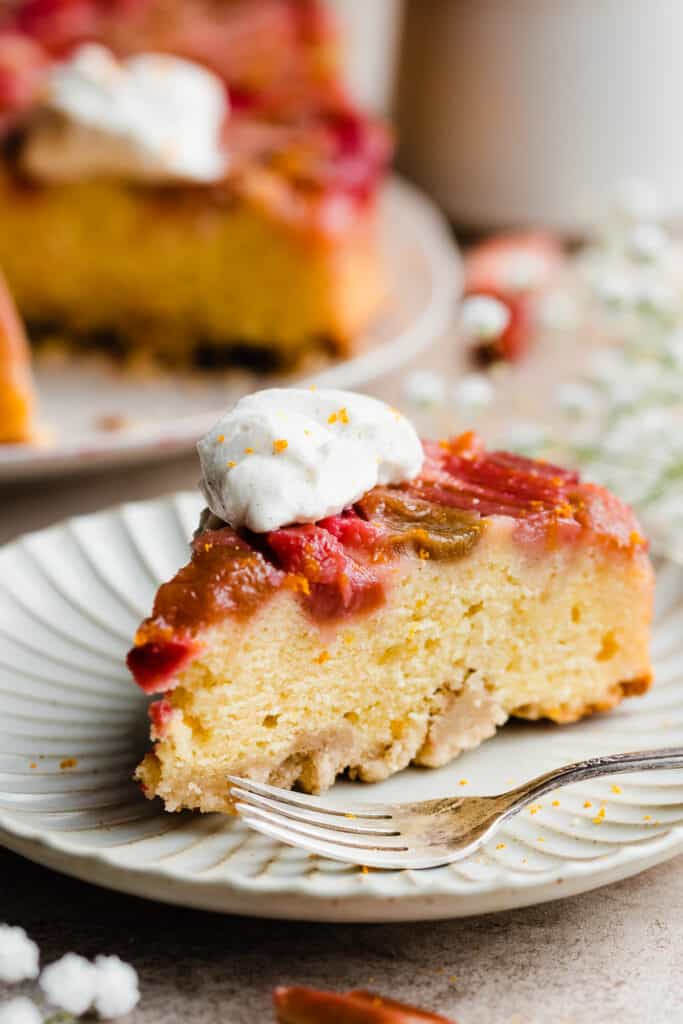
Recipes to Pair Whipped Cream with:
- Black Forest Cheesecake
- Peach Cobbler Cheesecake
- Key Lime Cheesecake
- Pineapple Upside Down Cheesecake
- Homemade Strawberry Shortcake
- Pumpkin Pie Cookies
- No-Bake Nutella Tart
- Berries & Cream Cake
Did you make this recipe? Leave a comment & star rating!
Click the little stars in the header of the recipe card below to leave a comment & star rating, letting me know how you liked the recipe. I take all feedback seriously, & leaving a rating helps my small business immensely!

Homemade Whipped Cream
Ingredients
For the Whipped Cream:
- 1 cup cold heavy cream, 240 grams
- 1/4 cup powdered sugar , Or up to 1/2 cup, depending on your taste (see note below), 29 to 58 grams
- 1 tbsp vanilla extract, or vanilla bean paste for those beautiful vanilla bean flecks! – 15 grams
For Stabilizing:
- 3/4 tsp plain gelatin
- 3 tsp water, 15 grams
Instructions
- Prep: Make sure your heavy cream is very cold, straight from the fridge, and make sure it isn't expired. If you tend to have bad luck with whipped cream, chill your bowl and mixers for 20 minutes before beginning. A chilled bowl can help the cream whip up better.
- Make the Whipped Cream: Add all ingredients to a large mixing bowl (larger than you think you'll need – it splatters, and grows!). Begin mixing with an electric mixer on medium high speed, using a kitchen towel to cover the bowl and mixer as it will splatter before it thickens. Beat on medium high to high speed until it begins to thicken. At this point, taste, and see if you want to add a splash more vanilla or a bit more powdered sugar. Keep mixing (you can remove the towel now) until you reach soft peaks or stiff peaks. Soft peak stage is when the mixer, turned off, is lifted straight out of the cream, and droopy peaks are left behind. Stiff peaks are the same, but the peaks remain stiff and upright. Once stiff peaks are reached, do not keep mixing or you may curdle the cream. Scrape down the sides and into the bottom of the bowl to make sure no under whipped bits of cream are hiding down there, as this can happen. My blog post above tells how to fix this if it does happen, in the FAQs.1 cup cold heavy cream, 1/4 cup powdered sugar , 1 tbsp vanilla extract
- Stabilize Whipped Cream: You'll need to do this if you want to pipe the cream onto a dessert, or have it last on a dessert for a few hours in the fridge before serving. Add the water to a small bowl, and sprinkle the gelatin on top, swirling a little as needed so the water covers the gelatin. Let sit for 5 minutes. It will be a very thick gelatinous mixture. Then, microwave for 3-5 seconds, or just until it liquifies. Set aside. Start making your whipped cream. Once the cream just starts to thicken, slowly stream in the liquid gelatin mixture on low speed. Then, keep beating the cream on medium high speed until stiff peaks form. Now it's stable enough to be piped!3/4 tsp plain gelatin, 3 tsp water
- Serve & Store: Once desired consistency is reached, serve immediately with desired dessert. Whipped cream is best when fresh, so don't make it ahead or plan on leftovers. If it's been stabilized and piped onto a dessert, this is different and it will hold up on the leftover dessert in the fridge for a few additional days.
- Notes: See blog post above for very detailed directions about other mixing methods for whipped cream (stand mixer, a jar, food processor, etc.) There are also details on stabilizing, piping, dolloping, and flavoring whipped cream.
Nutrition
Nutrition information is automatically calculated, so should only be used as an approximation.
I’ve tried other recipes for stabilized whip cream but this is the best one yet, no weird chunks of gelatin or pudding mix (other recipes), just perfectly smooth whip cream that doesn’t deflate or wilt after piping.
Thanks so much for your kind comment, Ashley!