This post contains affiliate links. Please see our disclosure policy.
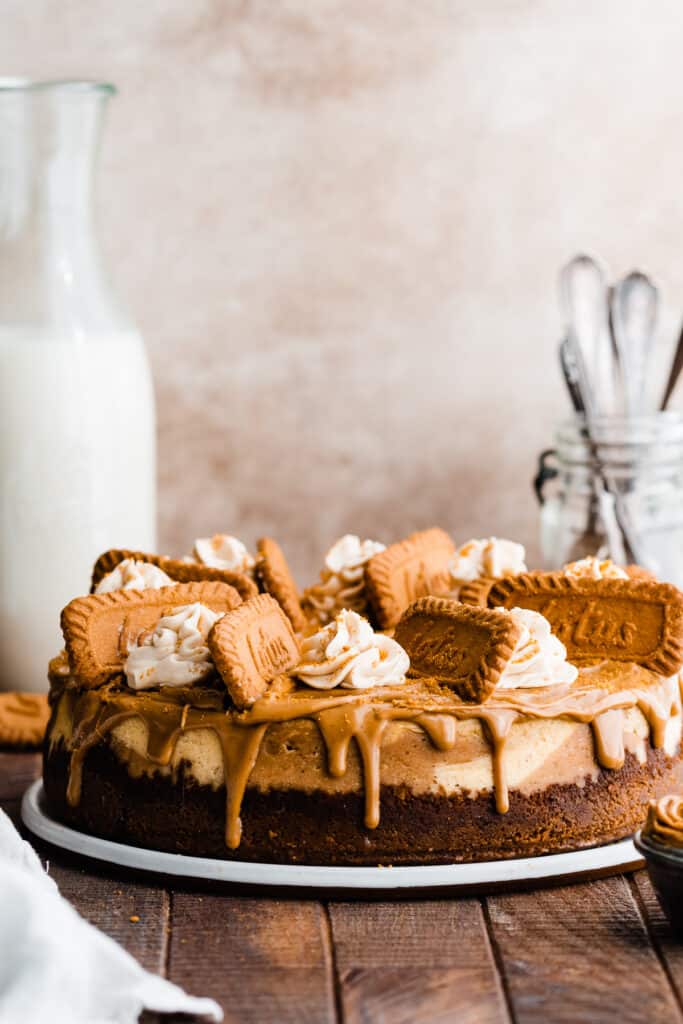
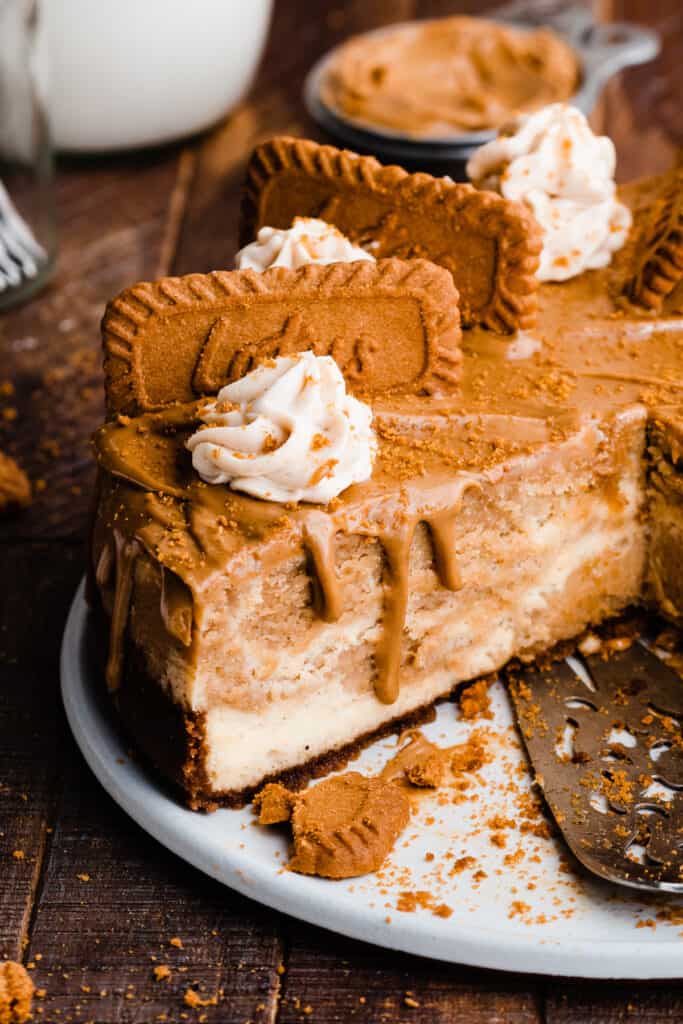
Biscoff Cheesecake has a biscoff cookie crust, biscoff cheesecake batter swirled together with vanilla cinnamon cheesecake batter, a cookie butter drip on top, and cookie butter whipped cream. It’s a cookie butter lover’s dream dessert!

Why you’ll love this Biscoff Cheesecake:
- Cookie butter in every bite – Every bite of this lotus biscoff cheesecake recipe is full of the warm, cozy flavor of cookie butter!
- Creamy Cheesecake – This cheesecake is ultra creamy and luscious.
- Approachable Recipe – Even though there are a few steps to this recipe, the whole thing is completely doable no matter your skill level as a baker!

Ingredient Overview:
As always, the full recipe with measurements & directions can be found in the recipe card at the bottom of this post. Use the table of contents (back at the top, below the first image, to navigate).
- Cream Cheese – Use full fat cream cheese, in the block style. This needs to come to room temperature before you bake.
- Eggs – Use large eggs at room temperature.
- Sour Cream – Use full fat sour cream, at room temperature. –
- Cookie Butter – Lotus Biscoff spread (also called cookie butter), is made by Biscoff, but you can of course use any brand you like (Trader Joe’s makes a great one!).
- Biscoff Cookies – Lotus Biscoff Cookies are a classic cookie! we’re using them for the crust & on top of the cheesecake. You can find these near the cookies in most grocery stores. They’re sometimes called speculoos cookies.
- Vanilla extract – Use real vanilla extract for best results.
Recipe Substitutions & Variations:
- Gluten-free – I’m not aware of a substitute for the cookie butter that’s gluten-free, so I recommend trying one of my many other cheesecake recipes if you want a gluten-free cheesecake! Scroll down to the bottom of this post for a list of cheesecake recipes.
- Dairy-free – I haven’t had any experience making dairy-free cheesecake, so I recommend finding a recipe from a reputable dairy-free or vegan blog.
- Gingersnap Cookies – If you can’t get your hands on the biscoff cookies, try crushed gingersnaps for the crust.
- All Biscoff Batter – Mix the cookie butter into the whole bowl of batter if you don’t want to swirl biscoff and vanilla batters together.
- Decorations – You don’t have to use a cookie butter drip and pipe the whipped cream on top if you’re crunched for time, but they are both delicious! You can always make the whipped cream and just let people dollop it on to their individual slices.
- Salted caramel sauce – Something tells me this would be delicious with a salted caramel drizzle! Use my 10-Minute Caramel Sauce recipe if you’d like to top it with that instead.
How to Make Biscoff Cheesecake:
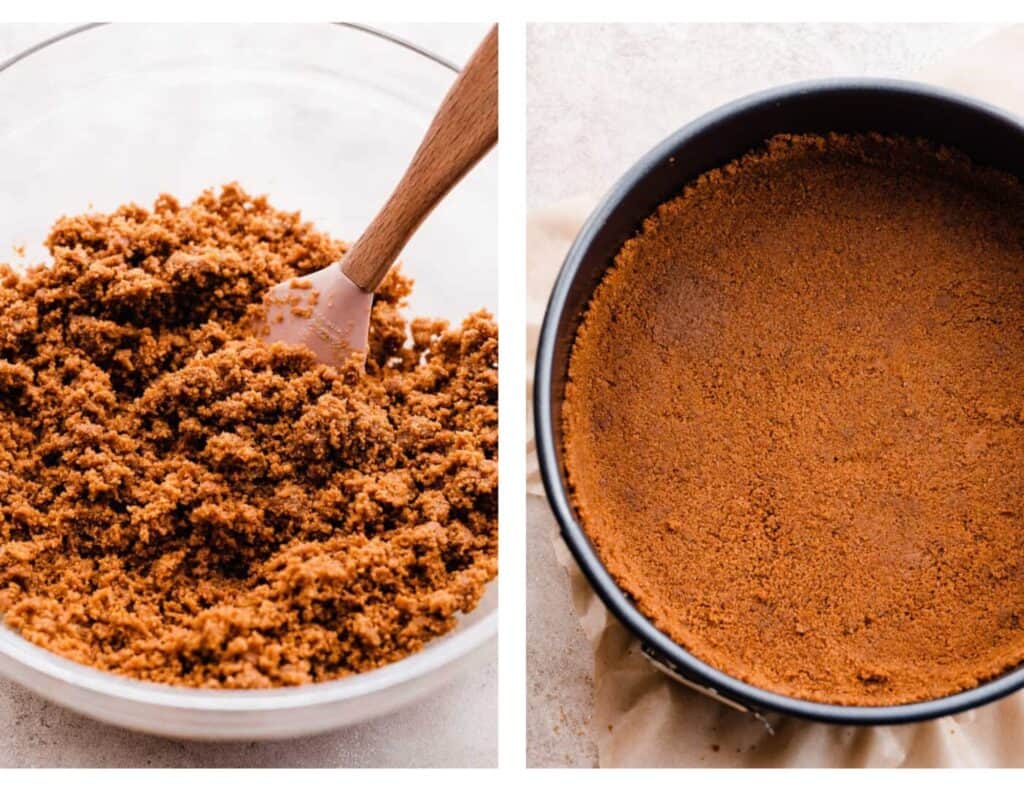
Step 1: Make the Crust. Stir together crushed biscoff cookies, melted butter, and a pinch of sugar. Press this into a 9-inch springform pan and bake for 10 minutes.
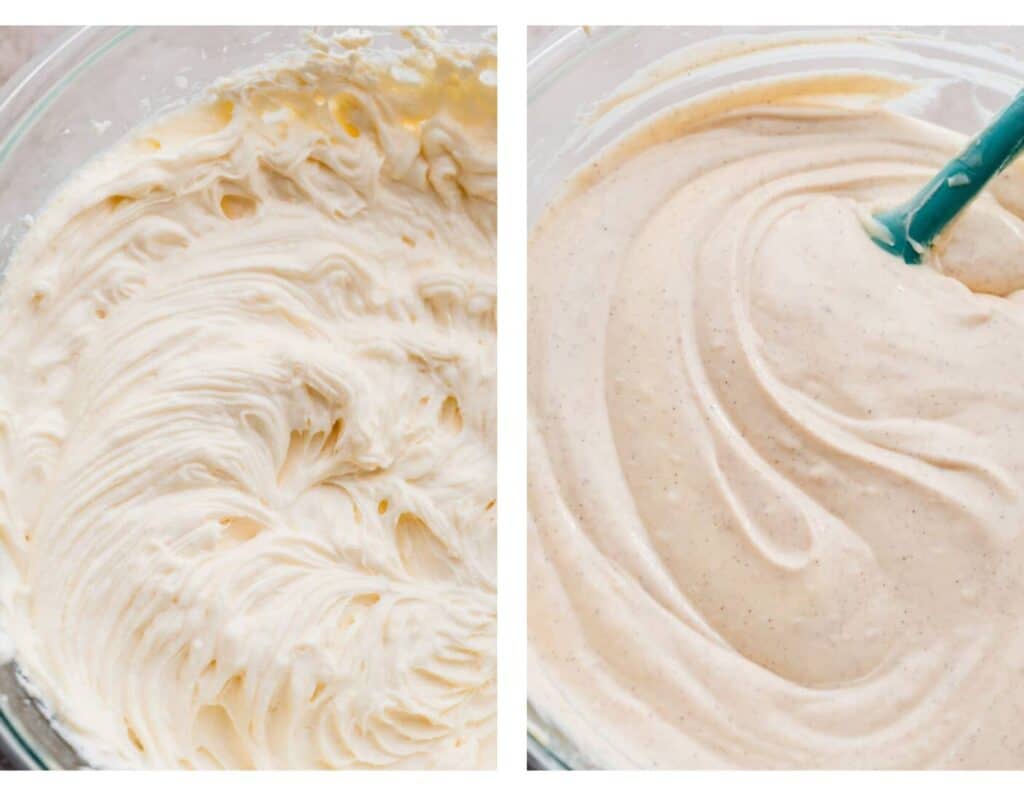
Step 2: Make the Biscoff Cheesecake Filling. In a large mixing bowl, beat your cream cheese on high speed with an electric mixer to smooth it out. Then, mix in the sugar, eggs, vanilla, and sour cream. You’ll have a silky batter. If there are a few tiny lumps, that’s ok.
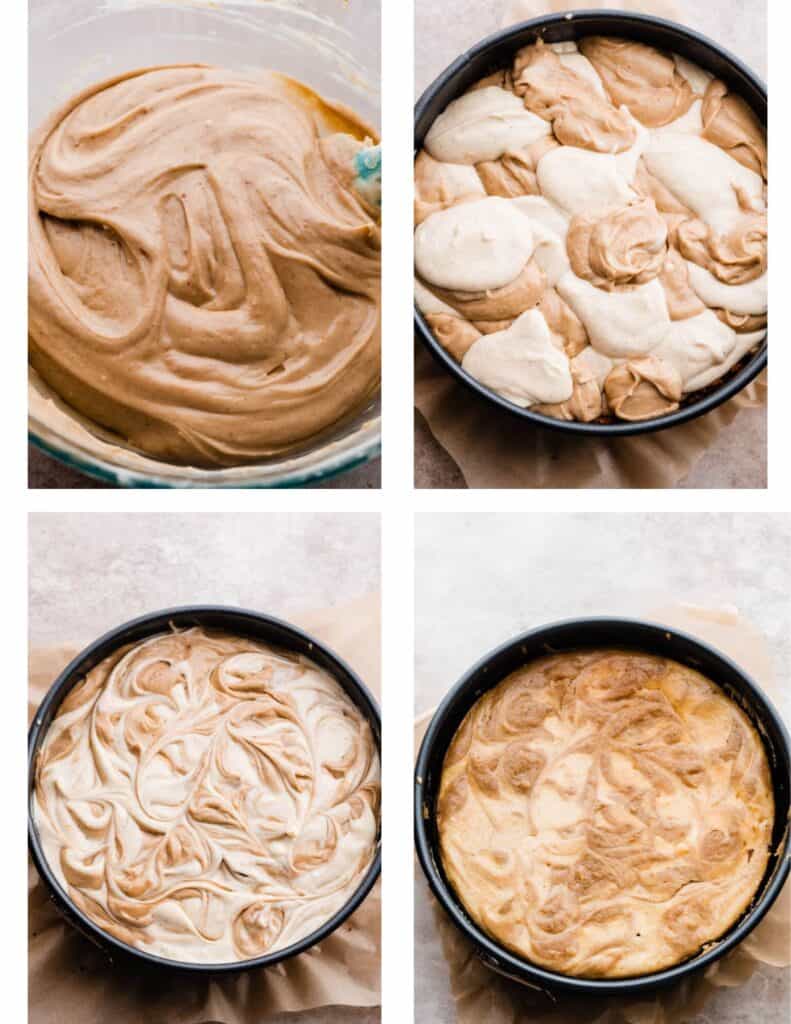
Step 3: Swirl the Batter & Bake the Cheesecake. Remove two cups of the cheesecake batter and fold in the biscoff cookie butter. Layer the two batters into your pan, adding random dollops of each, until all the batter is used up. Use a butter knife to swirl the batters together, then bake cheesecake as directed in the recipe card below.
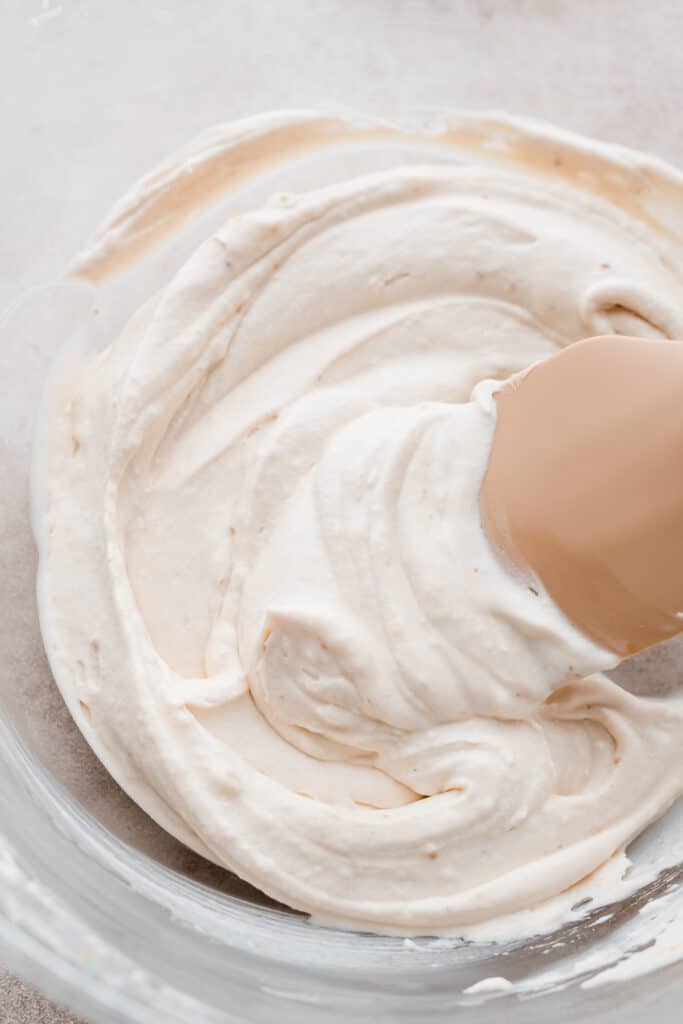
Step 4: Decorate the Cheesecake. Beat heavy cream, cookie butter, and a pinch of powdered sugar together on high speed until stiff peaks form. (See note in the recipe below about stabilizing the whipped cream for piping.) Top your cooled cheesecake with melted cookie butter and the biscoff whipped cream.
Serving + Storing:
Enjoy the cheesecake once it’s decorated! Store leftovers in an airtight container in the fridge for 3-4 days.
Expert Success Tips:
- Room Temperature Ingredients – It is imperative that you let your cold ingredients come to room temperature. Cold ingredients will create a lumpy batter.
- Don’t Over Mix – Over mixing the cheesecake batter when you’re adding the eggs can cause the cheesecake to buckle a little bit in the oven. It will still taste great, but won’t look as pretty.
- Don’t Over Bake – Follow the doneness cues given in the recipe card below to avoid over baking the cheesecake. Don’t panic if it browns the slightest bit on top – that can happen without it being overbaked.
FAQs:
Yes, I would recommend baking it in an 8×8 or 9×9 square pan.
I’m not sure that you would want to, haha. If you want two cheesecakes, you’ll need to mix each one up separately, I don’t recommend trying to double it with this quantity of batter.
Yes! That’s the nature of cheesecake. Allow the cheesecake to come to room temp after it’s baked, and then transfer to the fridge to chill at least 6 hours or up to 1 day before serving.
Cookie butter has a warm cozy flavor with hints of cinnamon. It’s delicious and lives up to the hype!
Special Tools:
- Springform Pan – This recipe uses a 9-inch springform pan.

More Biscoff Recipes to Love:
- Biscoff Stuffed Brownies
- Biscoff Mug Cake
- Biscoff Swirled Blondies
- Biscoff Cookie Butter Cake with Cookie Butter Frosting
More Cheesecake Recipes to Love:
- Mini S’mores Cheesecakes
- Perfect Classic Cheesecake with Strawberry Sauce
- Pecan Pie Cheesecake
- Chocolate Cherry Cheesecake
- Bailey’s Chocolate Cheesecake
- No Bake Cherry Cheesecake Parfaits
- Mini No-Bake Apple Pie Cheesecakes
- Boozy Key Lime Rum Cheesecakes
Did you make this recipe? Leave a comment & star rating!
Click the little stars in the header of the recipe card below to leave a comment & star rating, letting me know how you liked the recipe. I take all feedback seriously, & leaving a rating helps my small business immensely!

Triple Biscoff Cheesecake
Ingredients
For the Crust
- 2 cups finely crushed biscoff cookies, 200 grams . Use a food processor for this.
- 5 tbsp salted butter, melted, 71 grams
For the Biscoff Cheesecake Batter
- 32 ounces cream cheese, softened at room temperature , use full fat, in the blocks
- 1 and 1/2 cups granulated sugar , 315 grams
- 4 large eggs, at room temperature
- 1 cup full fat sour cream, at room temperature , 240 grams
- 2 tsp vanilla extract
- 3/4 tsp cinnamon
- 1/4 tsp nutmeg
- 1 cup cookie butter, melted , make sure it's room temp and not piping hot when you add it – 280 grams
For Topping
- 1/2 cup cookie butter, melted, 140 grams
For the Cookie Butter Whipped Cream
- 1/2 cup heavy cream, cold
- 2 tbsp powdered sugar , 15 grams
- 1 tsp vanilla extract
- 1 tbsp cookie butter, 18 grams
Instructions
- Make the Crust: Preheat oven to 350° F. Spray a 9-inch springform pan with nonstick spray and make sure the bottom is securely fastened. Stir together crust ingredients and press into prepared pan and up the sides a bit (see photos above). Bake this for 10 minutes. Set aside. Keep the oven on at 350. Fill a large pot with water and set it on your stove, and get out a large roasting pan – you'll need this for your water bath later.
- Make the Cheesecake Filling: Remember that your cold ingredients need to come to room temp before you start. In a large mixing bowl, cream the softened cream cheese until nice and creamy, about 1-2 minutes. Add the sugar and mix until just incorporated. Add the eggs one at a time, mixing on medium speed after each until just incorporated. Add the vanilla and sour cream, and mix until just incorporated. (See photos above for what the batter will look like). Remove two cups of batter and add to a medium bowl. Fold in the cookie butter with a silicone spatula. Fold the cinnamon and nutmeg into the larger bowl with the plain batter. Alternate adding dollops of the two batters to the baked & cooled crust until it's all been used. Use a butter knife to swirl the batters together for a pretty design.
- Prepare the Water Bath + Bake: Bring the large pot of water to a boil. Set your springform pan on a rack positioned in the center of the oven, and place the roasting pan on the rack below, or wrap the base of the cheesecake pan in foil and place it inside a 10-inch cake pan inside the roasting dish. Pour the boiling water into the roasting pan. Both of these methods ensure no leaks. Bake for 76-85 minutes. When done, the cheesecake will have only a slight wobble in the center, and a knife inserted into the edge will come out clean, and will have a bit of thick batter when inserted into the center.Turn off the oven and crack the door open. Let the cheesecake cool in the oven for 1 hour before removing it.
- Cheesecake Cooling: Once the hour is up, remove the pan from the oven. It should be cool enough to handle. Remove the foil and set the springform pan on a wire rack. Let cool completely at room temp, then cover with foil and refrigerate at least 6 hours or up to 1 day before removing from the pan and serving.
- Make the Whipped Cream: Add the whipped cream ingredients to a medium bowl and beat on high speed until stiff peaks form. If you want to pipe this, you'll need to stabilize it – see note below.
- Serve & Store: Pour melted cookie butter over the chilled cheesecake and top with the whipped cream. Slice and enjoy! Store leftovers in an airtight container in the fridge for 3-4 days.
Notes
Nutrition
Nutrition information is automatically calculated, so should only be used as an approximation.

My 6yo daughter and I made this. It was a hit.
So glad to hear that!
I took a risk made this for thanksgiving dessert – I’d never made a cheesecake before – and it was a huge hit, nobody could believe it was homemade. The recipe is easy to follow and had so many helpful hints and photos to take all the mystery out of the nuance of cheesecake baking. Will 100% make this again.
I’m so glad to hear that the recipe was easy to follow, especially for a first-time cheesecake baker! Thanks so much for your kind comment, Jess.
How much melted cookie butter for the topping? The recipe only says “cup” without a specific amount.
Hi Nancy! That should be 1/2 cup, my apologies. Thanks for letting me know about that error! Please let me know how you enjoyed the cheesecake.